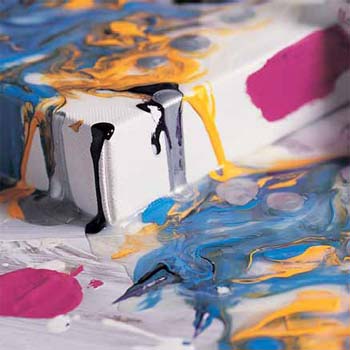
Pouring
Pools, Puddles, and Drips with Pouring Medium
Visit our blog for our 'Beginners guid to Acrylic Pouring'
| MATERIALS NEEDED |
| Liquitex Pouring Medium |
| Liquitex Soft Body Acrylic Colour |
| Measuring Cup and Spoon |
| Large Mixing Container |
| Palette Knife |
| Squeeze Bottles |
| Stretched Canvas, Board, Paper, or Glass |
Liquitex Pouring Medium can be used in combination with Liquitex Soft Body Acrylic Colours to create seamless surfaces and puddles of colour. Liquitex Pouring Medium is formulated to create a smooth, seamless, and strong body of paint when poured or dripped onto a surface. Suspend Liquitex Acrylic Colours in Liquitex Pouring Medium for sculptural effects and surface treatments.
- Mix one tablespoon or more of Liquitex Soft Body Acrylic Colour with one cup of Liquitex Pouring Medium in a large bucket or bowl. It helps to mix custom colours before adding to the medium, to ensure a uniformity of colour in the pour.
- Mix the colour and the pouring medium by hand with a palette knife. In order to prevent bubbles, blend gently and allow the mixture to sit for 10 minutes following agitation.
- Using a funnel, take the mixture and pour it into a squeeze bottle or applicator of choice. Additional applicators such as pitchers or tubes can be used for a variety of effects. The paint is now ready to be poured.
- Mixture can be poured directly on canvas or board supports, glass, or even paper. A good place to work with poured media is on a level work table. If the surface is not level, you may produce uneven results with very thin pieces that may tear.
- Pour evenly over the surface and allow at least one day of dry time. If the paint film is thicker allow up to two days of dry time.
 TIPS & TECHNIQUES
- Paint wet in wet! Multicoloured compositions can be created in one sitting if several colours are prepared at a time. Apply the next colour directly after the first pour for spots or crisp concentric circles.
- Marbled surfaces can be created using multiple colours applied side by side and then blended using a palette knife or by dragging a fork or pointed tool through the surface.
- Turn the support on its side to create thin drips. Allow the paint to run down the support surface at a variety of speeds.
- Pours and pools can be layered. Apply another coat after the first has dried for layers of colour.
- For sculptural applications, directly pour medium and paint mixture onto a glass surface to create a moveable, flexible paint slick. To make removable pours, treat the glass surface with a mold release or quick release spray for easy removal of the paint after it dries. When dry the poured paint can be sewn, glued, or rolled for different sculptural effects.
- In order to ensure the continued strength of the paint film, do not mix water with the Liquitex Pouring Medium.
- Dust can get caught in the paint film if left open to the air. Cover the painted canvas, glass, or board with a larger cardboard box to ensure a clean pour.


