
The Beginners Guide to Acrylic Pouring

Acrylic Paint Pouring is a fluid painting technique used to create art by pouring acrylic paint onto a canvas. Many methods can be used to apply the paint to the canvas, some are more simple and are better for beginners – others are a bit more technical! Here we cover the basics of pouring to get you off to a head start!
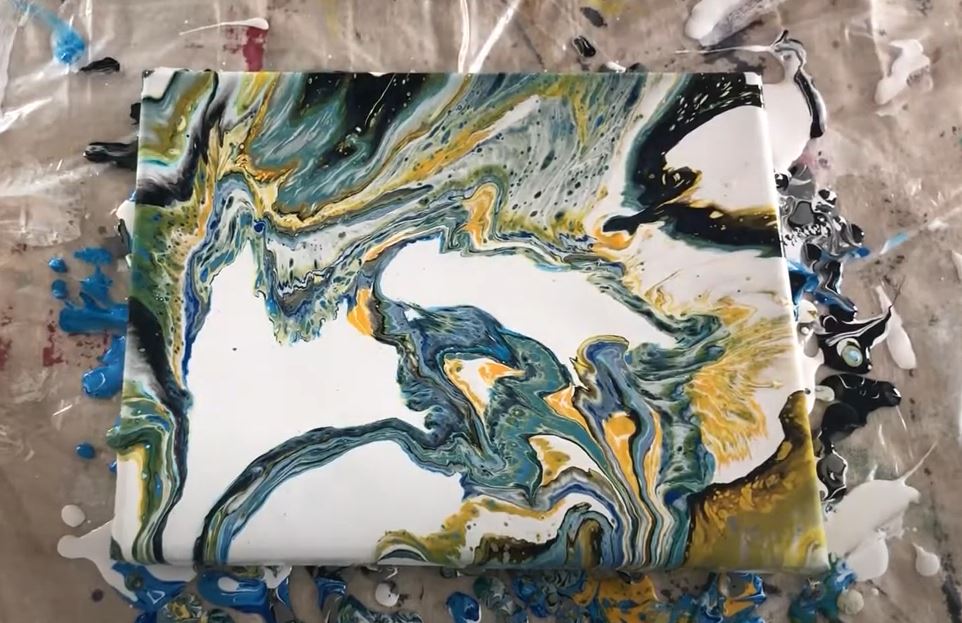
The Acrylic Pouring technique allows artists to apply colour in puddles, pools and marble-like patterns. Pouring results in a smooth, glossy paint film that is perfectly even and blemish free. It is particularly popular with beginners as it allows artists to create quick paintings with dramatic, contemporary results.
No matter which technique you opt for, you will need to treat your acrylic paint before creating your pours. Treating the paint makes it the right consistency for dripping and pouring and lessens the chances of your paint films cracking and tearing.
Although the technique may look and seem simple, it can be a tricky thing to master. Especially if you don’t know what you are doing! In this blog post we cover the basics of acrylic pouring, so you know what to expect before you get started!
What Materials Do I Need For Acrylic Pouring?
Before you start, it’s important to make sure you have all the correct materials to hand! There’s nothing more frustrating than beginning an acrylic pour, only to find that you are missing an essential tool.
You’ll need a selection of acrylic paints to get started. The colour is completely up to you but you will need to think about the ‘body’ of the paint that you use. The consistency of acrylic paint will impact the success of your pour.

Soft Body Acrylic Paints and Acrylic Inks
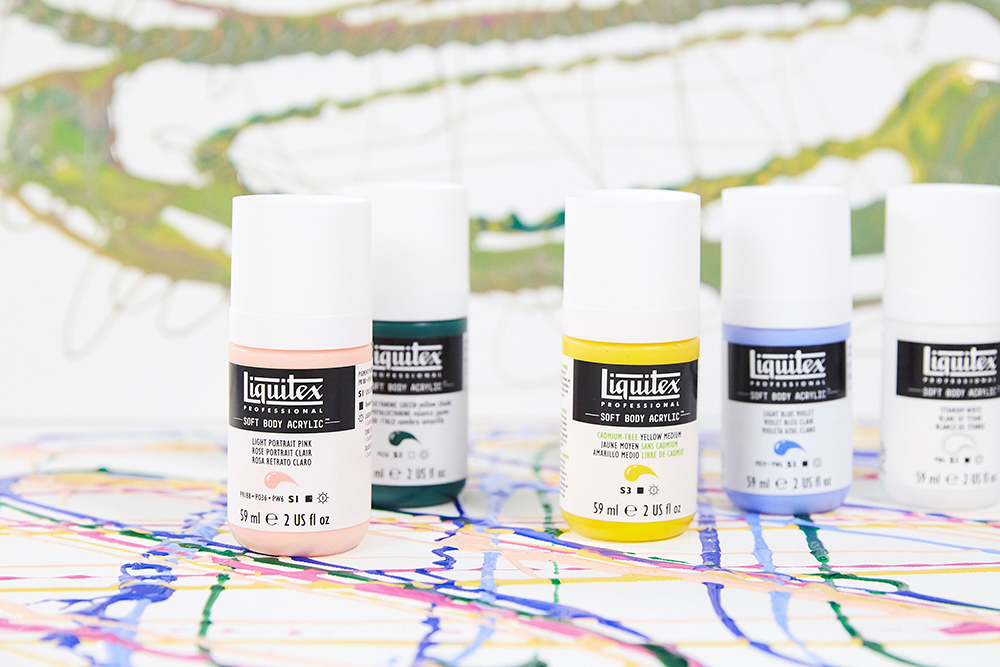
Acrylic Inks and Soft Body, High Flow or Fluid Acrylic Paints are the perfect consistency for acrylic pour painting. Their consistency usually falls between milk (ink and high flow) and heavy cream (soft body and fluid). This low viscosity makes it much easier to blend your colour with pouring medium and requires less medium to get it to a pouring consistency.
Heavy Body Acrylic Paints
Heavy Body acrylics have a much thicker consistency. Although they can be used with a pouring technique you will find that you need more medium to get them to the honey-like viscosity required for pouring. Some artists choose to thin the colour first with a fluid medium before adding pouring medium. You can get away with using a small amount of water to thin your colour before adding pouring medium, but be aware that too much water can increase the chances of your pour failing.
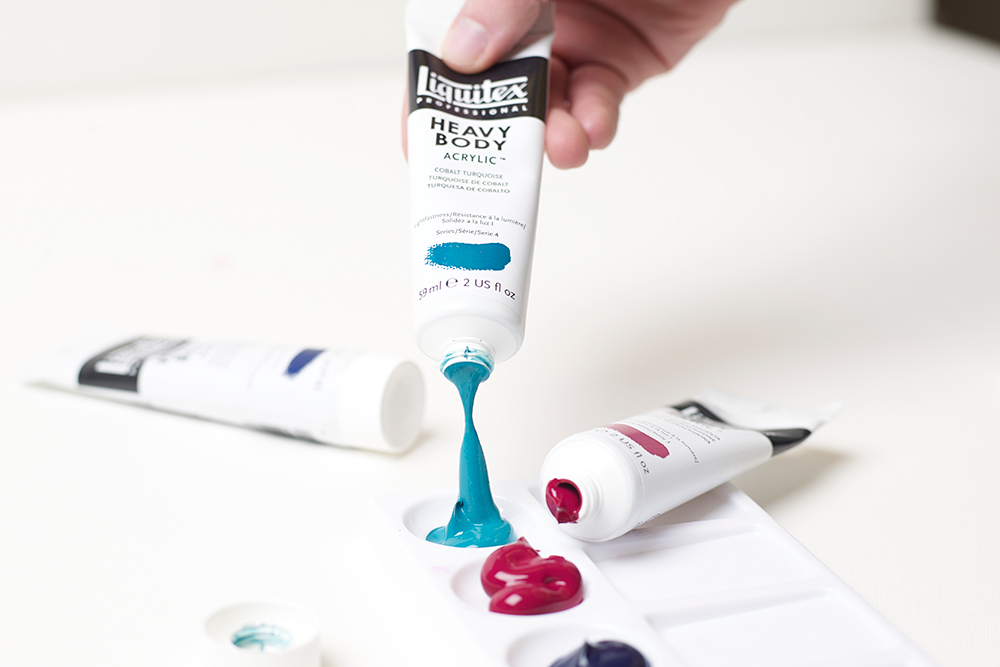
Using thick paint also means it is much harder to mix your paint and medium to a smooth, uniform finish. Too much agitation to get rid of clumps can create lots of bubbles in your pouring mixture. Consequently, these bubbles can mean your poured painting develops an uneven, textured finish. While you can pop these bubbles using methods we discuss later, it is always advisable to negate the chances of these bubbles forming by using a consistency of acrylic paint best suited to the pouring process.
Student Grade Acrylic Paints
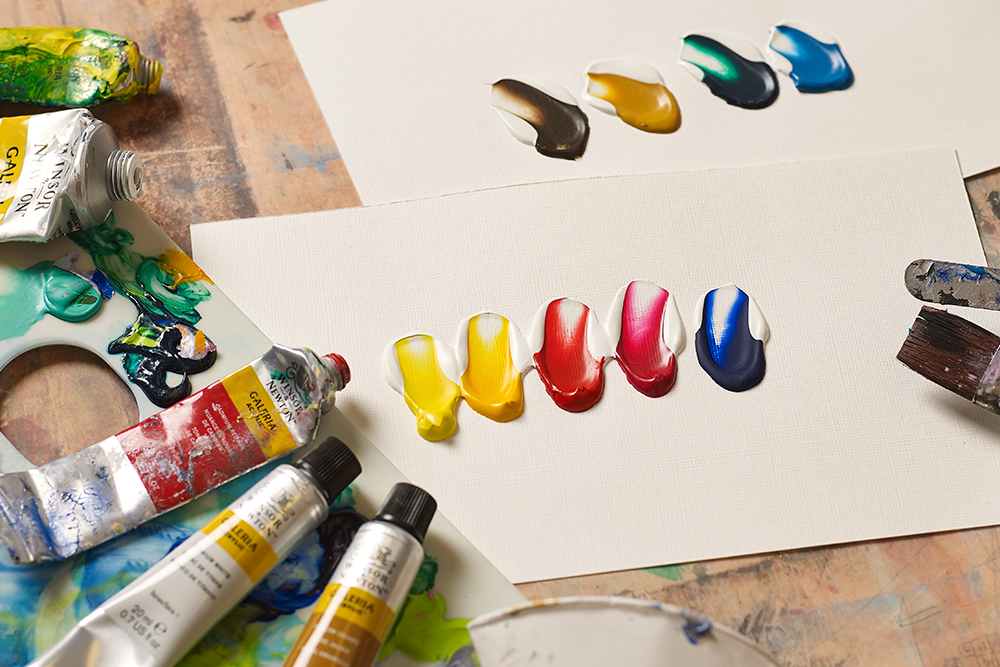
Student grade acrylic paints – like Winsor & Newton Galeria, Daler Rowney System 3 and Sennelier Abstract – are not available in different consistencies. Their texture generally falls between soft and heavy body – with System 3 being the most fluid and Abstract being the thickest. They can be used with pouring techniques, but require more medium to get them to a pouring consistency.
You can find out more about different acrylic paint consistencies on our blog.
Acrylic Pouring Medium
Liquitex Acrylic Pouring Medium has a special formula that gives the most seamless results when used with pour painting techniques. Using a dedicated acrylic pouring medium, rather than cheaper alternatives lessens the chance of blemishes appearing as your pour dries. Pouring Medium is self-levelling – so you can almost guarantee a smooth, even paint film. It also expels bubbles more readily, meaning you are much less likely to have tiny air pockets trapped in your finished painting. It is also a little tacky, like syrup or honey. This creates a consistency that is much easier for pouring as it adheres more to the surface so your paint film spreads evenly without running quickly off the edge of the canvas.
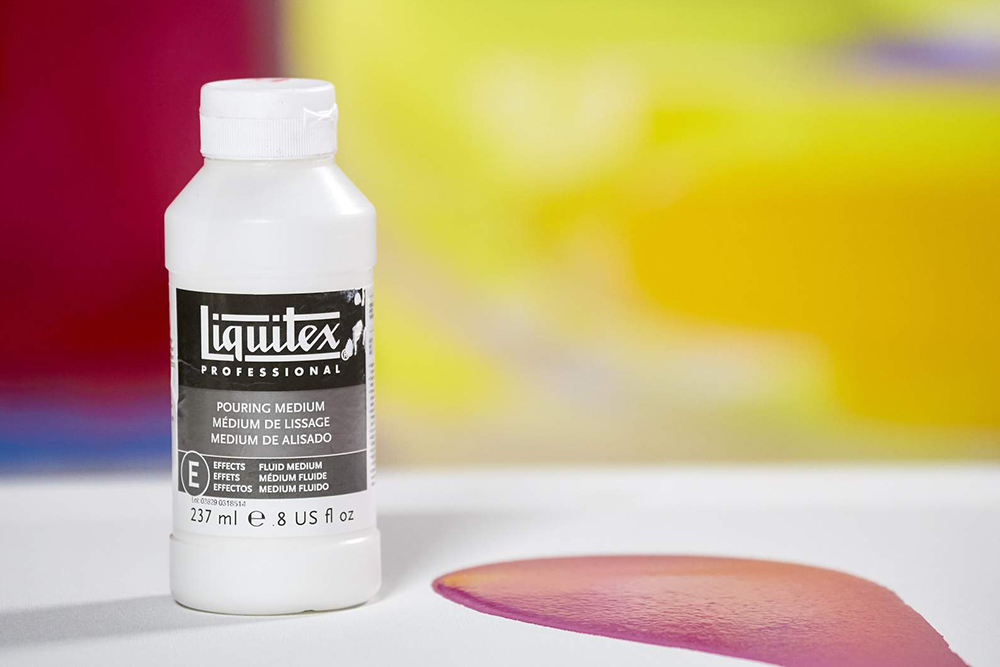
Some artists opt for using PVA adhesive (with added water for thicker paints) to give their paints a fluid consistency. However, this does add another layer of unpredictability to the pouring process. It does not give the same syrupy consistency as a proper pouring medium – often causing paint to be too thick or too thin, making it difficult to control your pour. It also does not account for the shrinkage of acrylic paint as it dries. This can cause unsightly cracks and tears to form in your painting. Liquitex make Pouring Medium to the same professional grade as the rest of their archival artist materials. Something that PVA is not. PVA can be great for starting out, but as your skills progress you may wish to move onto pouring medium for a more controlled result.
Canvas, Boards or Painting Panels
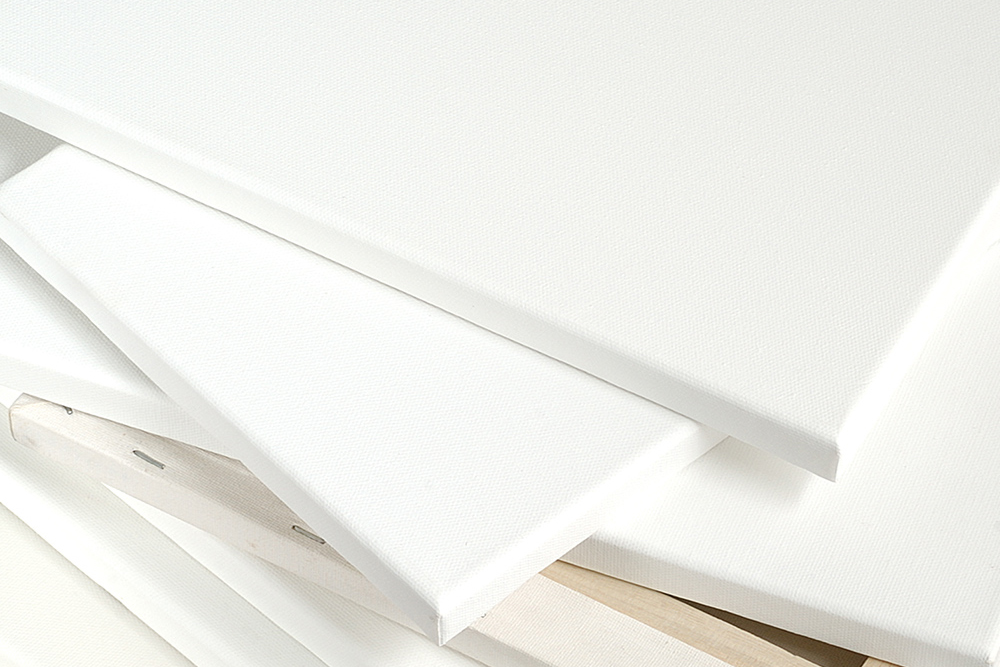
Virtually any flat surface that has been properly primed for acrylic painting will be suitable for acrylic pour painting. Some artists prefer to work on traditional stretched canvases, whereas others may prefer canvas boards or painting panels that are easier to store. The choice is up to you! Each have their benefits. There is more information about prepping your canvas below.
Acrylic Pouring Accessories
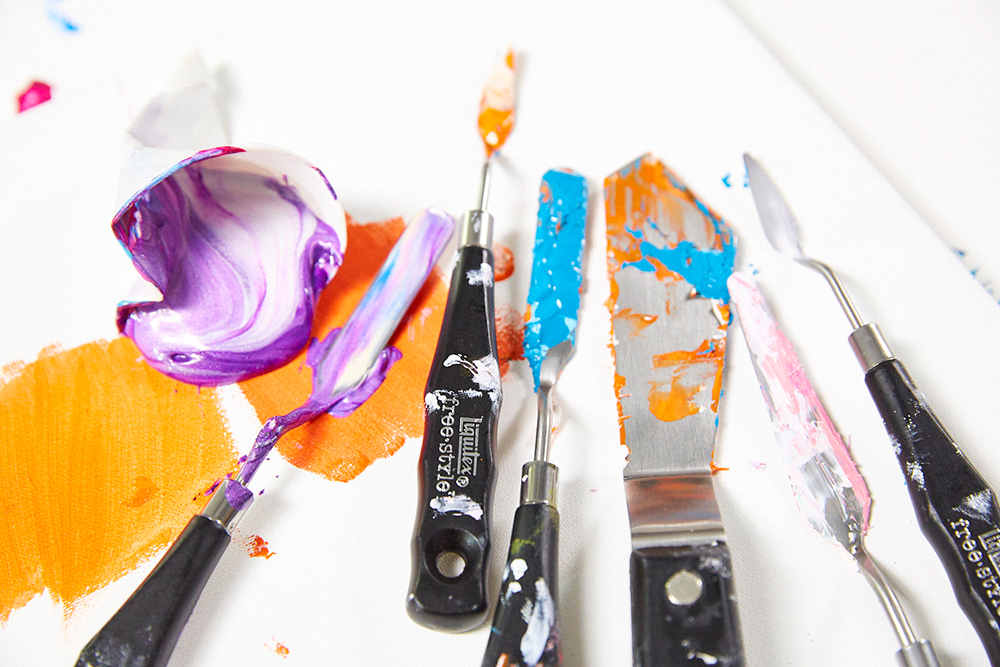
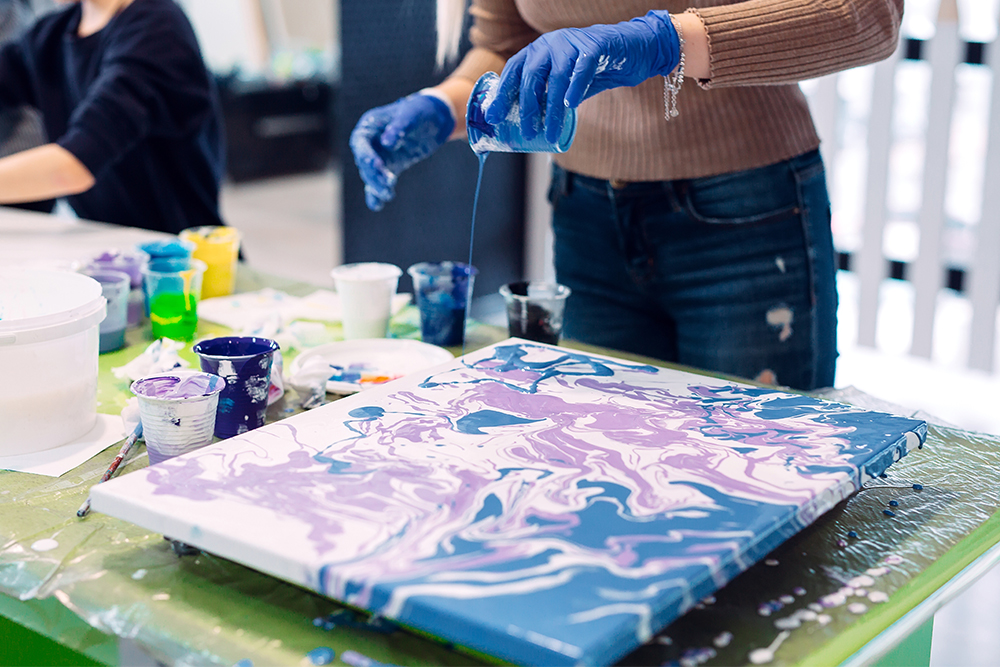
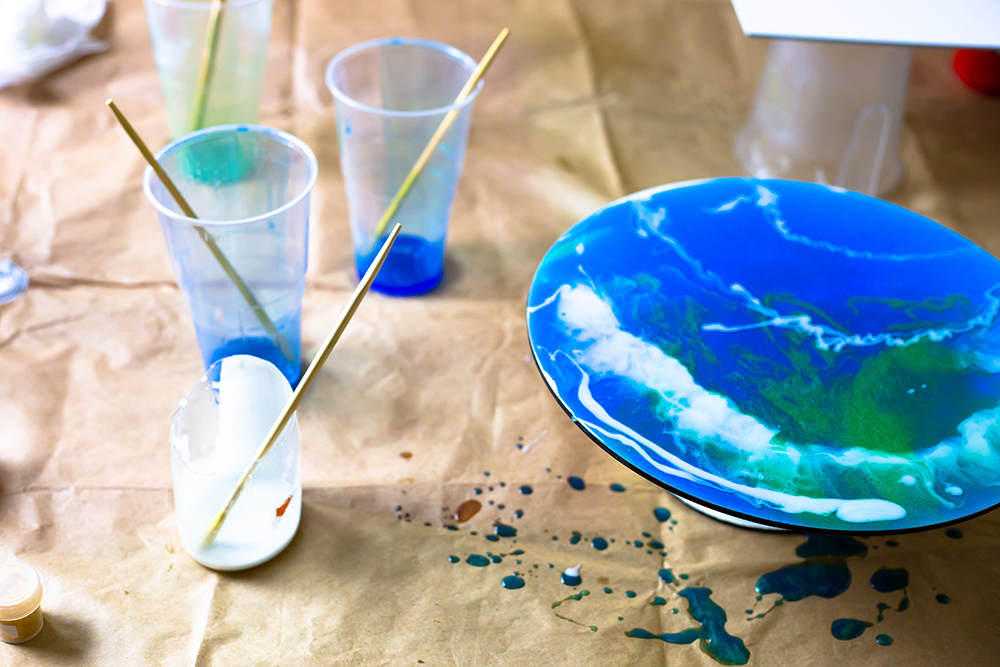
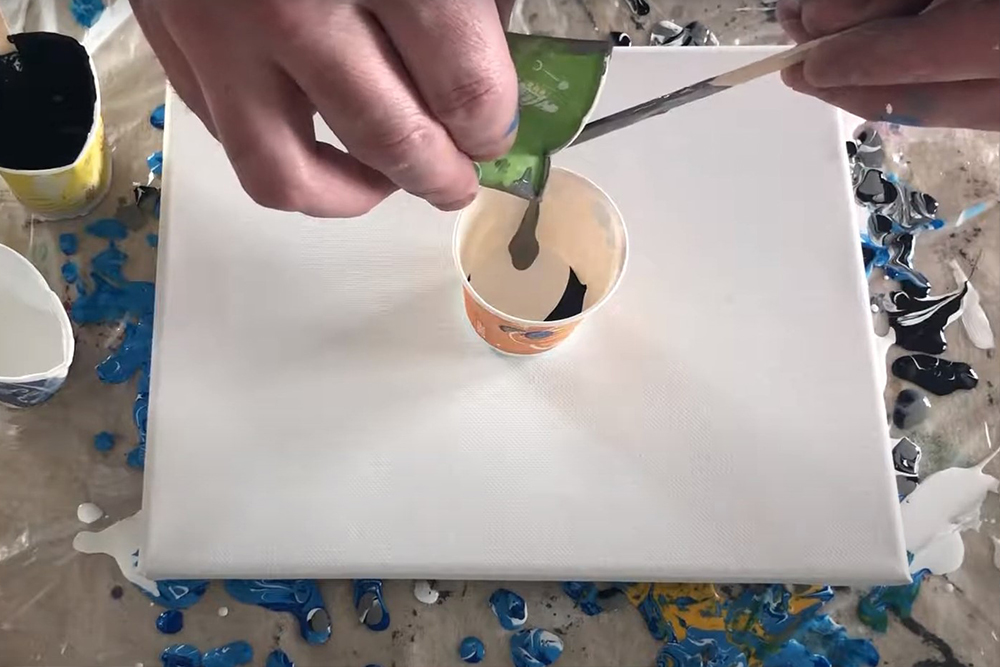
There are a number of accessories you may find it useful to have to hand when you are pouring. Disposable paper cups are handy for creating your acrylic paint and pouring mixes. They are easy to hold and perfect for controlling the amount of paint poured onto your canvas. Wooden craft spatulas or palette knives are great for mixing to ensure your colour/medium mixes are completely uniform.
You should also make sure to protect your workspace with a protective surface, as this technique can get messy quickly. Old sheets, newspapers, plastic sheeting and bin bags are perfect for this purpose.
It can also be handy to have a selection of similarly sized tins or jars available to stand your canvas or board on whilst you are pouring. Elevating your boards above your workspace will prevent any excess paint from sticking to the bottom of your painting.
As you try more advanced acrylic pouring techniques you may also require other tools to assist you – such as balloons, colanders or funnels.
Preparation
Preparing Your Painting Surface
You’ll need to get your canvas or panel prepared ready for creating your poured acrylic painting. Almost any surface primed for acrylic painting will be suitable for pouring – whether you choose traditional stretched canvas, canvas boards or painting panels is up to you.
Consider the Surface You Use
Acrylic pours can get quite heavy so consider the surface you use. Stretched Canvases have a hollow recess in the back between the wooden stretchers. The heavier your pour the more likely the centre of the canvas is to bow. This will create an uneven paint film that is more likely to crack or tear as it dries. You can avoid this problem by bracing the back of the canvas with card or another appropriately sized flat object. A brace will even out the surface, lessening the chances of an uneven paint film. You can also use wooden canvas keys to increase the tension of the canvas. Canvas boards and painting panels are more rigid. Smooth surfaces create the best pours – you may need to sand or prime the surface if you find the texture of your surface is affecting the pour.
You will also need to make sure that your canvas or board is on a completely level surface. Uneven surfaces can cause your colours to pool and shift, creating an irregular paint film. You can use a spirit level to double check you workspace if you are worried.
Elevate your Board or Canvas
As mentioned previously, it can be useful to elevate your canvas or board above your workspace. As excess paint flows off the sides of your canvas it will pool underneath. If your canvas comes into contact with this paint it can make it very difficult to remove without disturbing the paint film, especially once dry. Jars, tins, push pins or even old paint tubs can be used – you’ll just need to make sure they are all roughly the same height. Put one where each corner of your canvas will sit and place your canvas on top.
Allow a good couple of centimetres of space between the tub and the edge of your canvas. If they come into contact it can cause unsightly lips and ridges of paint as the excess paint flows from the canvas and onto the tub.
If you would prefer to use push pins all you’d need to do is gently press a pin into each corner of the canvas. Once your canvas is elevated you won’t need to worry about any excess paint ruining your work!
Many artists choose to begin their work on a white ground, but you may prefer to colour your ground before you paint. This can be any shade that you like, but you should bear in mind that the paints you pour on top will be affected by your choice.
Make sure your surface is clean
Before you start painting you’ll also need to make sure your painting surface is clean. You should remove any dust or large particles of dirt with a lint-free cloth. Also make sure the surface is completely grease free. Any residual grease can cause improper adhesion of paint.
Mixing Your Paints and Pouring Medium
Before you start painting you will need to prepare your mixes. If you are using Liquitex Pouring Medium you should use approximately 1 cup (250ml) of Pouring Medium for every 1 heaped tablespoon of Liquitex Soft Body Colour. These measurements will vary depending on the type of paint you are using. You will use a lot more medium if you use thicker paint. Essentially you will need to gradually mix in medium until your mixture is a pourable, honey-like consistency. If you are creating custom colours rather than using colours straight from the pot you will need to make sure they are mixed to a uniform finish before adding your medium.
If you are practising pouring with a PVA glue mixture then you should use approximately two parts glue to one part paint. It should have a similar sort of consistency to pouring medium, although you probably won’t be able to get the same tackiness.
Whether you’re working with Pouring Medium or PVA, you will need to make sure your paints are mixed carefully but thoroughly. You should mix gently with a spatula or palette knife to try to avoid getting bubbles in your mixture. Some bubbles may be inevitable if you are using PVA. However, Pouring Medium is formulated to reduce the amount of bubbles created. If you leave your pouring medium mix to sit for around 10 minutes any bubbles that have formed should disappear.
Choosing Your Colours
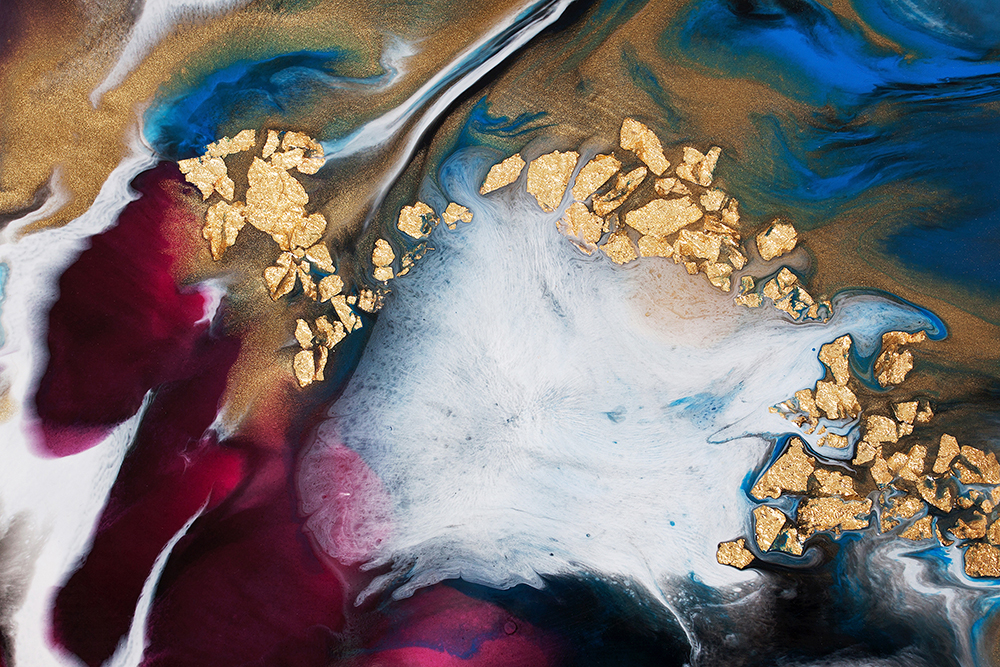
Ultimately the colours you use will be down to personal preference. If you’re starting out try pouring with a few colours first. It can be tempting to throw in all your favourite paints, but the result may become too busy and muddy. You can always add more colour as you go along. Glitter and metallic paints are popular for pouring as they add a bit of interest to the painting.
Getting Started
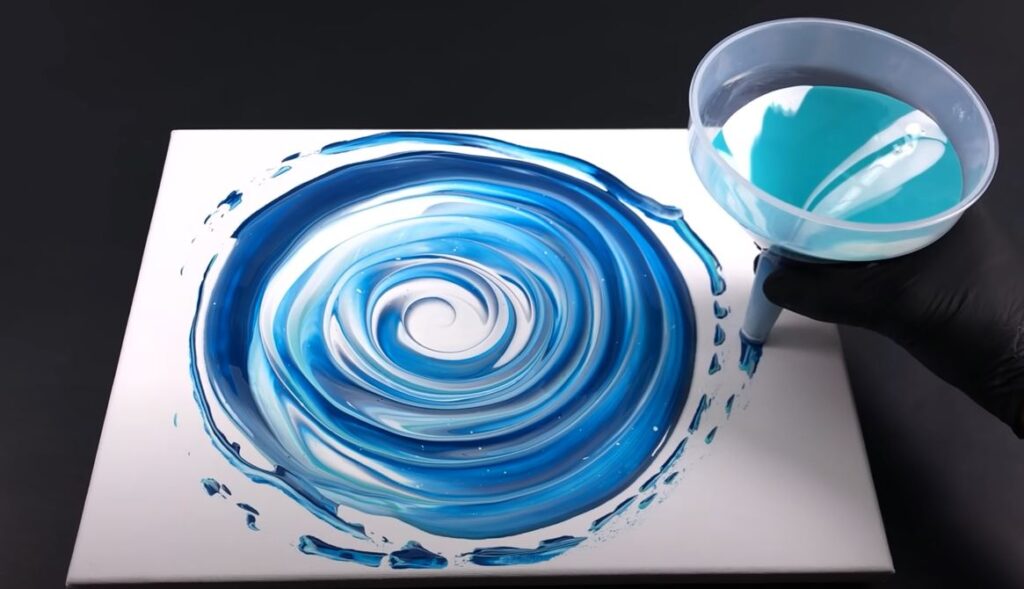
Once you have your materials ready, it’s time to get down to the fun bit! Pouring the paint onto the canvas. Pouring is an organic painting process that requires little painting but creates dramatic artwork. There are a few different methods you can use to create your paintings.
Simple Pouring Techniques
The list of pouring methods is endless! Artists are constantly experimenting and creating their own unique pouring methods. If you’re just starting out it is important to get to grips with some basic techniques first. The two most simple techniques are the traditional pour and the dirty pour.
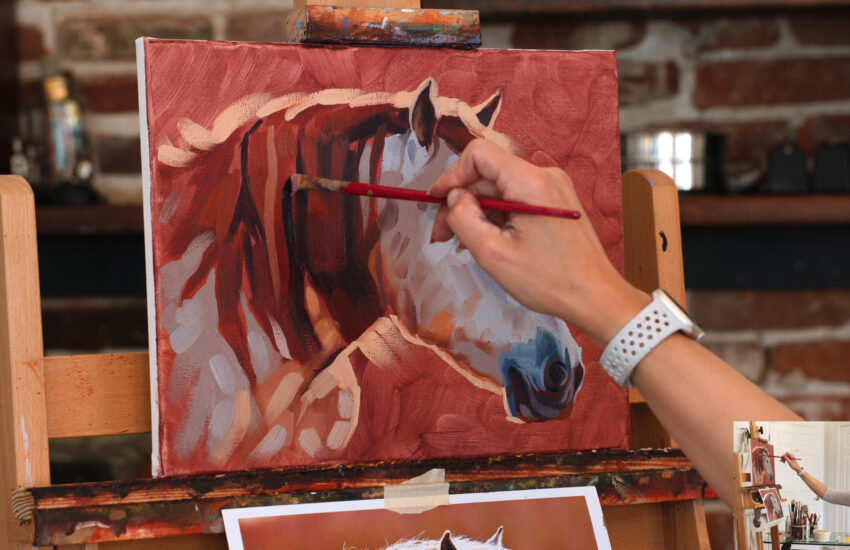
The Traditional Pour
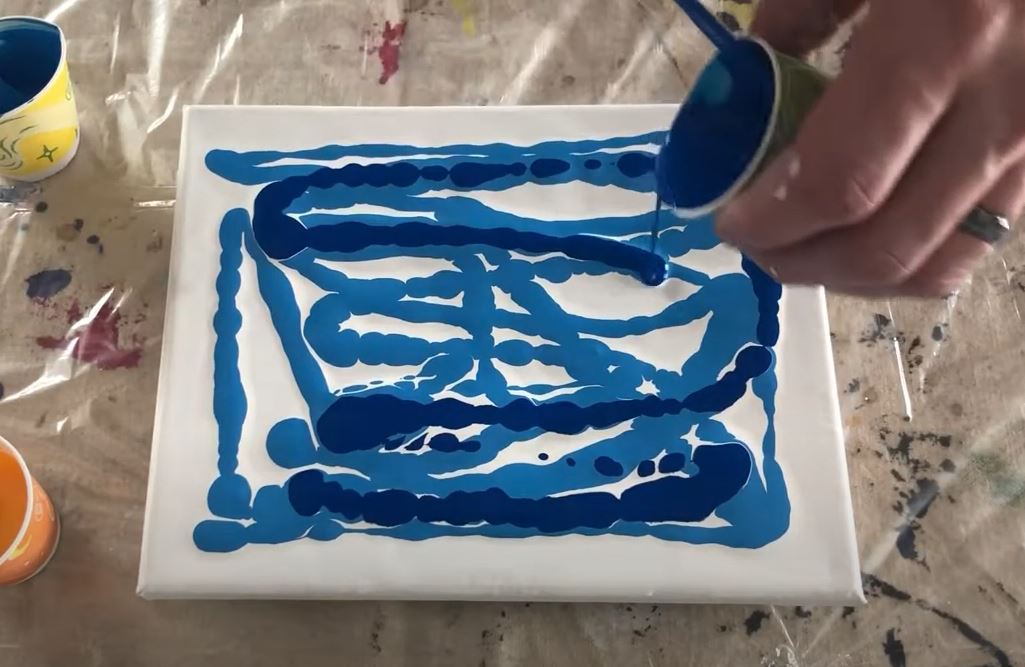
The traditional pour is the simplest technique for any aspiring artist to do. All it requires is a few simple steps.
- First mix each colour with pouring medium in a separate cup.
- Take each colour in turn and gently pour it onto your canvas or board. This technique allows for more control over where your colour goes.
- You can drop bits of colour here and there where you think the composition requires it.
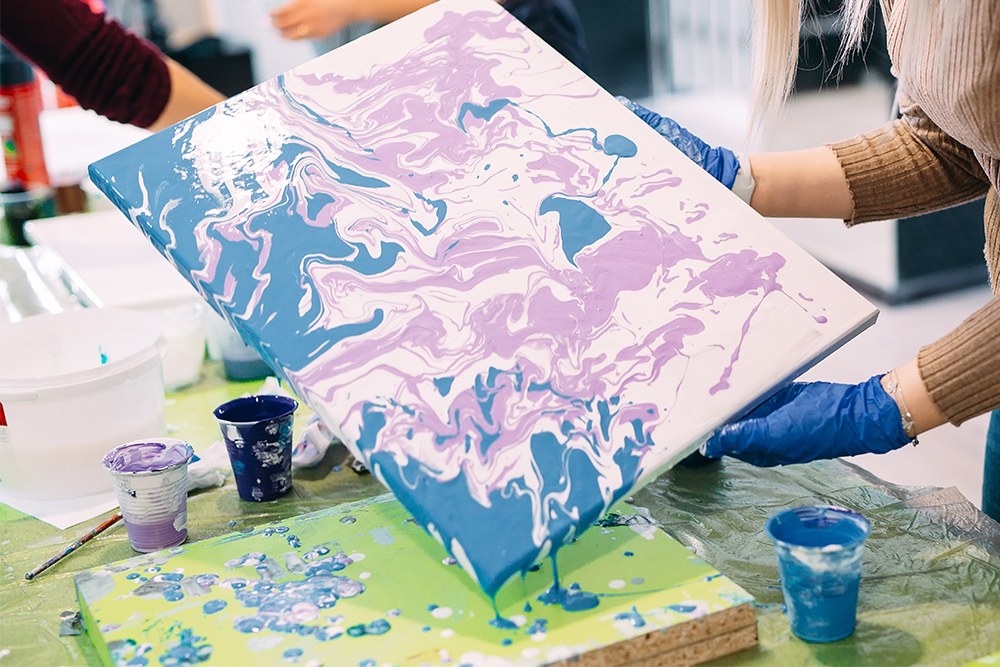
- Once your paint has been applied you can pick up the canvas and gently tilt it to encourage the paint to form interesting patterns and puddles. Allowing the paint to run down the sides will give your composition a finished look.
This method focuses purely on manipulating the paint alone, without worrying about adding additives or creating cells. Once you have got the hang of this technique you’ll be more than ready to tackle the dirty pour!
The Dirty Pour

Unlike the traditional pour, the Dirty Pour relies on all your colours being held in a single plastic cup.
- As with the traditional pour you will first need to mix your colours with pouring medium in individual cups.
- Next, take one clean paper cup and gradually add colours into it in successive layers. The way you pour your paints into the cup will determine how they appear when you pour them onto your canvas. Try pouring colours down the inner side of the cup or directly into the centre to see how the positioning affects your pours. The speed at which colour is added will also change the way it pours. If you add colour quickly it will force it to the bottom of the cup. If you add colour slowly it will sit at the top of the cup. Use different speeds and positioning to create different types of pours.
- Gently pour the colours from the cup directly onto your canvas. This can be done in any sort of pattern you wish – just make sure the canvas is pretty evenly covered.
- Once all the colour has been added you can pick up the canvas and carefully tilt it. Tilting encourages the paint to fill every spot, and can be used to create interesting patterns.
Once you’ve mastered these techniques you’ll be able to move onto more advanced methods. There are so many different ways to pour paint. Check out our post 9 Basic and Advanced Acrylic Pouring Techniques to Try Today to discover new ways to develop your pour painting artistry! All are equally fun and can have incredible results.
Using Additives
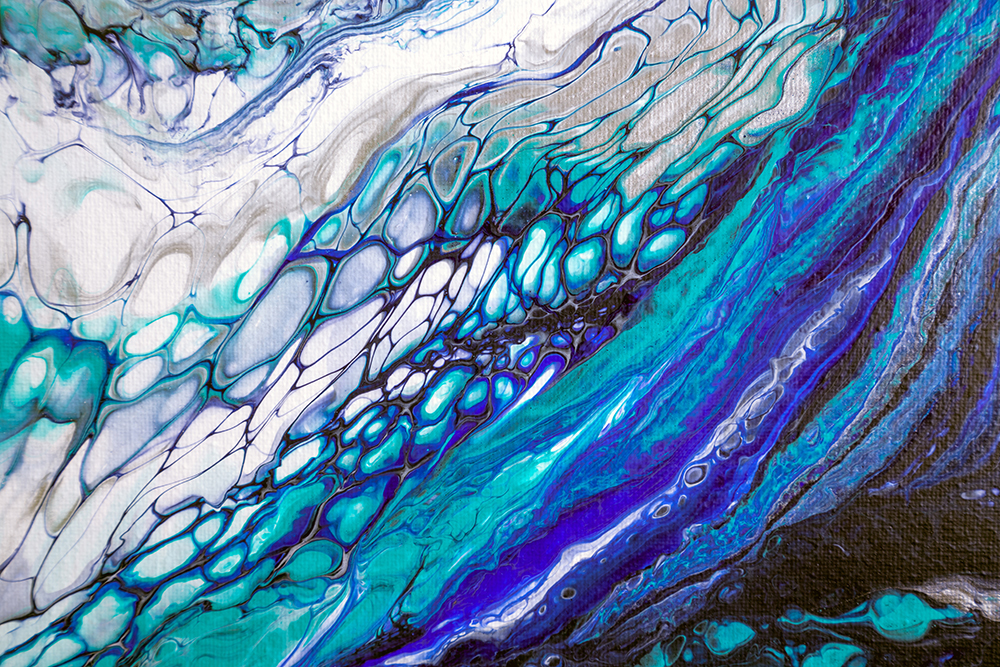
Some artists like to use silicone as an additional ingredient in their poured paintings. Using silicone can promote the creation of ‘cells’. Cells are small droplets of colour that rise above the rest of your paint and sit on the surface. They give your paintings a more defined marbled appearance. This ‘cell’ structure works on the premise that oil and water do not mix. The added silicone oil acts as a resist which prevents each of your colours from mixing with one another. Generally a drop or so is added to each colour/medium mix before it is poured onto the canvas. Similar kinds of effects can be achieved with isopropyl alcohol or alcohol ink mediums.
As a beginner you may wish to experiment with these additives, but be aware that silicone oils available at hardware stores can be toxic and do not have the same archival qualities as professional artists products. Using additives like silicone also adds another layer of unpredictability to your painting process. For some techniques it may cause your painting to crack or dry incorrectly as it leaves a greasy residue. It is best to experiment first and proceed with caution!
Some artists use the pigment density of each colour to create cells without the use of additives. Lower density pigments will rise to the surface of your pour, whereas heavier pigments will sink to the bottom. This density information can be hard to come by. Currently Golden are the only manufacturer that publish the pigment density of their artists’ colours online.
Drying Time
Once your pour painting is completed it is important to leave it to dry for at least 24 hours. If your paint film is particularly thick you may even need to wait as long as 72 hours. In this time your pour will move and shift – your painting may look considerably different from when you left it! Because of this it is important to leave your work completely undisturbed. Any bumps or movement can cause your carefully crafted patterns to move or even run off the canvas. Ultimately, pouring is an organic and spontaneous painting process – you can do your best to control the results you create, but be prepared for differences between the wet and dry painting.
Cover Your Painting
You should also make sure that your painting is covered while it is drying. If your art is small enough you may be able to cover it with a box. Just make sure it is free of dust before you use it! If you are working on a larger scale you can use plastic sheeting to create a tent over your work. In fact some manufacturers – like Golden – encourage this method as it protects your painting from any potentially damaging air flows and raises the humidity slightly to reduce the stress on the paint film.
Keep your Workspace Level
Level drying is the key to the success of pour painting. Uneven paint film caused by an irregular work surface can cause weakness in your paint film. If you find that your paint is pooling in particular areas you can bolster your canvas supports with wedges of folded card or paper. Just make sure your painting is stable!
If you are doing multiple pours on a single canvas make sure you allow sufficient drying time before completing each successive layer. If the first layers are not fully dry before a new fluid layer it applied it can cause cracking and crazing on the surface of your work.
Factors that can influence your Acrylic Pour Paintings
The beauty of pour painting is its unpredictability. So many factors can affect how your pour paintings appear. It can be hard to replicate the same pattern twice! This can be frustrating if you’re a beginner. Bear in mind the following points and it should help you get more consistent results.
- If you are starting out with an unprimed, absorbent surface be sure to seal it first. Some surfaces may require multiple coats.
- The quality of paint you use, the thickness of application, the use of additives, the consistency of your pour and whether or not proper pouring medium has been used will all affect how your paintings appear.
- Try not to attempt pour painting in extreme temperatures or humidity. Both these factors affect drying times. Standard room temperature should be fine.
- Be sure to keep your workspace free from contaminants like dust and oil. If your canvas or panels come into contact with them the quality of your paintings may be affected.
- Try to keep your paintings away from forced air – whether that be air ducts, fans, hair driers etc. They can cause uneven drying which will encourage tears and cracks in the paint film.
- Make sure your workspace is level. Not only will this make it easier to pour, it also results in less product waste running from your canvas.
Helpful Tips
Minimising Bubbles in your pours
If you notice bubbles appearing in your poured artwork there are a couple of techniques you can use to reduce them. If there are only a few you should be able to pop them with a toothpick or pin. A fine mist of isopropyl alcohol can also break the surface tension of the top paint layer causing the bubbles to pop. Some artists also use heat guns or small blow torches (like the type you would use in a kitchen) to get rid of bubbles. This method can generate new cells in your painting but also risks patchy and uneven drying. The area that has been torched can dry at a much quicker rate, which will cause it to move and crack as the rest of your painting dries.
Ultimately, the best way to avoid bubbles is to prepare your pouring mixes correctly. Try and mix your paints with minimum agitation and leave them to stand to free the bubbles. The formulation of Pouring medium also expels bubbles readily. So using this instead of PVA will minimise the chances of bubbles appearing.
Minimising Waste
Try and select a cup that will accommodate the amount of paint you plan to use. If you use too large a cup then your colours will have more space to mix and become muddy. Using an appropriately sized cup also minimises the amount of waste generated – you should only have as much paint as you plan to use! Most importantly never get rid of excess paint down your household drains! If there is excess paint in your cups allow it to dry out and then dispose of it accordingly. We have some more information on disposing of your waste water and paint solids in an environmentally conscious manner in our A Beginners’ Guide to Painting with Acrylics: Tips to Get Started blog post!
Finally, remember that the real magic happens when you have finished working on it. Sometimes it’s important to step back from your work. Come back to it in an hour or so to see how the paints have moved to create an organic pattern.
Another useful thing to know is that you should tilt your canvas until the paint runs off the side to get the best effect. This is why it is important to prepare your surface to protect it from the acrylics.
When it is completely dry, you might like to varnish your work of art to preserve the shine of the paints.
More Acrylic Pouring Resources
If you want to expand your pour painting skills then why not take at look at our 9 Basic and Advanced Acrylic Pouring Techniques to Try Today blog post! You can build on the skills developed here and try out new and exciting ways to paint. We also stock Acrylic Paint Pouring with Tanja Jung. This great book covers all aspects of pour painting and is great for beginners and enthusiasts alike. It includes 16 projects that will introduce you to some exciting techniques.
Ultimately, with Acrylic Pouring, experimentation is all part of the process. Once you’ve developed the basic skills you’ll be able to try all kinds of methods. Try painting wet-in-wet, use brushes and knives (or even a fork) to create pointed patterns. Try flipping your canvas vertical and dripping paint from the top to the bottom. Different viscosities will drip at different rates. You can even try pouring onto a glass or plastic surface to create poured acrylic sheets! These sheets can then be cut and applies to mixed media work with acrylic mediums.


Hi
Can you recommend a white paint for the initial layer (pillow) of a pour painting. I have seen artists using household paint but I would rather use Artist materials. My wood panel has been sized and triple gessoed, then sanded with 320 grit paper.
Hi Oisin. Thanks for your comment! For the initial layer of your pour painting, it’s advisable to opt for an artist-grade titanium white paint in as close to pouring-consistency as you can get, usually soft body or fluid acrylics. Some artists use a little pouring medium to help get the paint to the right consistency. Using household paint might risk long-term issues like peeling, cracking, and deterioration of the artwork.
I use oil paint on most of my paintings and im very interested in using the Acrylic pour techniques. the only issue is im not sure if its ok to pour acrylic paints over a dried oil painting im looking for ways to make this pouring technology work with my oil paintings if anyone knows please let me know
Hi. Thanks for your comment. We wouldn’t recommend using acrylics over oils. Even if your oil painting is fully dry – which can take months or even years – the acrylic paint will never properly adhere to it, causing it to crack and flake over time.
My paintings are sticking to one another. I have added a top coat to some but it still seems to be sticking to another painting or piece of wax paper. Once I try to pull it apart it loses some of the paint. What can I do to stop my pour paintings from sticking to one another? I have limited space so I can’t just leave them out everywhere.
Hi Kaleia. Thanks for your comment. Sorry to hear that you’re having trouble with your paintings sticking together. Which materials have you used to create your poured paintings? We do cover sealing your work in our Common Acrylic Paint Pouring Problems (and How to Avoid Them) blog post, where we recommend the best products to use. If you’re using these products and still experiencing problems let us know and we should be able to advise.
Hi. I’ve bought a paint pouring kit which shows a pendant, but the kit didn’t include a pendant. I’m trying to find a suitable pendant for paint pouring. Can you advise? Thanks
Hi Christine. Thanks for your comment. Unfortunately we don’t stock anything like this I’m afraid. It would probably be best to go back to the retailer you bought the set from and contact them for advice. Or alternatively get in touch with a jewellery compent supplier and see if they have anything that might be suitable.
Can acrylic paint pouring work on card/paper? If so, are there any preparation steps I should consider ? Once dry, can the finished painted surface be cut into desired shapes or sizes, or will this cause cracking? I was hoping to use small pieces of my poured art surface for card embellishments. Thanks
Hi Bej. Thanks or your message. Acrylic paint pouring won’t really work on paper or card – they are too flexible and you’ll find that they will cockle and warp as you apply pools of paint. If you’re looking to use poured acrylic in cardmaking projects it might be worth looking at creating acrylic skins (also known as acrylic sheets). Essentially you would create your poured painting on a non-flexible sheet of perspex or glass. Once dry you should be able to gently remove the dried acrylic skin from the perspex/glass. You can then cut it up and use it for cards and other projects. Hope this helps!
Great! Thanks for the advice: I’ll definitely give that a try.
No problem! Glad we could help!
is pouring acrylic thin enough to run thru an airbrush? i have been thing regular acrylic was wondering if i can use the pouring type?
Hi Charles. If you’re applying acrylic with an airbrush we’d recommend thinning it with Airbrush Medium. Pouring Medium will thin acrylics to a fluid consistency, but it won’t be thin enough to use through an airbrush.
Excellent info…answered many questions I had..very informative
Which silicon oil do you recommend please
Thank you
Hi John. We sell Daler Rowney Fluid Acrylic Silicone Oil on our website you can use with acrylic pouring.
Hi thanks for sharing, i need to know if i use acrylic pouring paint which is already liquidish , do i still need to add a medium to the paint or only on canvas?
Hi Sema. If you’re using any of our brands of acrylic paint you’ll need to mix it with pouring medium even if it is already fairly fluid (like System 3 Fluid or Golden Fluid for example). The pouring medium will reduce bubbles in your pour help the paint film dry to a smooth, crack and craze free finish. Unless the labels on your paints specifically state that they’re pre-mixed with this kind of medium you’ll need to add it in yourself.
Thanks for sharing
great help
Are there pouring acrylic paints that don’t require a flow medium? Just “pour and tilt” right out of the bottle?
Hi Mary. Unfortunately we don’t stock anything like this I’m afraid. We do sell low viscosity paints (like System 3 Fluid and Golden Fluid acrylics). While they’re ‘pourable’ from the bottle they won’t have the right consisency to get the smooth, level finish that you’d see when you use pouring medium. Adding pouring medium to your mixture not only helps achieve the glossy, level surface associated with poured acrylic paintings, it also reduces the chances of bubbles appearing in your pours and lessens the chances of the paint film cracking or crazing.
Can this method be used on wood? I have some wooden crosses I’d like to do for Easter wreaths..
Hi Marilyn. Yes, acrylic pouring can be done on wood. You’ll probably need to prepare the surface in some way before you paint on the wood, depending on whether the wood is varnished or painted already. We have some information about surface preparation for acrylic painting on our website here.
You mentioned in one of your posts that you do not recommend using a hair dryer for moving paint on the canvas.
I see many videos of professionals using hair dryers.
If you do not recommend hair dryers, could you tell us what we should use instead to get the same effect?
Hi Jo. Thanks for your comment. We’d usually suggest tilting the canvas or blowing through a straw to move the colour around on your canvas. Any heat generated by the hair drier can cause very patchy drying and risks the top layer of the paint skinning over before the paint beneath has a chance to dry. This can cause tearing and warping in your paint film, ruining the otherwise smooth, level surface of your poured acrylic painting. If you’re set on using a hair dryer to move the paint then it should be used on the very lowest heat-setting or on a cool blow to lessen the chances of any damage to the paint film.
Very Nice and detailed article. Keep it up.
Hi! Question!? For example if I want my background base to be white do I need to pour white paint on it (leaving it wet). Then do my Center pour with colours (that I choose), and blow the colours out on the wet white paint background? Or can I just do my center pour directly onto the canvas and use the blow dryer to blow out my design?
Hi Bobbi. You can go ahead and begin pouring paint straight onto the canvas without applying a layer of white paint providing the canvas you are using is primed ready for acrylics. In the photo under ‘The Traditional Pour’ heading, the canvas has been coated with a mixture of pouring medium and white paint, on top of the gesso primer – this has been done to help the paint flow better once it is poured on. Either way you are best using a tilting motion to help your design cover the canvas. We’d advise against using a blow dryer to either dry or move the acrylic paint. The forced air causes patchy, uneven drying which can cause the paint film to crack and tear.
Isn’t the blow dryer method called a Dutch pour? I see so many using the hair dryer.
Hi Shana, while hair driers can be used to manipulate paint our suppliers advise that any air movement can increase the chances that your paint will dry unevenly and potentially cause cracks and fissures. If you are using a hair drier to manipulate the paint rather than using it to dry the paint, make sure you use it on the lowest heat setting.
I’ve been thinking about trying pour painting & have looked at many sites before starting. Your blog is so useful and informative! I now have a better understanding of how to begin!
Thanks!
Hi Dale! So glad to hear that you found our blog post helpful. Hope you enjoy acrylic pouring!
Very useful blog! Thank you for a very detailed information. I’ll make sure to follow these ideas you shared.
Very useful blog! Thank you for a very detailed information.
I have been working with dirty pours using a hair dryer to get a certain effect, however, my paint is drying too fast and clumping. Any suggestions?
Hi Michele. Thanks for your comment. Generally we’d advise against using hair driers on poured acrylic paintings. The forced air causes uneven, patchy drying which can make the paint film crack and tear. What type of effect is it you are creating? It may be that another tool would be better at making the effect you’re looking for, but without damaging the paint film.
seen people blow with a straw and a blow torch , not sure why lol
Hi, some great information here but I’m still confused as to why the canvas is covered in white (or other colour) or its purpose. Can you explain for me please? Is it always the case?
Hi Fiona. Thanks for your comment. Most canvases come pre-primed with an acrylic-based, universal gesso primer. This Gesso layer is white in the majority of cases, so this is the white base that you see in most of the photos. Gesso provides a bit of tooth that ensures your paint adheres to the canvas surface. In the photo under ‘The Traditional Pour’ heading, the canvas has been coated with a mixture of pouring medium and white paint, in addition to gesso – this has been done to help the paint flow better once it is poured on. Some artists choose to work on a coloured or tinted ground. This can be done by preparing your canvas with tinted gesso (gesso mixed with a colour of your choice) and can change the overall appearance of your painting once it is finished. For example, if you work with transparent colours in your painting you’ll notice some of the tinted gesso layer showing through.
Hi there! I am a retired professional illustrator and I have used acrylic paint in my artworks in the late sixties, seventies and eighties. Mostly using Liquitex brand. However, I’m not familiar with this pouring paint version of these paints and I’m somewhat fascinated with some of the results of using these paints and technics. My question is: in a simple terms without complicated terminologies, what do you recommande I buy at this time to start with experimenting this version of creating some interesting art. What bran, glossy or not, ( I prefer glossy of course) and quantities of paint, since there’s so much waste of paint in this process. What is the best mixing medium to get etc. Obviously I do not have issues with composition and design, and I do know how to draw unlike some of these artists that I have seen on line. 🙈🙃😂
Your help would be great help and highly appreciated.
Thank you in advance.
Lévon
Hi Levon, thank you for your message. We do make a number of recommendations in the blog post about what to buy to get started with acrylic pouring, but the basic things you need are a canvas/surface, some pouring medium and some acrylic paint. The thinner the better for the paint so it is easy to mix with the pouring medium, so either s soft body paint, like Liquitex soft body, or Golden Fluid, or an acrylic ink, such as Liquitex Ink. https://www.artsupplies.co.uk/cat-acrylic-pouring.htm
We do sell a couple of different kits, which include a selection of Liquitex Inks and some pouring medium which would be a perfect start for you to have a go at pouring for the first time. https://www.artsupplies.co.uk/search.php?search=pouring
very informative
very informative, thanks for sharing
Very informative post. I tried pouring for first time yesterday and today ive noticed my paint has sank into the canvas board. What have i done wrong?
Hi Andi. I’m sorry to hear that your pour painting didn’t turn out as expected! The success of your painting can depend on a few things – like the paint, mediums and boards you are using – as well as other factors. If you can send some information about the products you have used, along with photos of your poured painting to [email protected] we should be able to help!
I have read discussions about using too much paint, but what is too little, what would be able/not able to do on a canvas? I watch as a whole lot of paint is ‘wasted’ in my opinion.
What is the best sealer when you are done pour painting on glass, and canvas?
Hi Donna, most acrylic varnish is suitable for any acrylic poured painting. Some painters also choose to use epoxy resin as a final protective coating. You should work with the varnish in accordance with the manufacturer’s guidelines, and if working on glass you should always make sure you’ve done some surface preparation prior to painting to get the best possible adherence. If you’ve added other materials to your pour (like oils) you will need to thoroughly clean your painting before varnishing, especially if using epoxy resin. If oils are used it would also be worth adding an isolation coat of gloss medium between your painting and varnish.
Thanks for sharing!
Hi. I’ve recently discovered that this was a thing and was considered as art and I’m intrigued, so much so that I started searching for information. Your article was a life-saver as I now know what I need to buy to get started.
Thank you very much. I’ve put your link on my screen so I know where to find you when i need information.
A thousand thank you’s
Great post! Thanks so much for sharing.
Hi there you have,nt told us anything about using silicon oil in the paint mix that causes big or small cells in the painting if thats what you want. im new to this and still dont know how to get best results with silicon oil. can you mix silicon oil mixed with water to spay onto a picture.
thanks Hugh
I’d be keen to understand how cells are created, what medium is used, to either flick or pallet paint over the colours to get this. And how heat exacerbates this?
Thank you for your comment. Silicone Oil can be added to the prepared colours before pouring. This is one method to create cells. When you pass a blow torch over the paint on your surface it causes the oil and the surrounding paint to flow better. The oil rises to the surface bringing colours with it and making the paint move even more which it what creates the cells.
What a really informative and useful article. I just wish this had been written a few months back, when I first started this!
I have used liquitex from the start, it’s been quite expensive, as you imagine.
I have quite a lot of thick paints, do you advise thinning them with fluid medium? and do you have advice on how this is done. I followed the link, but wasn’t sure what I needed.
Thanks again 😁
Hi Abbie, thanks for your comment! The main thing you have to worry about when thinning thick acrylic paints for pouring is the film strength of the acrylics. If you are working with thick paints it is advisable to thin the paints with a fluid acrylic medium and a slight amount of water (if absolutely needed). If you are using water in your mix it is important to use it in as small amounts as possible – using too much can cause your colours to wash out and can cause your paints to crack and peel over time. We’d advise using something like Golden GAC 100 or Liquitex’s fluid Gloss Medium. These mediums both increase the flow of your paints, while maintaining the stability of the paint film. If you are using a mixture of paint, fluid medium, water and pouring medium you may notice slight changes in the finish of your pours as opposed to using soft body/acrylic ink and pouring medium alone. Golden have some great info on their blog about thinning down thicker paints for pouring.