
9 Basic and Advanced Acrylic Pouring Techniques to Try Today
Acrylic Pouring can seem like a deceptively simple painting technique, but it can be a tricky thing to master! After all, pouring can be done in all sorts of ways, and the results can be dramatically different. If you’re a pouring newbie, don’t worry! These 9 acrylic pouring techniques will make you a pouring master in no time!
If you’re just starting out with acrylic pouring it can seem like a fairly simple technique. It is, at its simplest, just pouring fluid acrylic paint onto a canvas or board. However, artists can quickly become frustrated. Mixes quickly become muddy and their paint doesn’t behave as they thought it would – resulting in drab colours and wasted canvas. Learning a few useful techniques will introduce you to the workings of acrylic pouring and help you to get used to acrylic pour paint’s unique qualities. This way you’ll be able to create poured paintings time and time again with accuracy and predictability. There’s nothing more satisfying than creating your own poured acrylic painting with an ultra smooth surface and colours that pop!
If you’re brand new to acrylic pouring you may want to check out The Beginners Guide to Acrylic Pouring. This post gives a great overview of the types of paint you will need to use and the basics of using a pouring medium. The techniques below use paints that are pre-mixed with pouring medium. You can find out more about how to mix your paint with pouring medium by following the underlined link.
The Traditional Pour
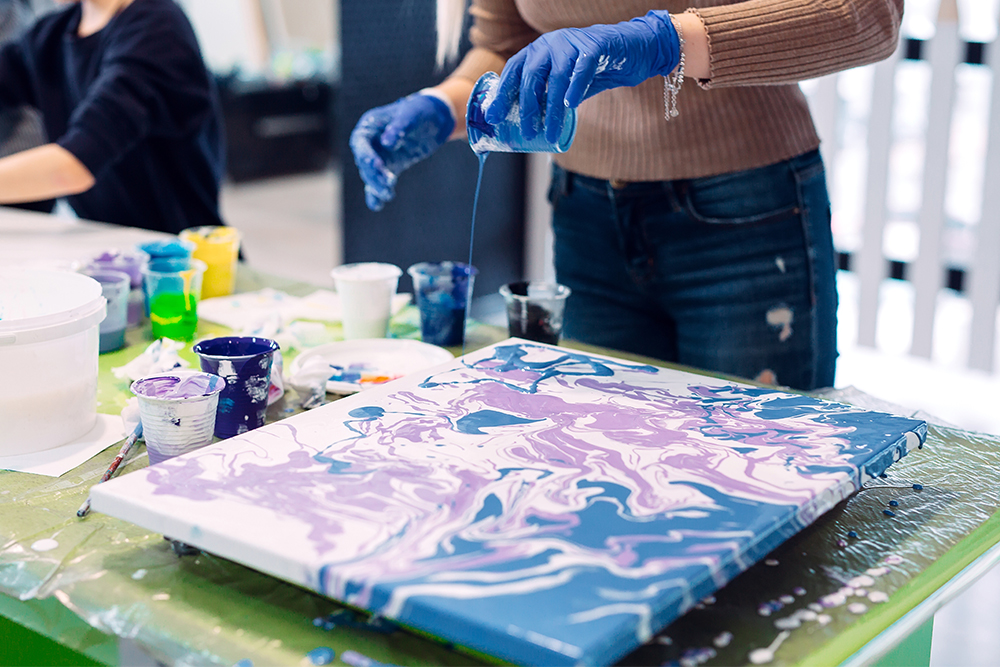
If you break down pour painting to its most basic parts, it is essentially creating fluid colours with pouring medium and pouring them onto a canvas or board. The traditional pour is the most simple pouring technique of all and is straight forward for beginners. It should definitely be your starting point if you have never tried acrylic pouring before! Just follow these few simple steps and you’ll be able to create your first piece of poured artwork.
- First you’ll need to select the colours you want to use. It can be tempting to use all your favourites – but try to stick to a palette of a few colours to begin with to avoid your pours getting muddy.
- Allocate each colour it’s own paper cup then prepare each colour cup with a paint/pouring medium mix. Some artists choose to work on a wet base coat – so if you want, you can prepare your canvas with layer of fluid colour.
- Take each colour cup and pour each colour where you want it in your composition.
- Once you’ve applied your paints and are happy with your composition you can pick up your canvas and tilt it to encourage your paints to cover the whole canvas. You should notice interesting patterns and puddles developing. You’ll probably find that your composition ends up looking very different from the initial colours you laid down!
- Once you’re happy with how the painting looks, leave it under a box/tent to dry!
This technique allows you the most control over where your colours go and gives some level of predictability in the final outcome. Try it out on a series of small canvases or boards and you will soon get to learn how the poured paint behaves!

The Puddle Pour
The Puddle Pour is an offshoot of the Traditional Pour. Instead of pouring colours in puddles, drips and dribbles across the whole of your canvas you create a series of puddles that incorporate a drop of two of each of your colours. The puddles can be arranged in a linear pattern across the whole of your canvas, or can be added in a more random, polka dot type effect – the choice is up to you!
- Begin, as always, by mixing your paints and pouring mediums together. For this method you will need an allocated cup for each colour. You can also prepare your canvas with a white or coloured fluid base coat if you choose.
- It’s important to think about how to layer your colours in a puddle pour. The first colour you apply will remain at the bottom of the puddle, so you will need it to be a colour that stands out against your base colour. The darkest colour in your chosen palette should be a good one to opt for. Once you’ve made your decision apply a series of puddles across your canvas. Again, the pattern you choose is entirely up to you!
- Take your second colour and pour it as close to the centre of the initial puddles you created as you can. Try not to rush this – the quicker you pour the more likely you are to get drips, splashes and bubbles in your pour.
- Repeat step 3 for each of the remaining colours. You may also want to repeat colours, or alternate the colours you use in each puddle.
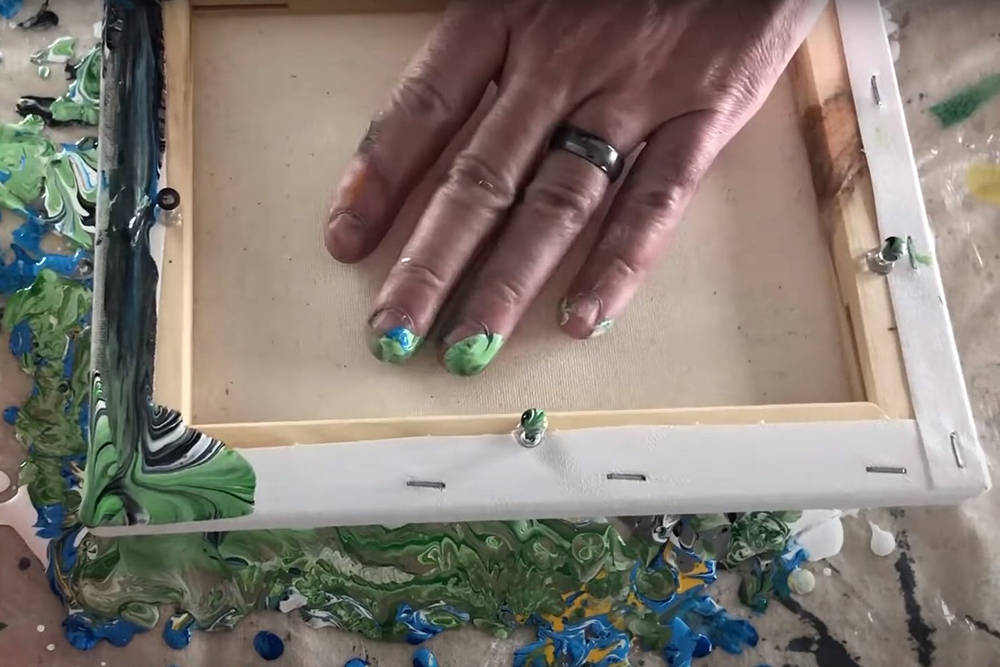
- One thing to bear in mind with this technique is that the more paint you pour, the heavier the weight of the paint on your canvas. This can cause paint to pool in the centre. You can tighten the surface beforehand with canvas keys or add a support brace to the back of your canvas. This will help even out your paint film
- Once you’re happy with the puddles you have created you can begin tilting your canvas to make the paint flow around it’s surface. You should try and get the paint film fairly even to so your painting will dry uniformly.
Try some variations of this method by varying your colours, where you pour the paint and you’ll get some great abstract results! This pouring technique and the traditional pouring technique have relatively ‘solid’ colour results. They are a great way to learn how pour paint behaves. As you move onto more advanced techniques you’ll learn more about colour mixing and layering.
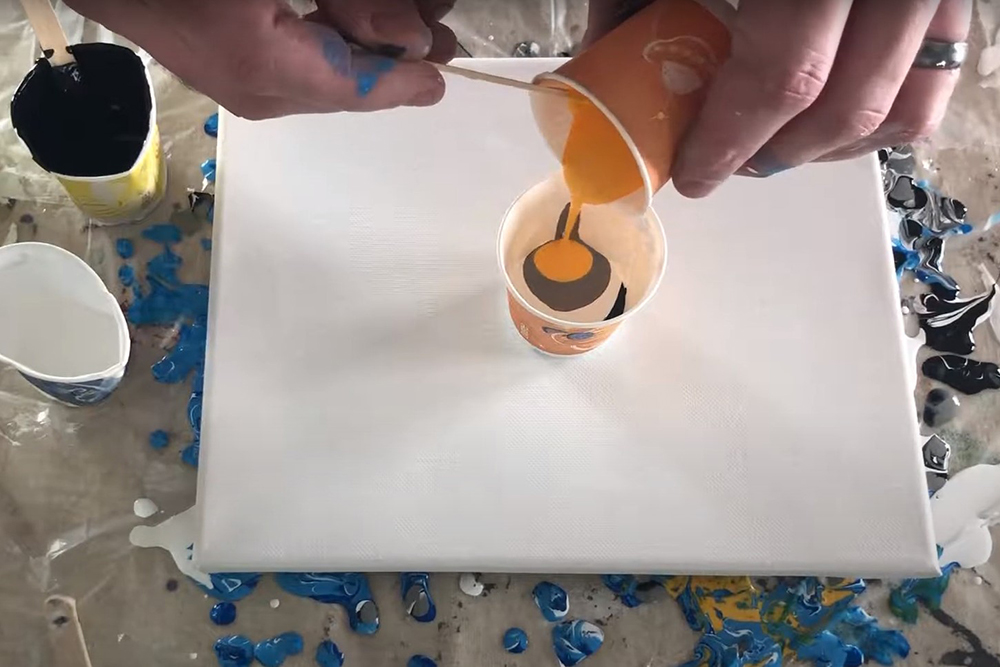
The Dirty Pour

The Dirty Pour isn’t too dissimilar from the Traditional pour. Instead of preparing your colours in individual cups, you will put all of your colours into a single cup before pouring. It delivers slightly more unpredictable results than a traditional pour, but is a fairly easy technique to master.
- Begin by preparing your paints as you would a traditional pour. To start with you will need to mix them in individual cups.
- Next, take one clean paper cup and gradually pour in your pre-mixed colours in successive layers. Bear in mind that the way you pour them in will affect the way they appear on your canvas. Weighty paint will sink to the bottom, while lighter colours will rise to the top. Colours dripped down the inner side of the cup will not be as predominant as a colour that is poured in a thick layer directly in the centre. If you pour quickly the colour will be forced to the bottom, while slower poured colours will be closer to the top.
- Once you’re happy with the colours in your cup gently pour the colours from your cup and onto your canvas. This can be done in any sort of pattern you want – just make sure the paint film remains even and covers a good portion of your canvas.
- When all the colour has been added you can pick up your canvas and tilt it to help the colours cover. As the design stretches out you should find that the patterns and puddles in your paint begin to show.
This technique can get a few tries to get used to. You’ll need to master the art of filling your cup with paint without having them mix. This can cause muddiness in your final piece. You also have less control over how the paint combines. Try it a few times and vary the way you add colours to your cup. The reward will be a more interesting painting with intricate patterns emerging.
The Flip Cup

The Flip Cup technique is an offshoot of the Dirty Pour method. The only difference is that you flip your cup of paint onto your canvas, rather than dribbling colours gradually. This method can take a little practice, and can potentially get messy if you don’t have your materials perfectly balanced!
- Start your Flip Cup pour with the two first steps from the Dirty Pour technique. Remember, like with the Dirty Pour, you’ll need to consider how the paints are layered as it will effect the final piece.
- Once you’re happy with your paint mixture, place your cup in the middle of your workspace and ensure it is stable. Take your canvas and place it on top of your cup, roughly in the centre with the painting side facing down.
- Hold the back of the canvas with one hand to keep it stable. Use your other hand to keep a firm hold on the cup. You’ll need to carefully flip both the canvas and the cup together without allowing your paint to escape. Your canvas should be facing upwards with the upside down cup resting on top.
- Pull the cup away. This can take a bit of force as they can form quite a tight seal with the surface of your canvas. Try to pull the cup away quickly at an angle, rather than pulling up. This will help reduce the chances of stray drips falling on your poured painting.
- Slowly tilt your canvas to encourage the paint to fill every corner of your canvas. The quicker you tilt the more ‘stretched out’ your pour will look. You can use a brush or your fingers to fill in any blank spots at the edges that resist the paint.
Like the Dirty Pour, this method relies mostly on how your paints are layered within your cup. Try it out with different colours to see how their weight affects the pour. It can be amazing how dramatically different the results can be!
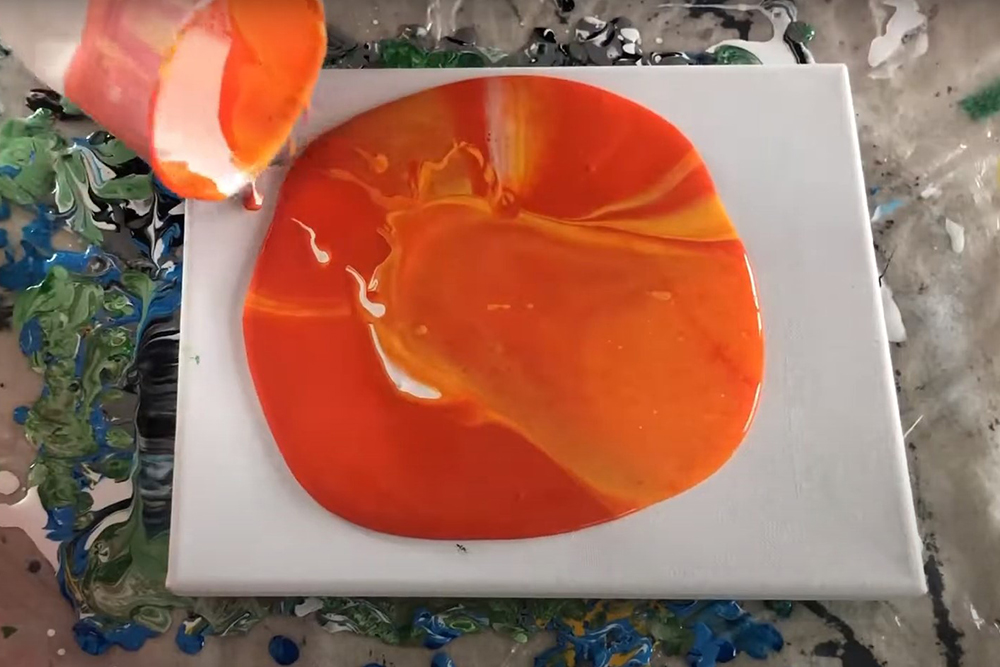
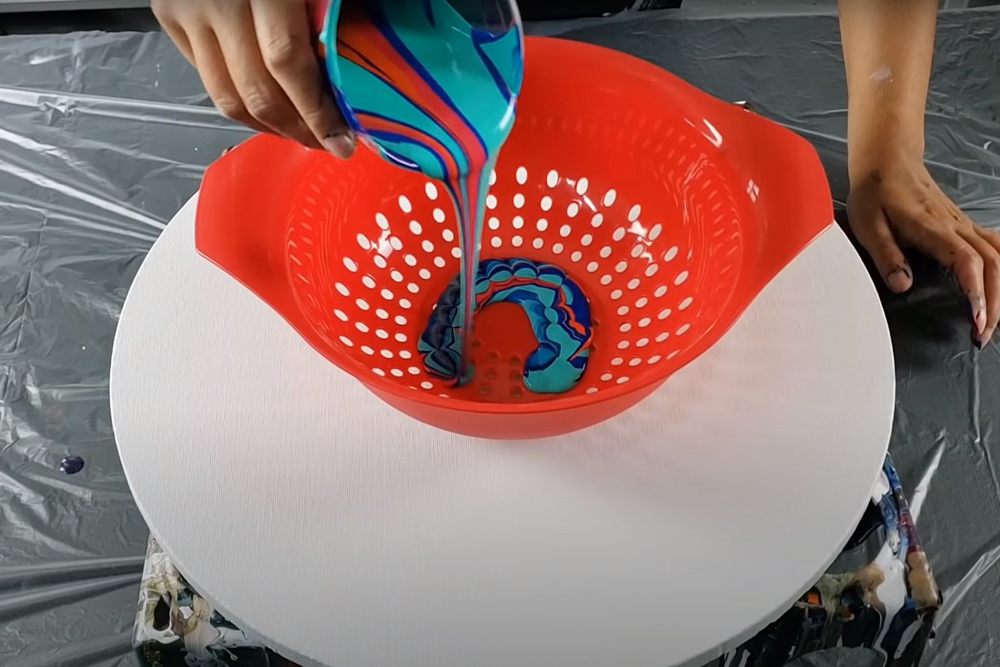
The Colander Pour

The Colander Pour is the next step up once you’ve mastered the Dirty Pour and the Flip Cup. This more advanced technique uses a standard household colander to create a poured painting with an almost kaleidoscopic effect. This example shows the technique on a circular canvas. The shape echoes the natural shape of the pour as it cascades through the colander. However it can be used on any other shape of canvas!
- Prepare your colour mixes and pour them into a single cup – as with the Dirty Pour and Flip Cup.
- Place your canvas central in your workspace and place the colander in the centre of your canvas. You can place it in a non-central position on the canvas but bear in mind that your whole design will ‘radiate’ from this point. Moving the position of the colander can dramatically affect the composition.
- Take your cup and pour your colour into the centre of the colander.
- Once all your paint has been added you’ll need to slowly lift the colander up and away from the canvas, allowing your colours to drip out.
- When the paint stops running lift the colander away from the canvas. You’ll need to try and avoid getting drips from the colander on the surface of your painting.
- You should end up with a puddle of kaleidoscopic looking paint sitting on your canvas.
- Gently tilt your canvas to encourage the paint to fill the whole of your canvas. If you’re working on a circular canvas it is best to tilt the canvas forward and backward, then spin it gradually along until all the canvas is filled. Once the full canvas has been filled you can encourage the paint to run over the sides of the canvas. It can be a slow process to get the paint to cover – but don’t rush it! It can stretch out your design.
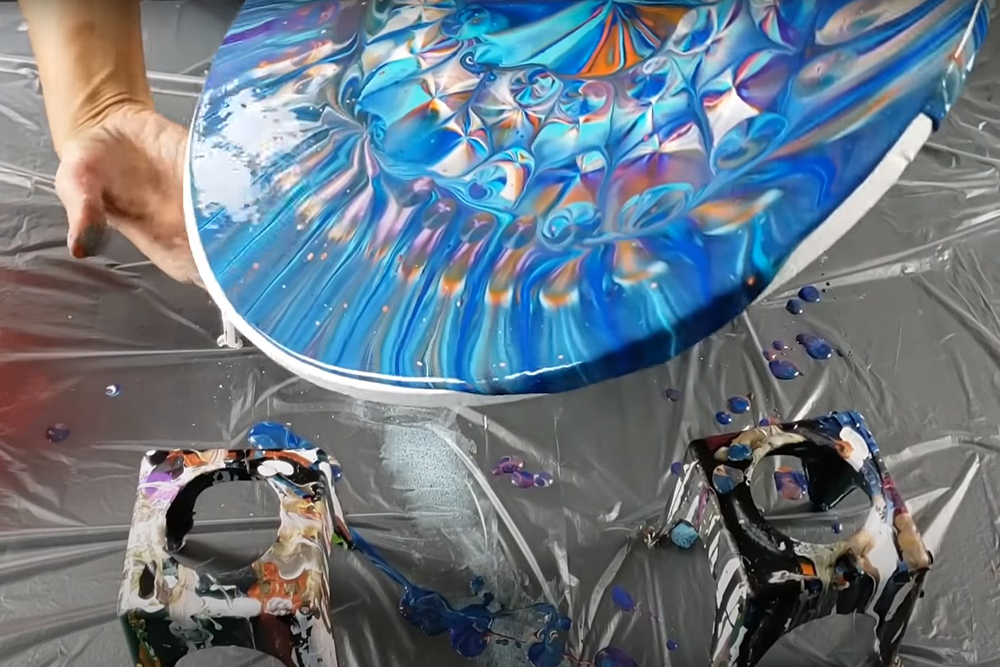
- Once your canvas is full you may find that your original design has warped or shifted somewhat. You can pick up your canvas and tilt it gradually to encourage your design to shift roughly back to the centre of your canvas.
- Your painting should have a central colourful bubble and a series of swirls, dots and kaleidoscope like patches made from all the colours you poured. When you’re happy with the composition leave it to dry!
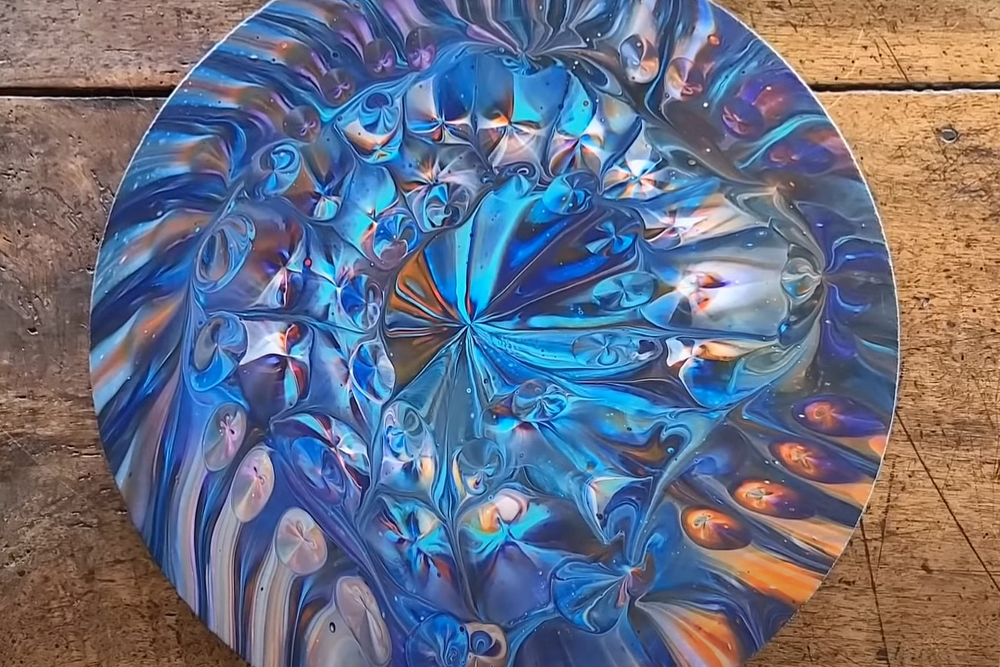
There are a few things to bear in mind with this technique. A smaller colander will be better for small scale paintings, whereas a larger one is better for large paintings. A colander with fairly large holes is better for this technique. Try out different sized colanders with different sized holes and you can create all kinds of different effects. Some artists working on a very small scale also use sink plug strainers for a similar effect!
The Bottle Pour / Funnel Pour
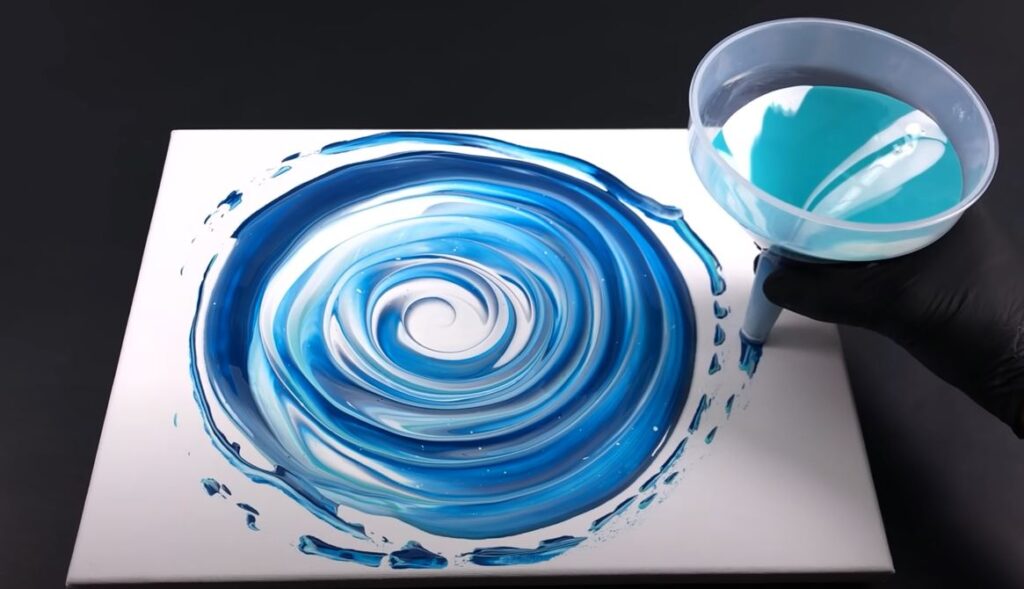
The Bottle or Funnel Pour makes use of any spare bottles you have hanging around! Be sure not to throw away your next bottle of Pepsi or Fanta – reuse it for this technique! If you already have a funnel then that can be used instead. This technique works similarly to the dirty pour, but the funnel allows you to create an interesting spiral pattern.
- Place your canvas central to your workspace and roughly position the funnel where you would like your spiral pattern to radiate out from.
- Cover the bottom of the funnel with your hand or finger. This will prevent the paint from running out of the bottom.
- Gradually pour your pre-mixed paints into the funnel, making sure not to let any of the paint escape. As with the Dirty Pour, you’ll need to think about how your colours layer as it will change how they look in your final pour.
- Once you’re happy with the colours in your funnel move it to where you want your spiral to begin. When you’ve found the right position remove your hand or finger and allow the paint to begin pouring out.
- As the paint flows out, move it around in a spiral formation around the initial paint puddle. This should create a spiral of colour radiating out from your starting position.
- Keep on adding to the spiral until you run out of paint or are happy with the pattern. Once you have finished adding paint carefully lift the funnel away from the canvas, making sure not to create any stray drips or dribbles.
- Gently tilt your canvas so that the paint moves to fill every corner. You may need to move the paint with your fingers to get it to cover the edges of your canvas.
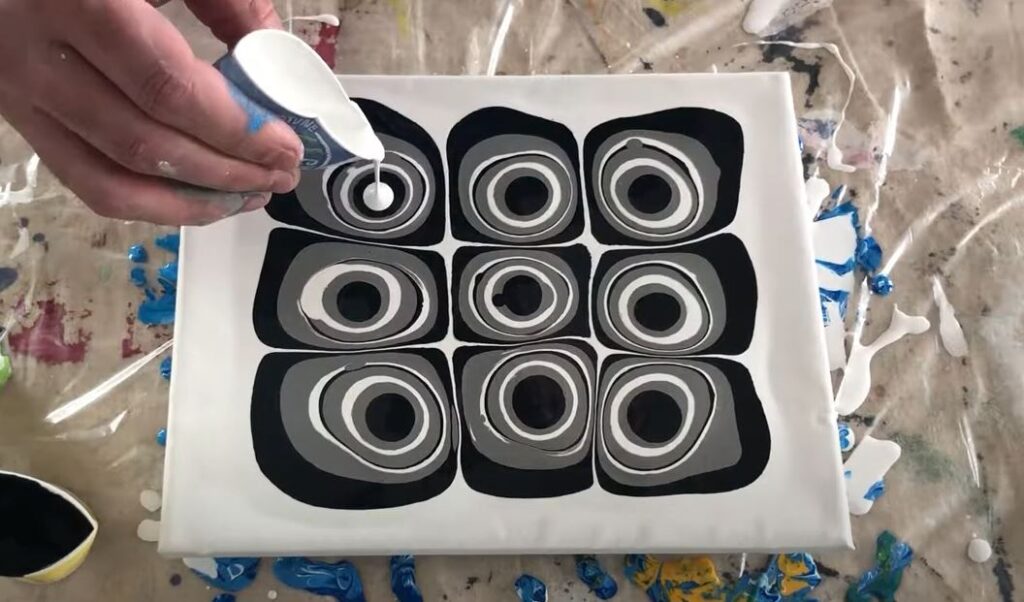
The String Pull Pour
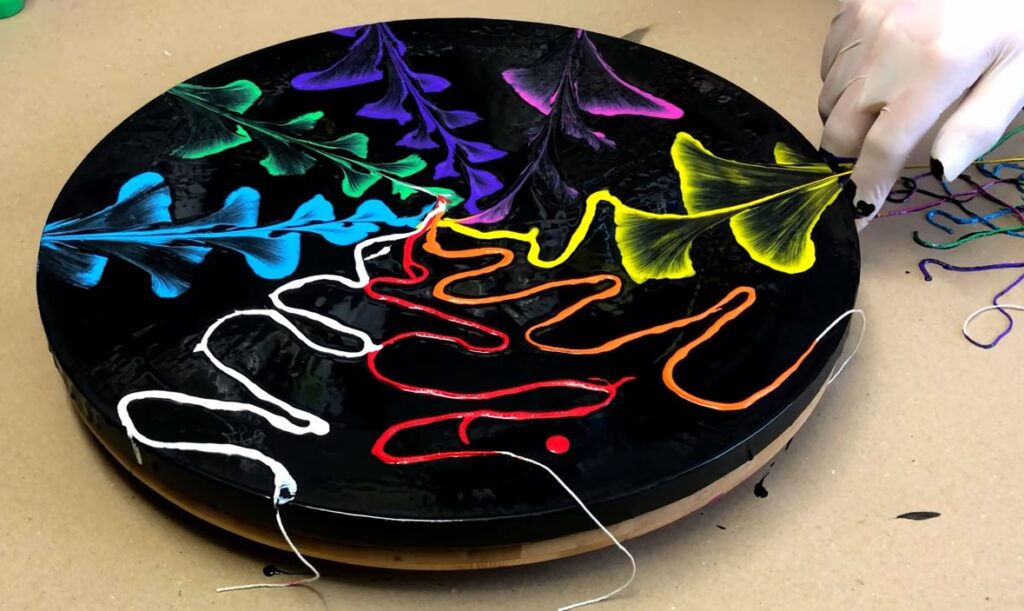
The String Pull Pour is a great technique to try if you’re looking for a more advanced technique. It involves coating a short length of string or twine with paint and arranging it in a coil on a fluid painted background. Pulling the string out creates a floral effect.
- Keep your pre-mixed colours in their own separate cups and add a length of string to each one. Make sure to leave a little overhanging so you can easily grab it from the cup. The length of string will need to be an appropriate size for your canvas. Cut a few lengths and hold them to your canvas to work out the size you will need for your design.
- Make sure each length of string is thoroughly coated in its respective colour and leave them to one side.
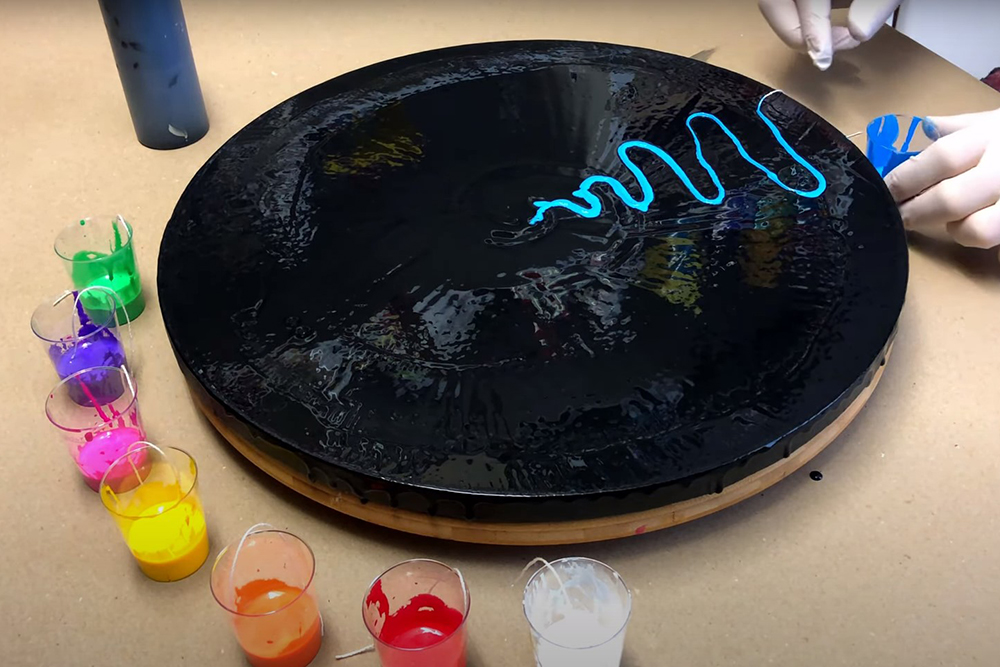
- Apply a base of fluid paint to your canvas. This can be any colour you want, but bare in mind it will need to contrast the other colours you have chosen. Pour your base coat and smooth it out with a palette knife.
- Take the end of one of your paint saturated strings and coil it around on your painting surface. This can be done in any way you want, but you’ll need to hang the paint-free end of your string over the edge so you can pull it free later.
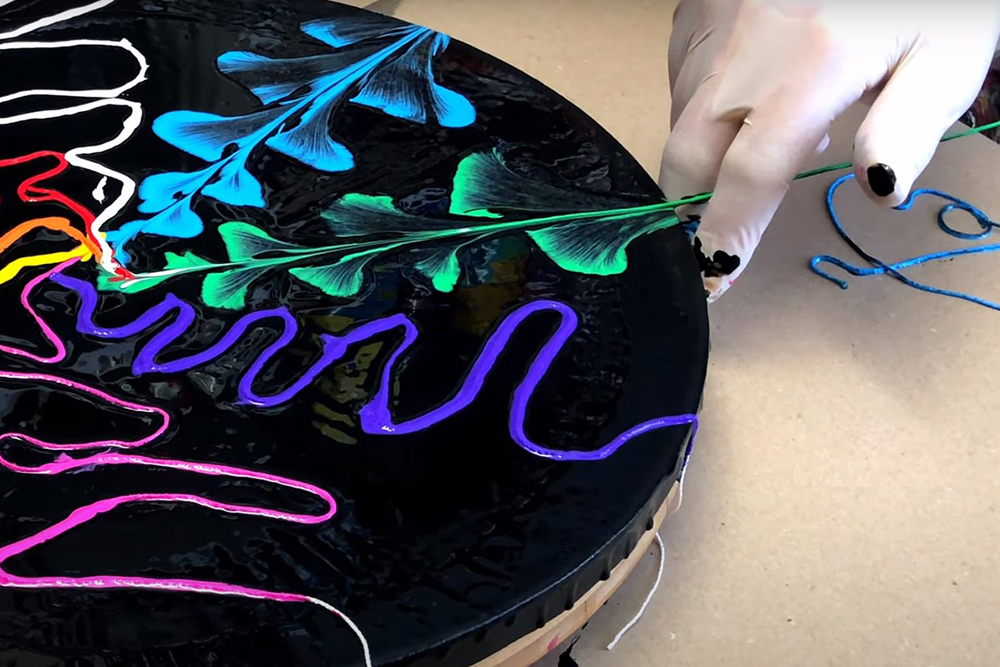
- Gradually add all the other bits of paint covered string onto your canvas until you’re happy with the overall composition.
- Pull the strings from the edges of your canvas. You’ll need to pull the string from one consistent point to drag the paint down a central line. Hold your hand as steady as possible while you pull to get the best results.
- Once finished you should be left with a leafy, flower-like impression of each colour on the canvas.
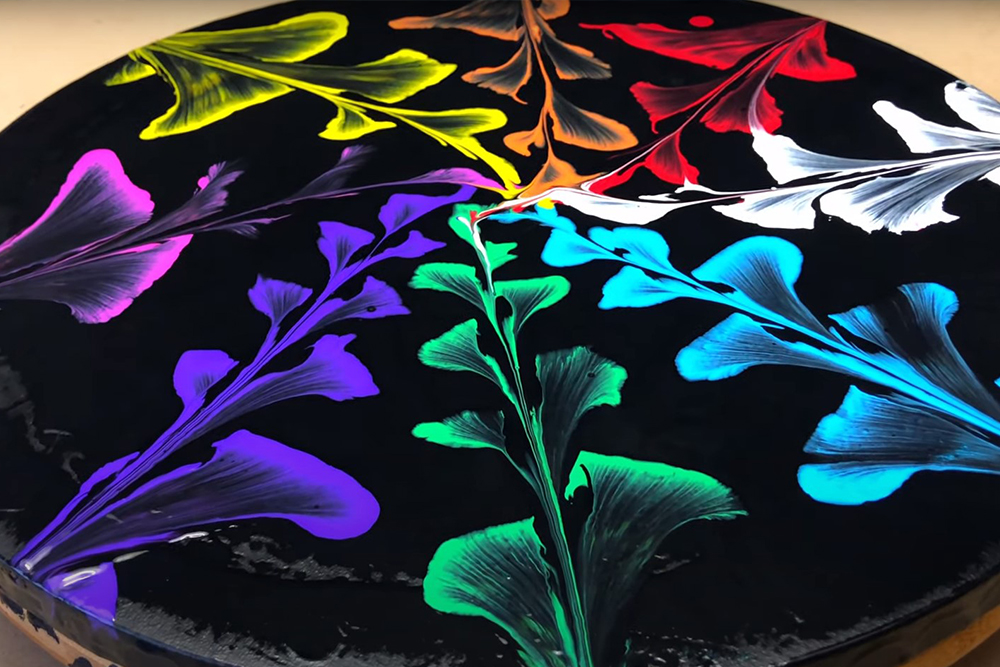
This can be quite a tricky technique to master, as the paint consistency needs to be just right to get the best results. It can take a few attempts to perfect, but once you’ve got the hang of it, it is very rewarding!
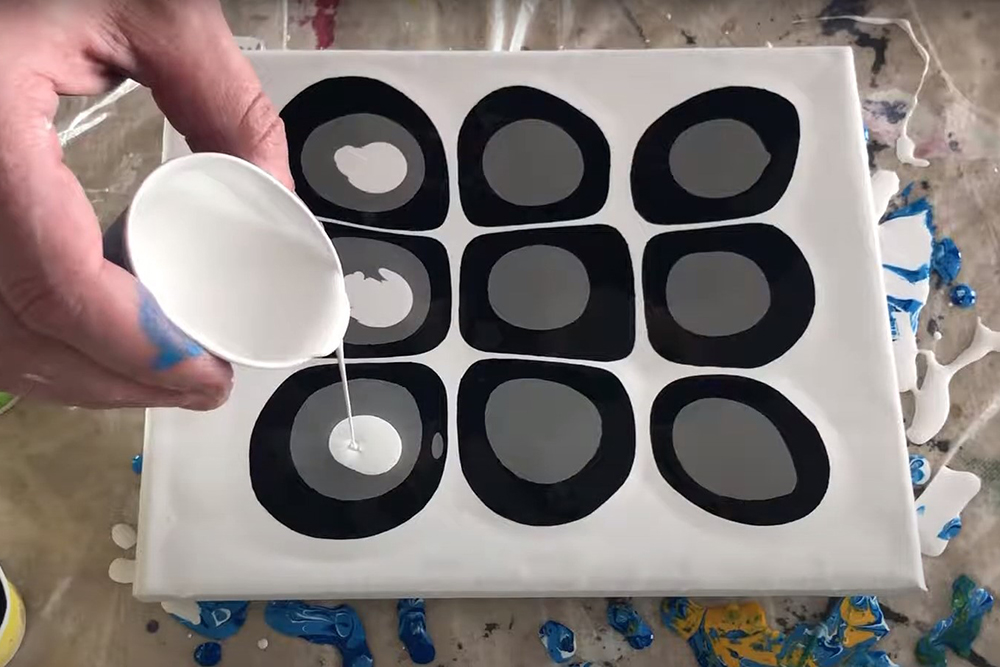
Balloon Dip Pour
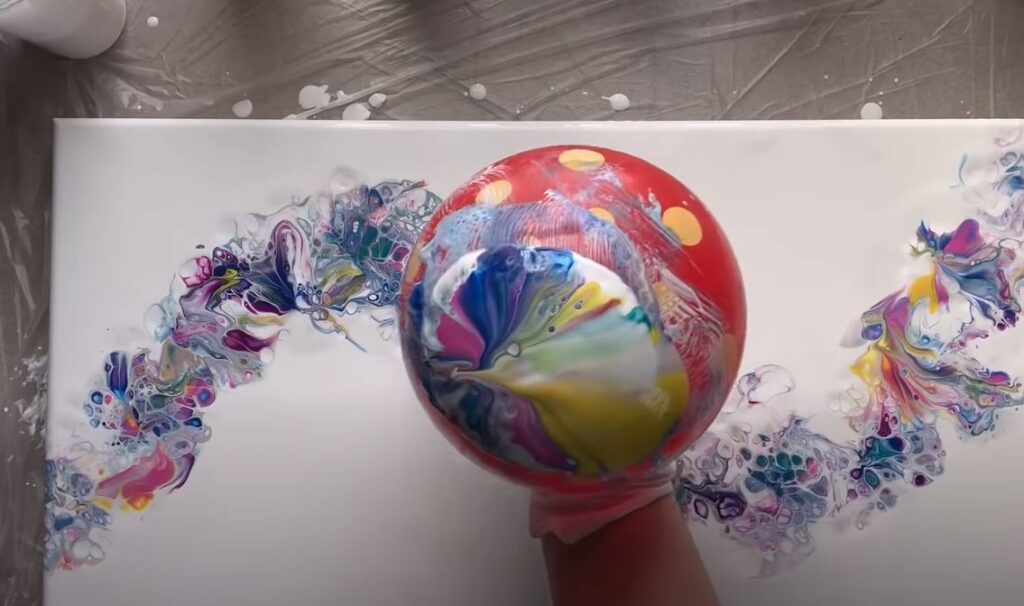
The Balloon Dip Pour is testament to how unpredictable the pouring process can be! The technique initially started more like a printing method. A balloon in dipped into your fluid paint mix and pressed into the surface of the canvas. The technique has changed a little to give more reliable and dramatic results.
- Begin by priming your canvas with a layer of mixed acrylic and pouring medium. You can use a palette knife to smooth out the surface. You can also use a palette knife to coat the sides.
- Take your pre-mixed colours and drop puddles of colour into the base coat. This can be done in any sort of pattern you want.
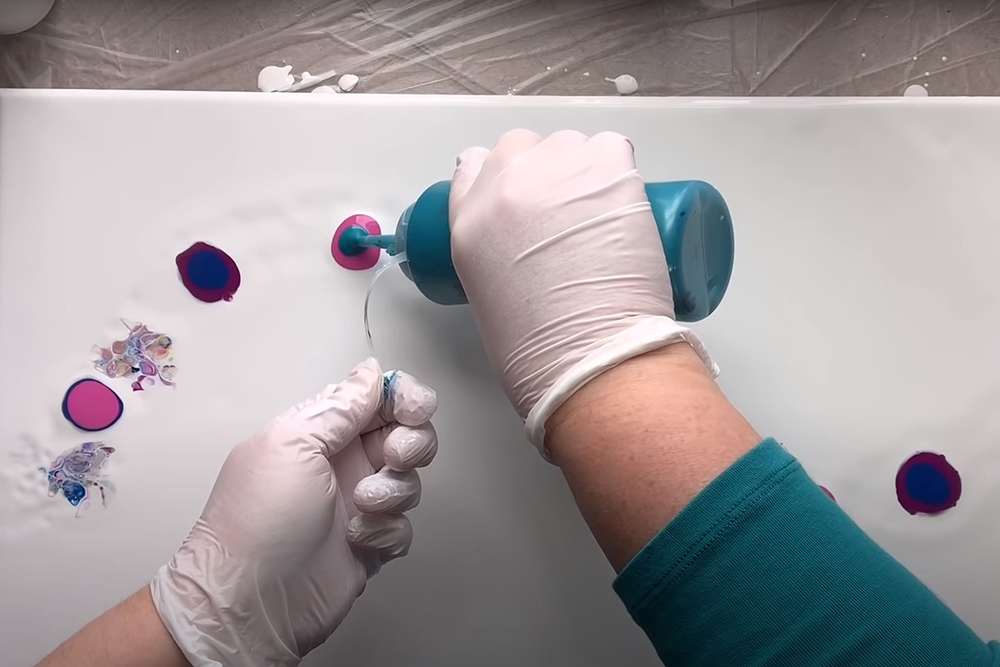
- Gradually build up the puddles until you’re happy with the overall composition. You can add layers of colour like you would in a Puddle Pour, or drip the colour around more randomly.
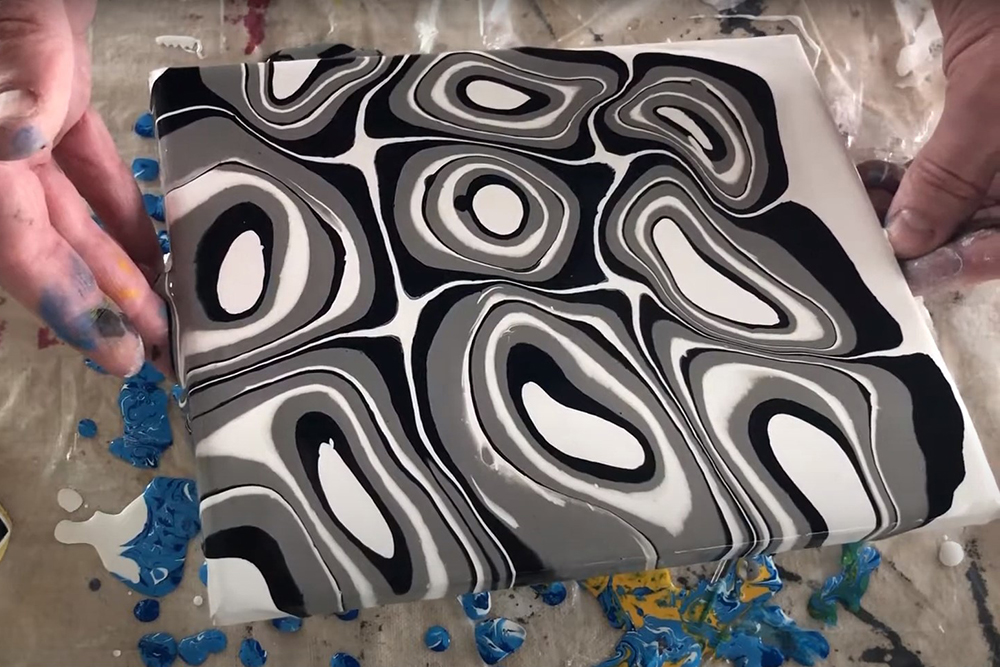
- Take your balloon and gently press it into the coloured puddles you have made. You may need to wipe down the balloon between presses to clear it of any residue from your base coat.
- Pour some of your pre-mixed colours into a shallow plate or pie tin. Dip your balloon into the mixture and touch it gently against your canvas. This part can be tricky as it can lift the base coat without depositing any colour if you press too hard. All it requires is a light touch. Once you get the hang of it you can use it to create interesting accents in your painting.
- Add more colour and continue pressing colour with the balloon until you are happy with the overall composition.
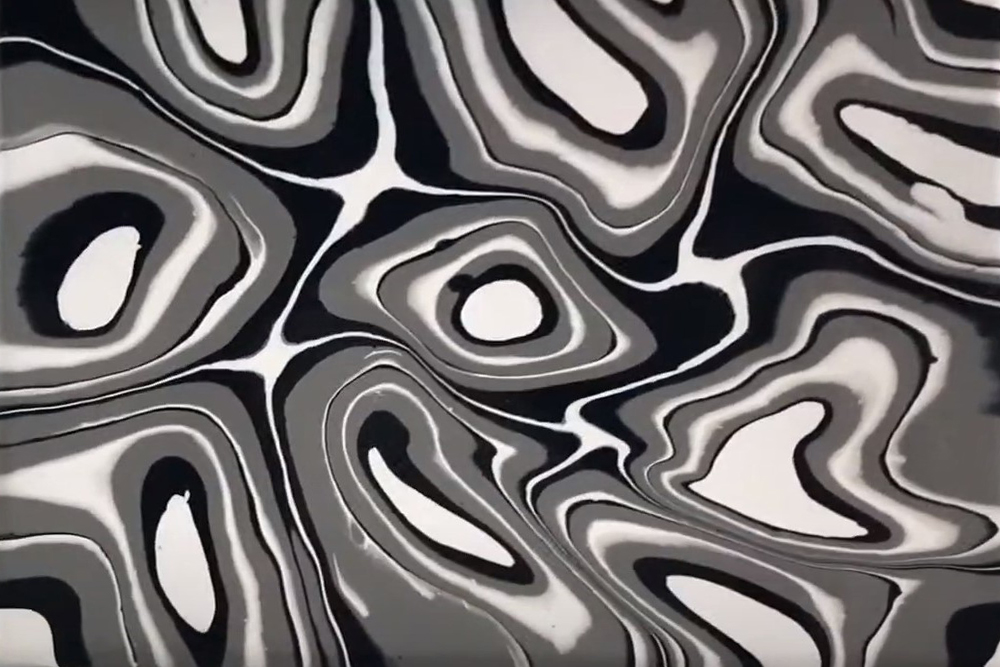
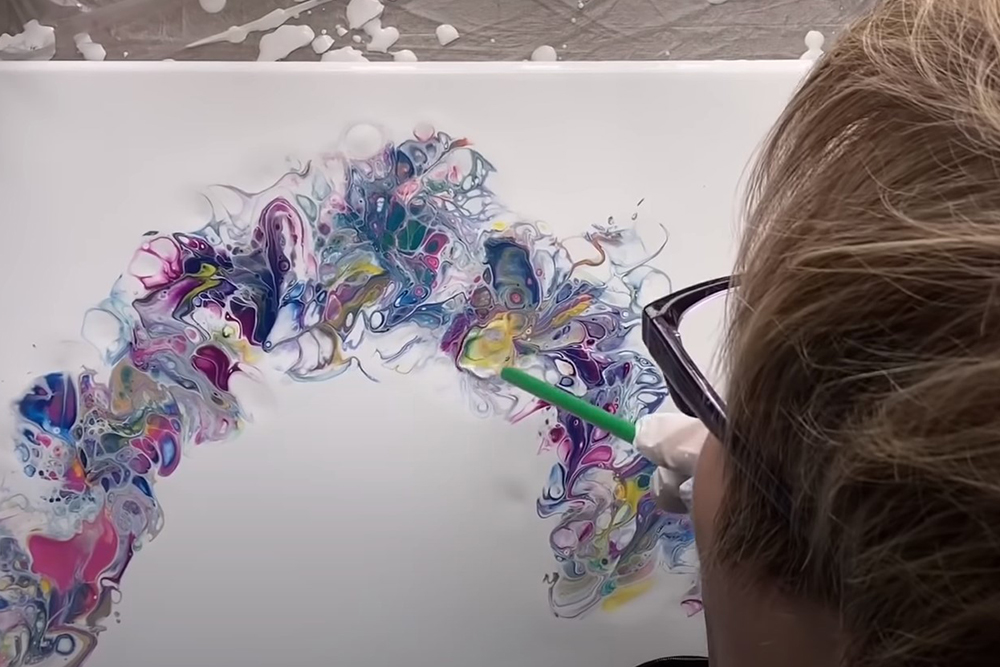
- In the areas where you have used the dipped paint and balloon to apply colour, your design may be quite small and indistinct. You can tilt and move your canvas to encourage the patterns to expand and move across the surface. You may also want to blow areas with a straw to force the pattern in a particular direction.
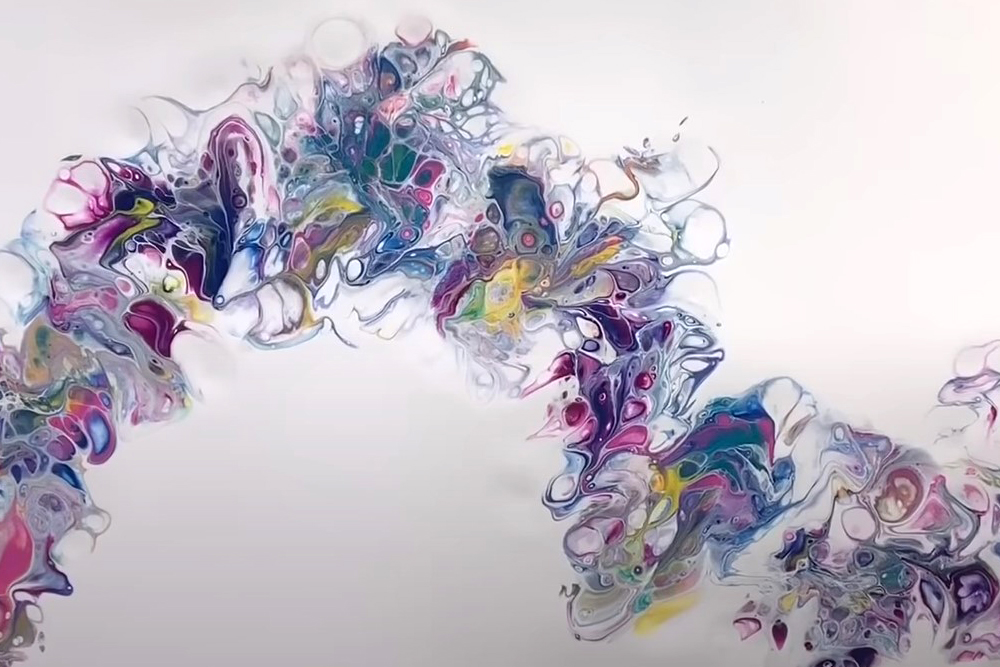
- Leave to dry once you are happy with the result.
You can add additives like silicone or Isopropyl Alcohol (IPA) to your mix to generate cells with this technique. But bare in mind that it can affect drying. These materials may also not necessarily be made to professional quality, so if you are selling work or concerned about the overall stability of your work it may be something you wish to avoid.
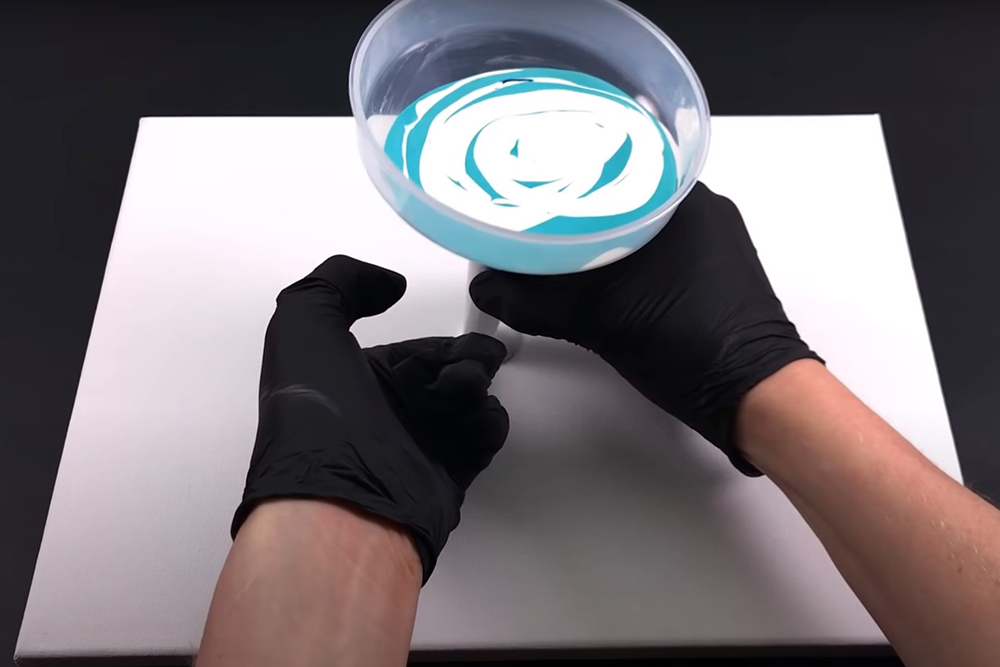
Dip Pour
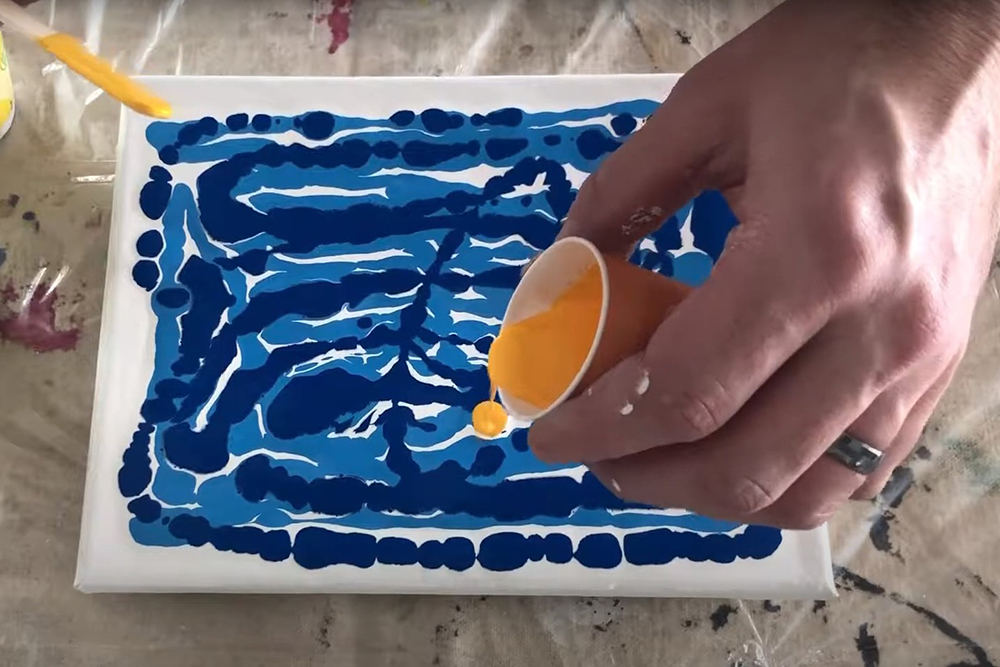
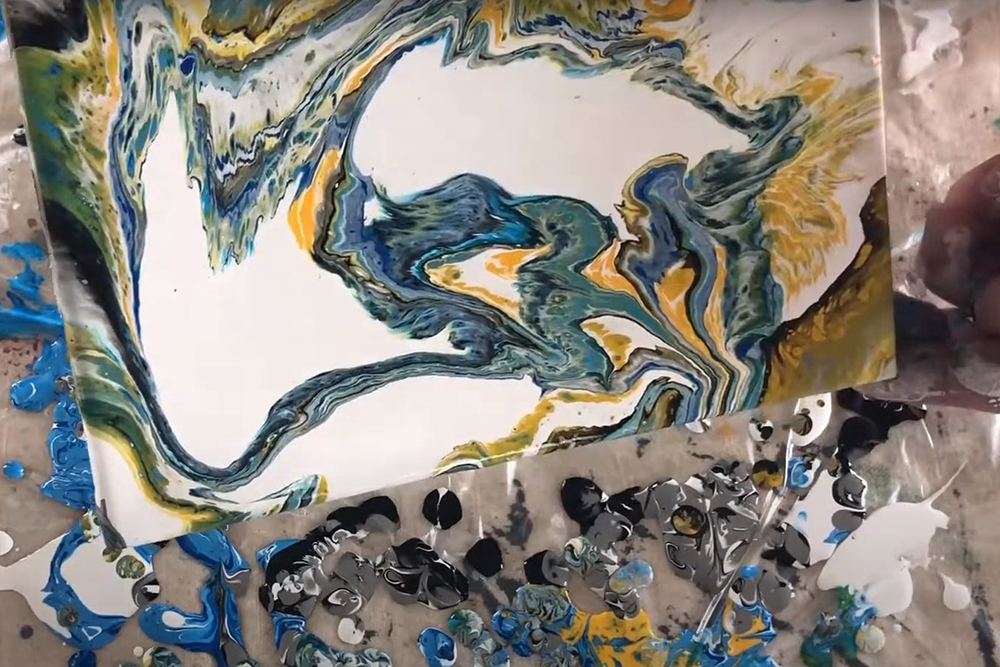
This method turns the canvas on its head – literally! The Dip Pour can seem more like a printmaking technique rather than a pouring technique. You create your composition on your workspace and ‘print’ or ‘dip’ it with a blank canvas.
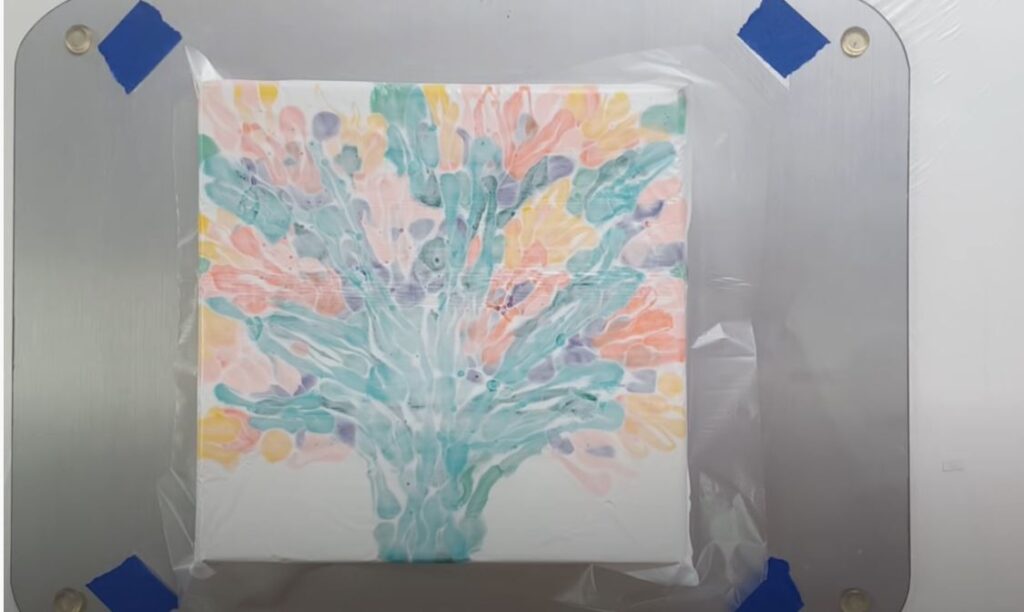
- Prepare your painting surface by laying down a clear plastic sheet. You will be applying paint to this sheet so make sure it is clean and free from grease or dust! Add a bit of tape to each corner to prevent it from moving around.
- Place your canvas on the plastic sheet and make a mark on the plastic showing where the edge of the canvas sits. Try to be as accurate as possible – it’s better to have a bit extra paint than not enough to cover your canvas!
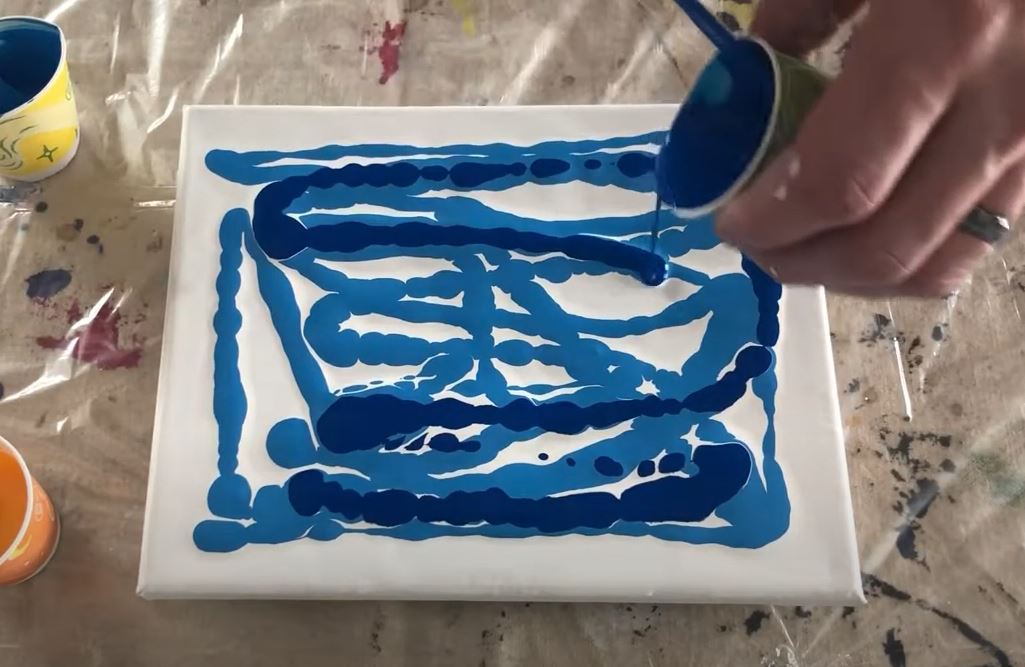
- Fill in the paint outline of your canvas with a paint/pouring medium mixture. Even it out with a palette knife. This can be any colour you want.
- Pour your acrylic paints onto the area you have just filled in. You can make any sort of pattern you want – in this example a tree-like pattern was created. Add colour individually like with the traditional pour or create a ‘dirty pour’ cup and add colour all at once.
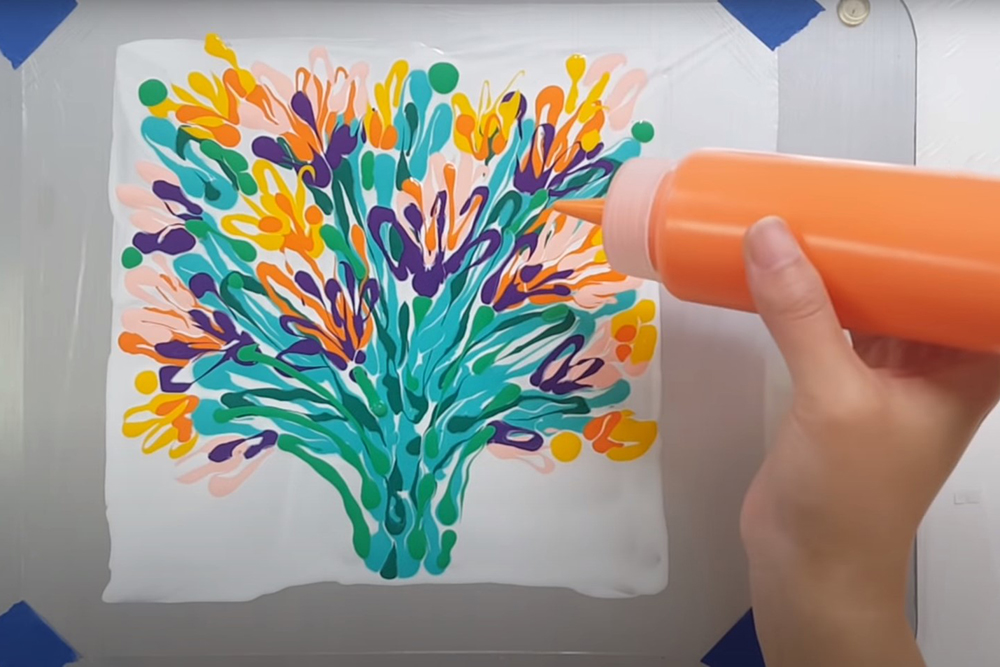
- Keep adding paint until you’re happy with your composition.
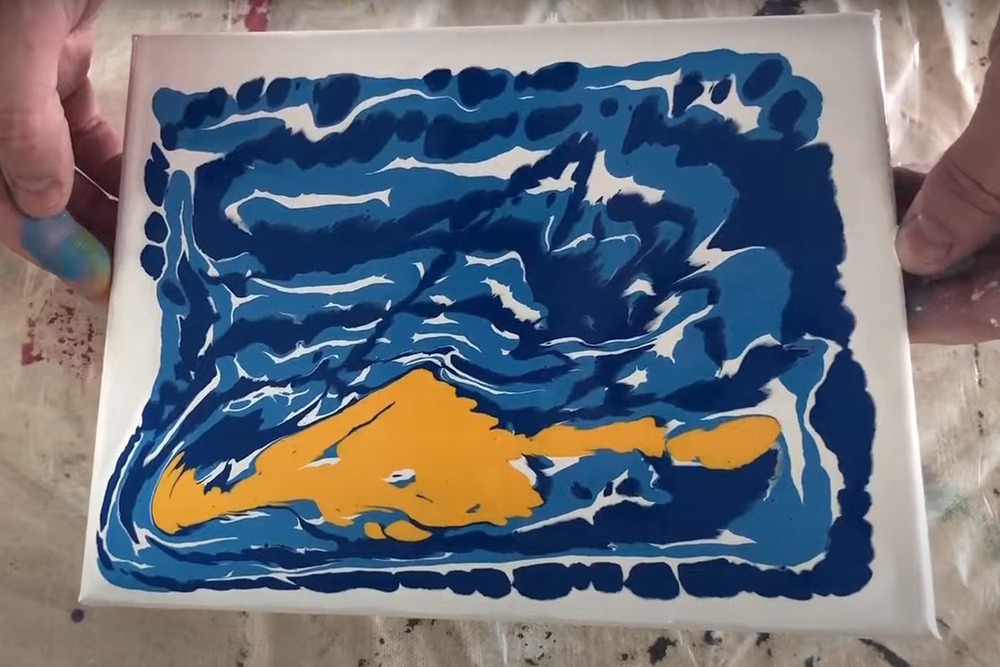
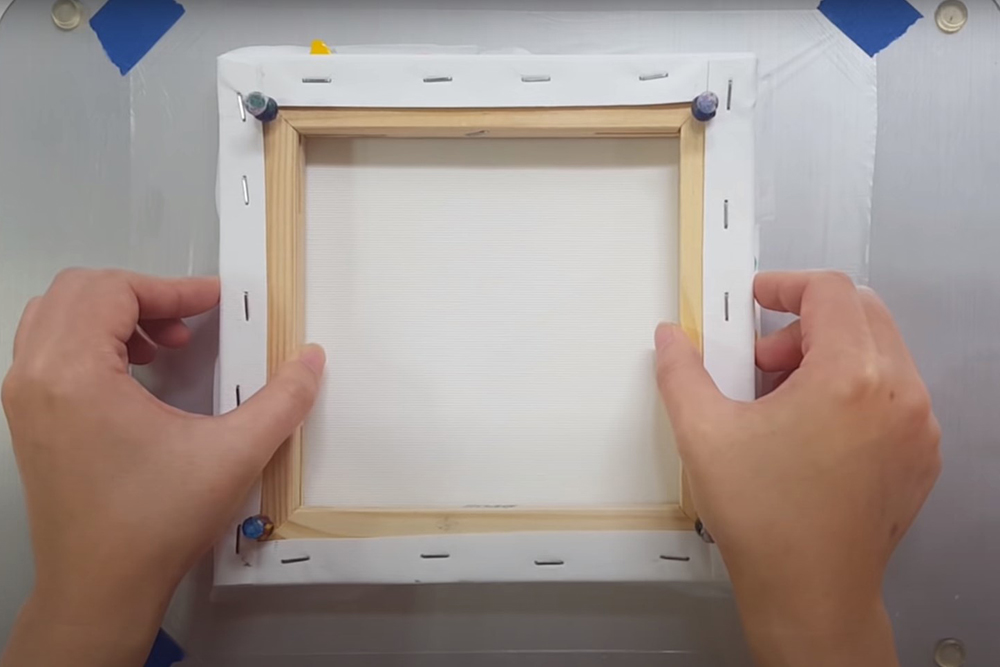
- Next you need to prepare your canvas with the same paint/pouring medium mixture as in step 3. Again you can smooth this down to cover your canvas with a palette knife.
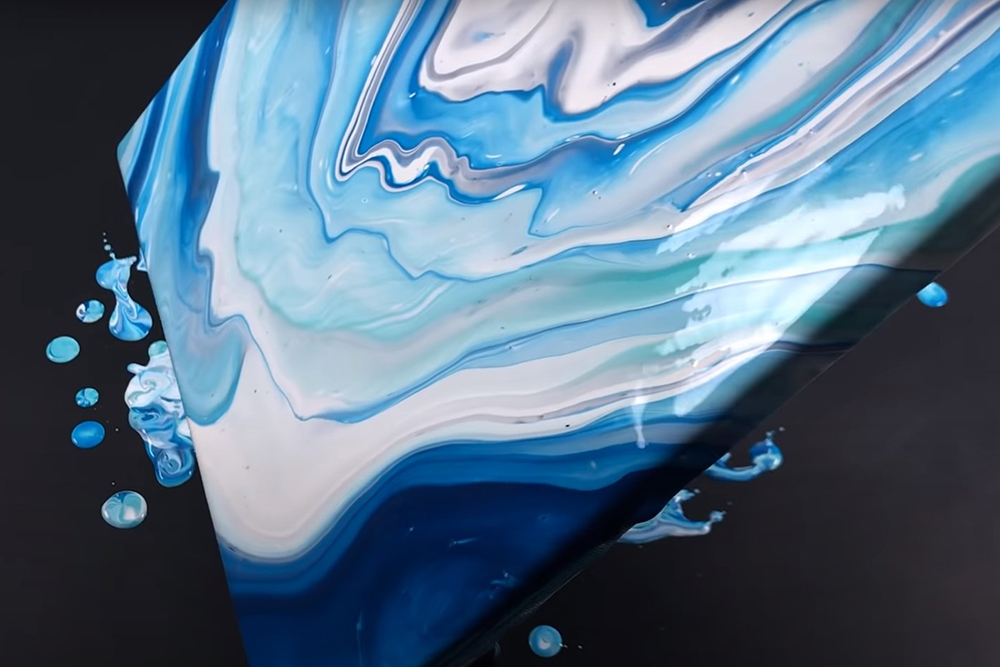
- Once your canvas is prepared pick it up and place it on top of the painted plastic sheet with the prepared surface facing down. Gently press down on the back of the canvas to make sure the canvas comes into contact with all the paint.
- Cut the tape from the edges of the plastic sheeting and flip the canvas/plastic sheet over so the paint layer is facing you. Use a needle to prick the surface of the plastic film to release the air layer.
- Leave the plastic sheet attached to the surface of the canvas and flip it back over so the plastic sheet is in contact with your work surface. Tape the plastic sheet in position again – this will keep the plastic steady as you pull the canvas away from it.
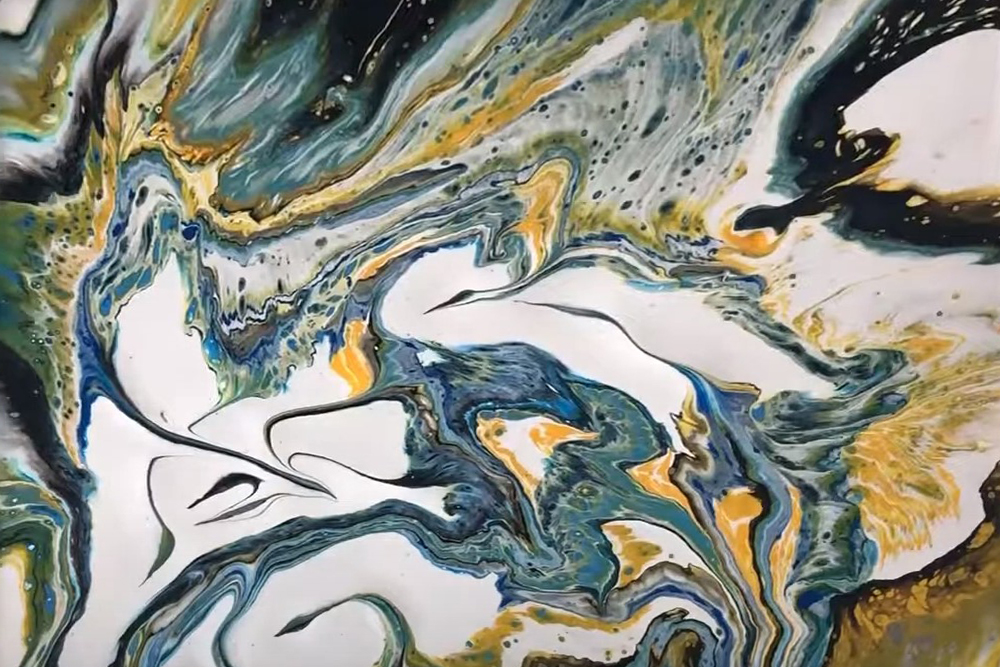
- Brace the back of your canvas with your hand or a paintbrush to keep it steady and slowly pull the canvas away from the plastic sheet. Your dip pour painting is finished!
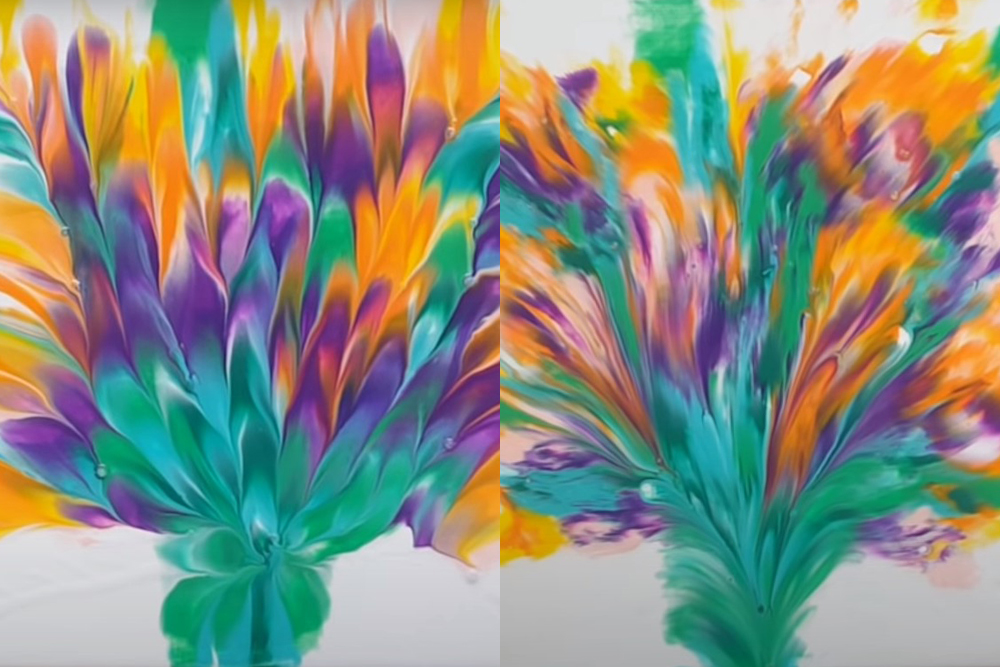
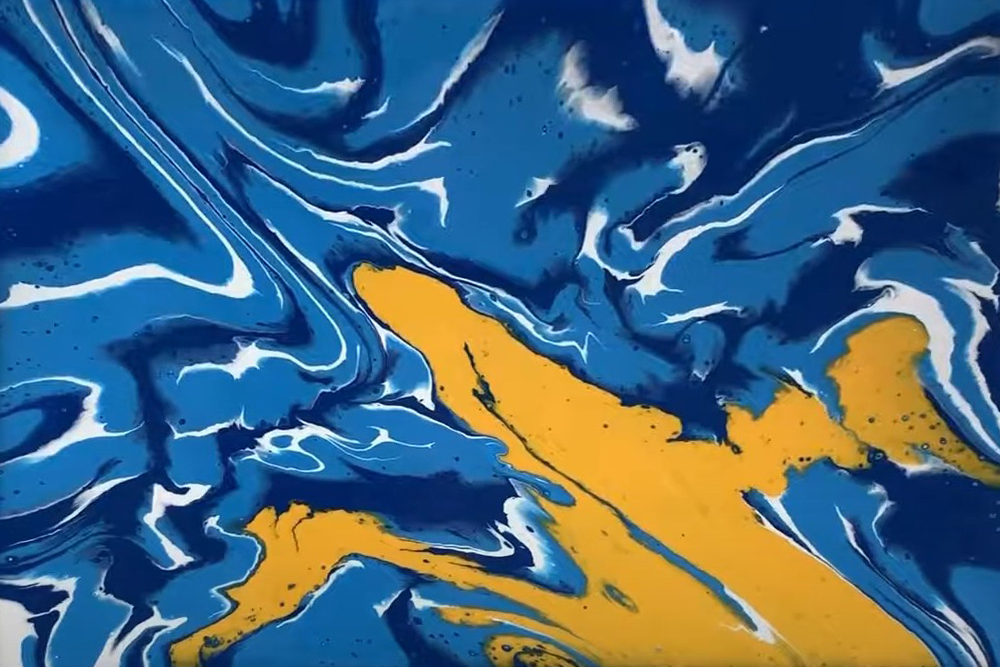
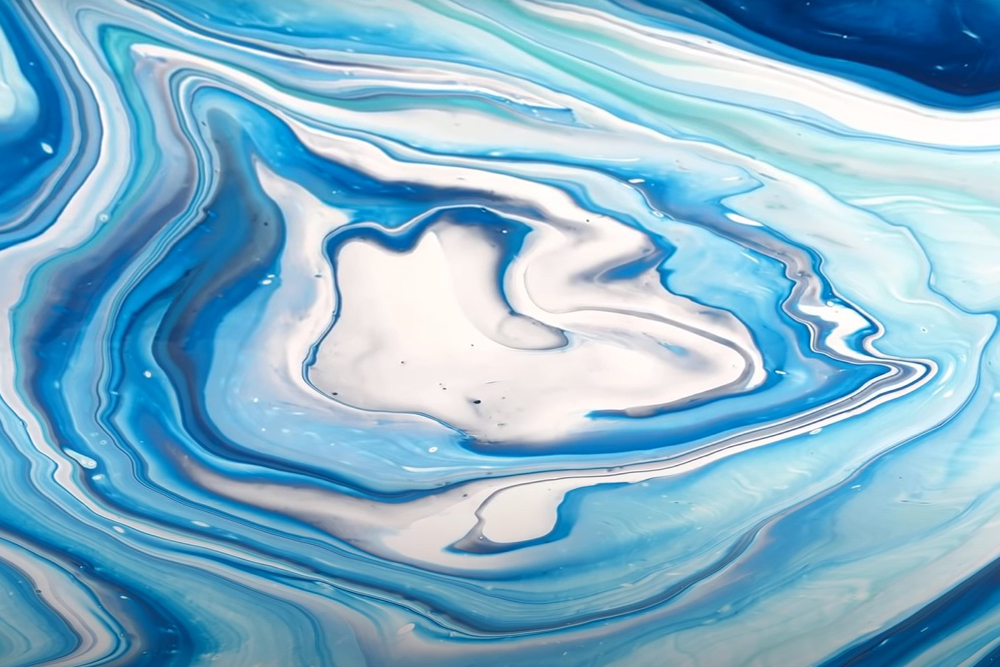
When you’re finished you’ll probably find that the plastic sheet still has quite a lot of paint on it. You can use this to create prints on more canvases. The more you reuse the painted sheet the more you will find the colours muddy. You may only be able to get a couple of good prints from them, especially if you are using lots of colours.
Once you’ve had a go at a few of these techniques you will be well versed in acrylic paint pouring! There are so many techniques out there to try, and the more you experiment, the more likely it is that you will discover your own new and exciting way of pour painting. Paint pouring is a great way to have fun with your paints and experiment to create spontaneous abstract designs.
Sources:
- https://www.youtube.com/watch?v=N7sxxoqlhcA&feature=emb_title
- https://www.youtube.com/watch?v=0rOQj0AcmhY
- https://www.youtube.com/watch?v=14ffdmRLp7o
- https://www.youtube.com/watch?v=zXD-PTD6ikc
- https://www.youtube.com/watch?v=pv_bg3M_dWg
- https://leftbrainedartist.com/basic-acrylic-pour-techniques/
- https://leftbrainedartist.com/advanced-acrylic-pour-techniques/
- https://www.youtube.com/watch?v=iPVop7wnZsU


Is it important to cover can canvass with a base coat please.
All our stretched canvas and canvas boards come ready primed. You can opt to add another coat of gesso before painting, but when doing a pouring technique it really isn’t necessary.
hi my name is joe i have just started paint pouring i finde it to be most relaximng and i am gooin g to start doing a lot more i still need some bore things like mixing medium and varnish
Hi Joe! It’s great that you’re trying out acrylic paint pouring. We hope you enjoy the technique! If you’re looking for materials to get going with we do stock a fantastic range of paints and mediums on our website here.
Thank you for sharing the different techniques. I tried my first one last night and it’s going to take some time to figure out the paint consistency on a pour. It was fun and I will be trying it again for sure.
Hi Sue! We’re happy to hear that you found the different techniques helpful. Have fun experimenting and just let us know if ou have any questions!
I’m just getting started did my 1st yesterday, but must have pressed to hard as some were muddy. Appreciated all the different types of pours and can’t wait to try some of them. Found this very informative, thanks to sites like this for us who are just wanting to try different techniques. Again thank you.
Hi Carol. Thanks for your comment. We’re glad to hear that you found the blog post helpful – hope you continue to enjoy acrylic pouring!