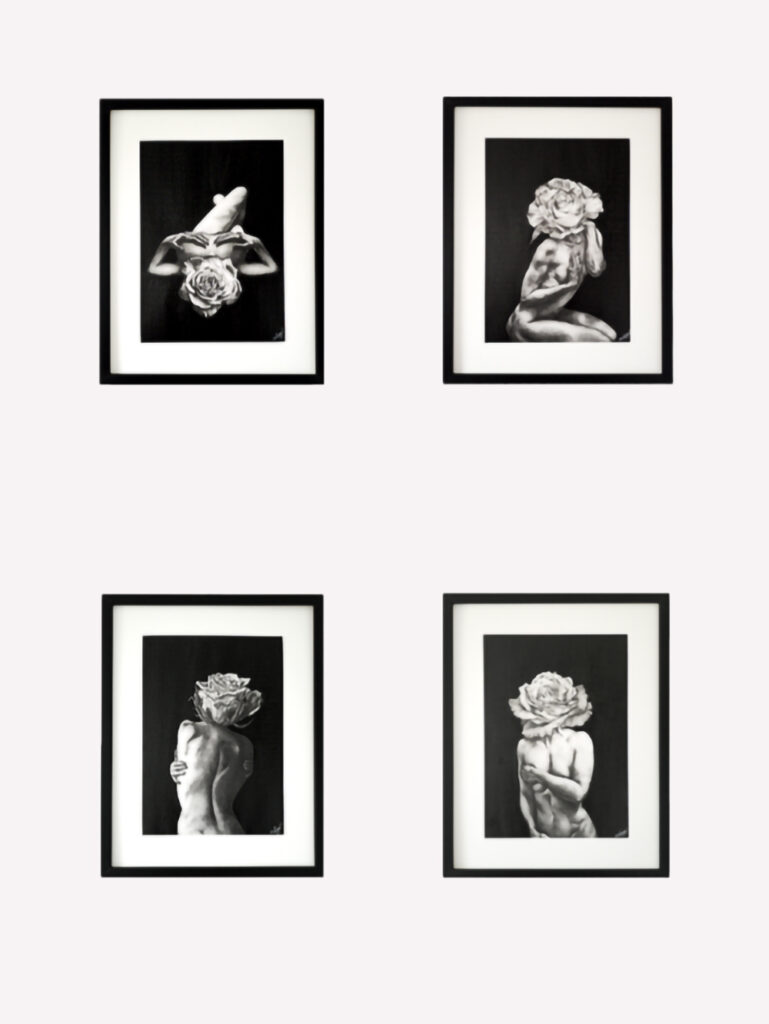
How to Achieve Photo Realism with Uni Pin Fineliners in Four steps
Using Uni Pin Fineliners is a great way to achieve a high standard of fine art drawing as they provide permanent, archival, highly pigmented ink with a continuous flow. I have honed my drawing techniques with them over many years and favour the traditional methods of hatching and stippling. In this post I will demonstrate some of my techniques using fineliners to create a figurative drawing.
Materials needed for this tutorial
– Black Uni Pin Fineliners from Uni-ball in nib sizes 0.03, 0.05 and 0.1
– Light grey Uni Pin Fineliner from Uni-ball in nib size 0.1
– Cold pressed watercolour paper (I use Clairefontaine Goldline Studio watercolour pad 200gsm) or you could use Saunders Waterford Cold Pressed 200gsm in natural rather than high white. I use watercolour paper because of the fine grain and the ivory tone, as opposed to a bright white, it lends itself really well to figurative work like mine.
– Drawing glove
– Cotton buds
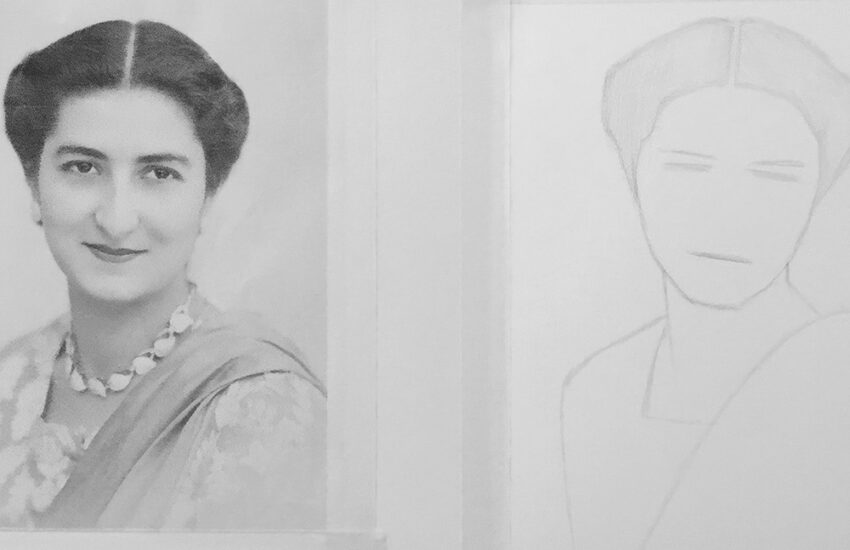
Step 1 – Mark out your image
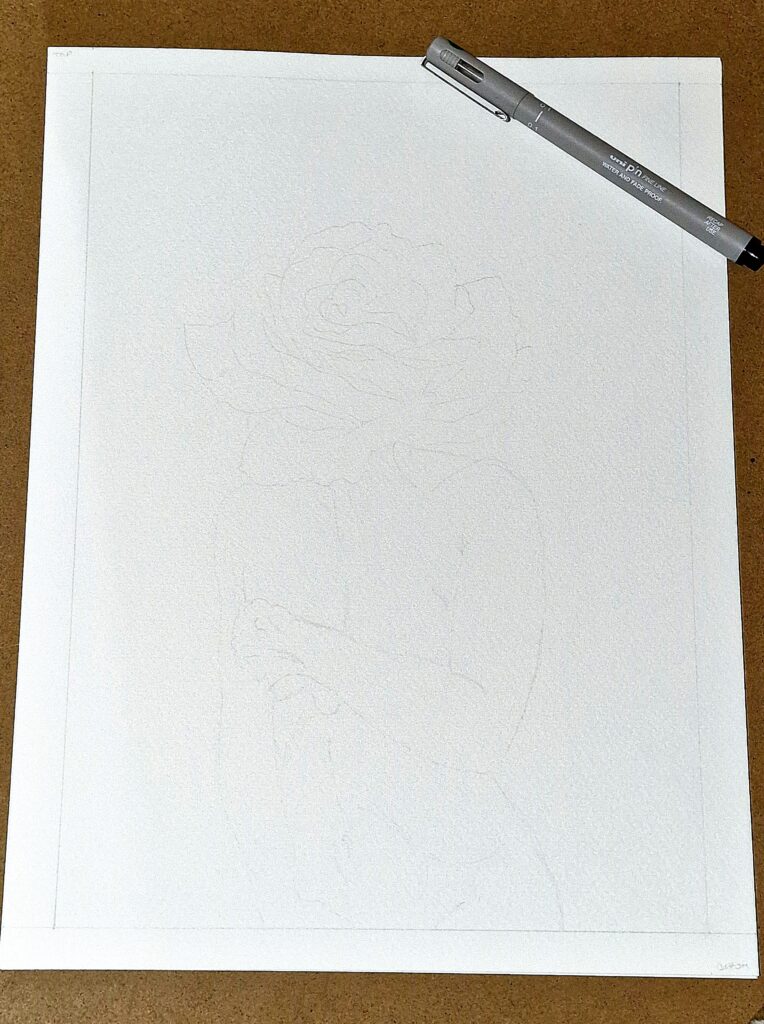
I use the Uni Pin Fineliner in Light grey, nib size 0.1, to sketch out my images before I go in with a black pen. I find the subtle pale tone of this pen a great starting point to grow my drawings from. It’s light enough to act as my guide for the shapes I’m drawing and is also easily hidden by the black Uni Pins.
So, mark out your outline with the light grey Uni Pin. You can mark in detail at this stage too if there is anything you aren’t sure of or don’t want to miss out.
Step 2 – Hatching the foundations of shading
Now to use the black Uni Pin Fineliners. This part doesn’t need to be as scary as you might think. I always start the actual drawing with my favourite nib 0.03. It’s the smallest, and most forgiving nib if you start off wobbly and are unsure.
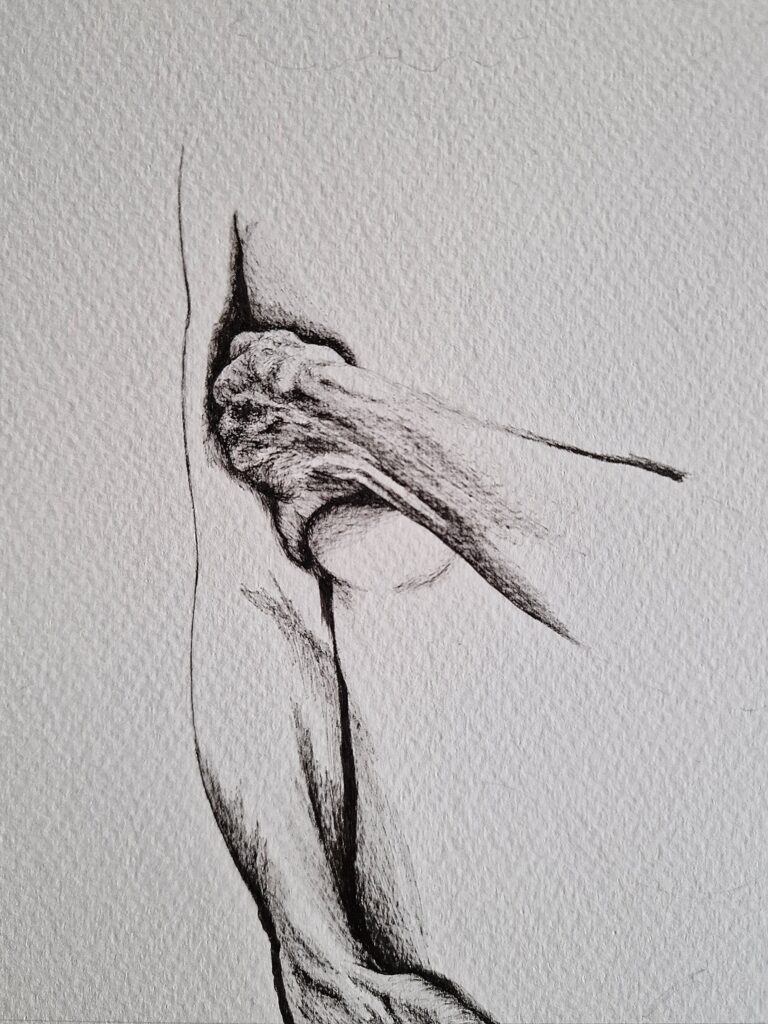
My advice would be to choose a part of the drawing that scares you most first. Go in the deep end, then everything else will feel like a breeze! For my latest drawings I started off with the hands. Hands, feet and faces are my scary shapes so if they are part of my artwork, I get them out of the way first!
With your 0.03 nib, in small strokes start to add areas of shading. You can make them longer as you go, but build your confidence first. Stay light with your hand movement, don’t press too hard on the paper, you don’t want to dent the surface. Don’t be afraid to use a combination of light touches, barely skimming the paper for your lightest areas, and committing the ink more in darker areas and outlines. You are looking to have a base to guide you where the dark, mid and light tones are. Do not shade so that the drawing looks complete, that’s for step 3.
Extra Tip: If after a while the ink flow starts to drop or becomes a little scratchy, don’t throw the pen away! I use all of my Unipins until there isn’t a drop left in them. Used pens are a great way to get different shades of black into your work, making them perfect for achieving gradation and shading. They are also a really good tool to be able to give you very faint marks to improve texture.
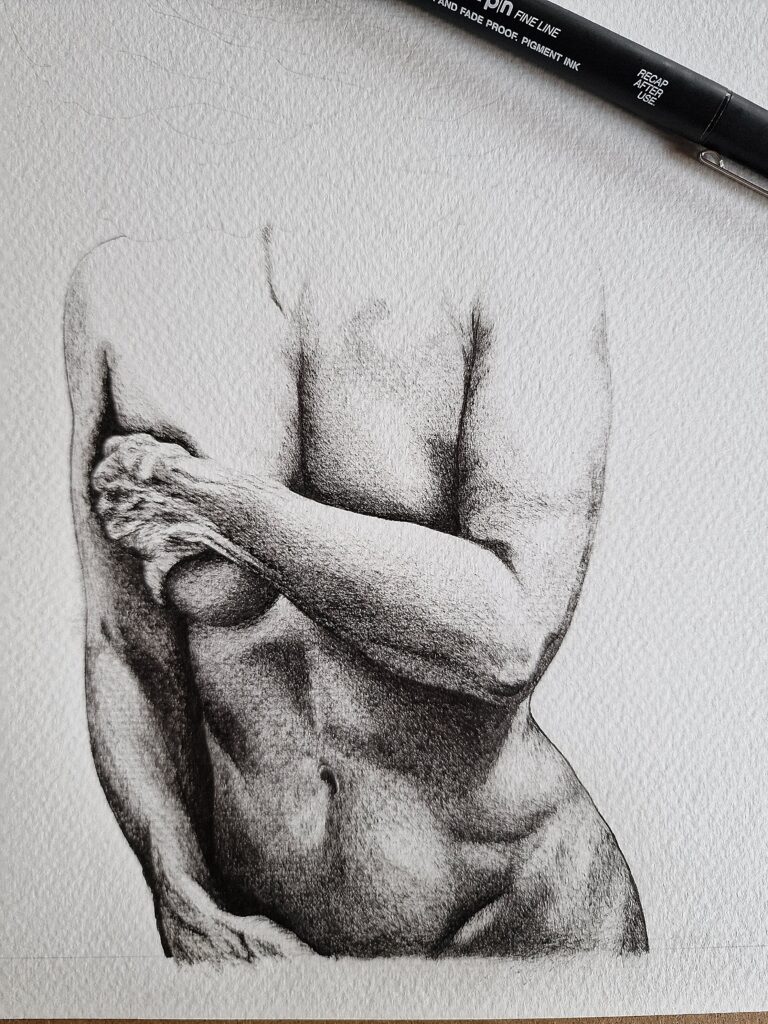
Step 3 – Stipple and blend for buttery smooth skin
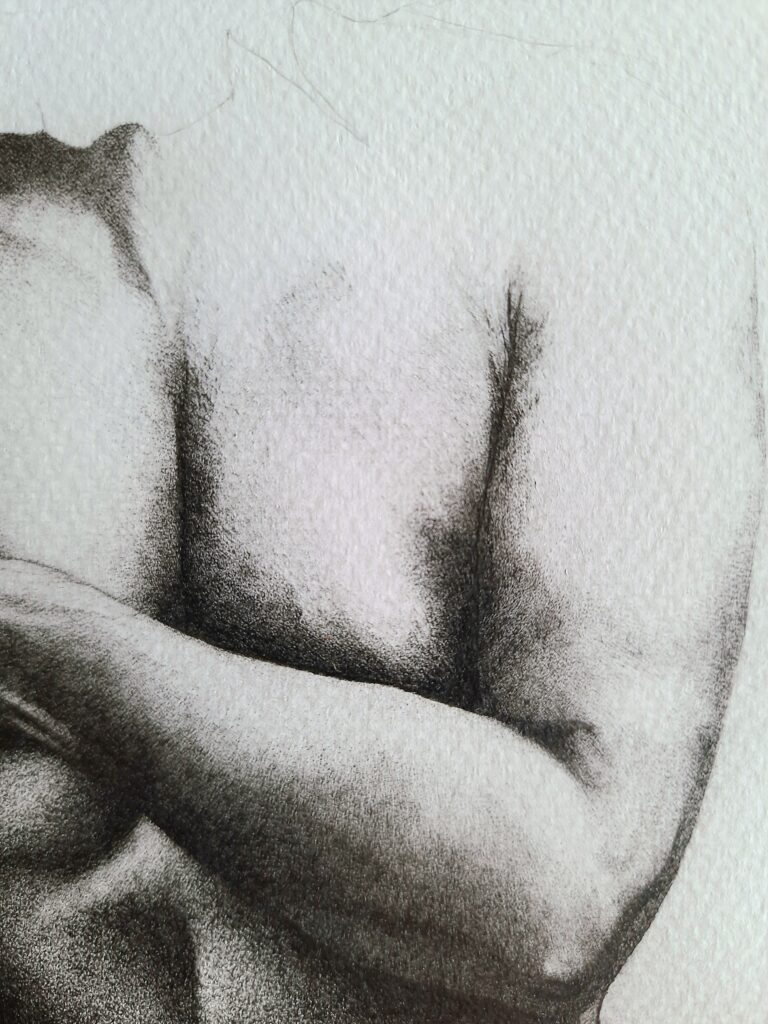
Stippling is how I achieve that buttery smooth skin surface. This will literally be thousands of dots. You do this by simply placing the pen nib onto the paper over and over again, moving across your area as you go.
Grab your 0.03, 0.05 and 0.1 nibs now and carefully stipple following these 3 rules:
Rule 1 – For darker areas
You want to use the 0.1 as much as you can, reducing to the 0.05 for smaller areas. You will need to exercise some control over your dot placements, they need to be close together and almost always touching. This is now where your drawing glove comes in (or cotton bud if you prefer). After you have done a small area of dots use your gloved little finger (or cotton bud) to rub in a light circular motion over the area. This will allow the ink that hasn’t fully dried to blend together, it’s this step that will make all the difference in how “soft” your skin will look. It may look blurry up close but stand back, I promise you its worth it.

Go over areas again with more dots for deeper black shading, the more compact the better. Then gradually fade them out to the mid tones.
Rule 2 – For mid tone areas
I would use a mix of all 3 nibs (0.03, 0.05 and 0.1), judging as you go which one you need to utilise more. These dotted areas still need to be compact but you can leave more space in between them and you don’t need to achieve the blackest black here, think charcoal grey. Using your gloved little finger or cotton bud, lightly rub in circular motions over the area you are working on to achieve a continuous “soft” skin tone. When you are happy fade these areas out to the light areas.
Rule 3 – For the light areas
I suggest just using the 0.03 nib for these areas. Remember before you start these light areas, some of them may need to be so light you don’t need any shading at all. It’s better to space your dots out more for the lighter areas, as once you add them you can’t take them away. So build them up slowly and work from the mid tones outwards. You will need to use the circular rubbing motion with your gloved finger or cotton bud for when the mid tones join the light but it is not necessary to blend them all the way out. The dispersal of your dot placement will do this for you.
Step 4 – Darken and sharpen the details
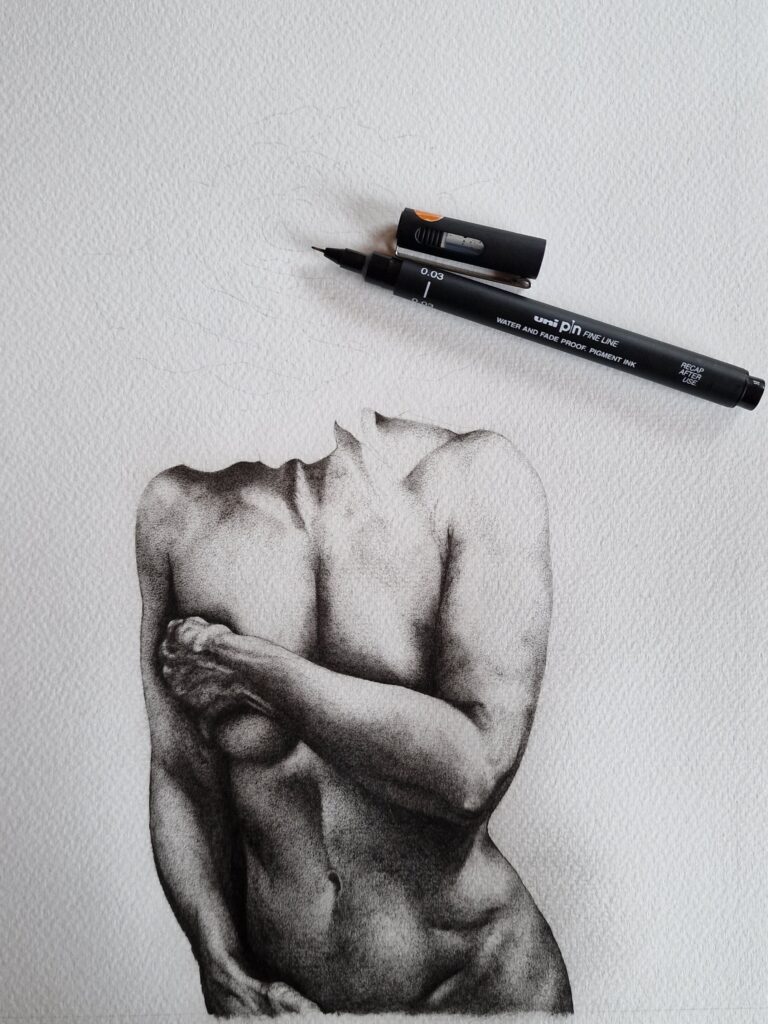
Once you’ve made all your marks, stippled and hatched your way to a drawing you love, it’s now time to darken and sharpen up any details. Steadily draw your details, sharpen any edges and smooth out any lines. This will allow you to get tiny details emphasised and also deepen the intensity of the blackest black.
And that’s it! The basic steps for achieving photo-realistic drawings using Uni Pin Fineliners. Practice each step before you commit to a final drawing and get used to the techniques and the nibs. Happy drawing!