
Teddy Bear Gouache Tutorial
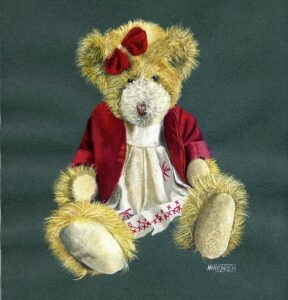
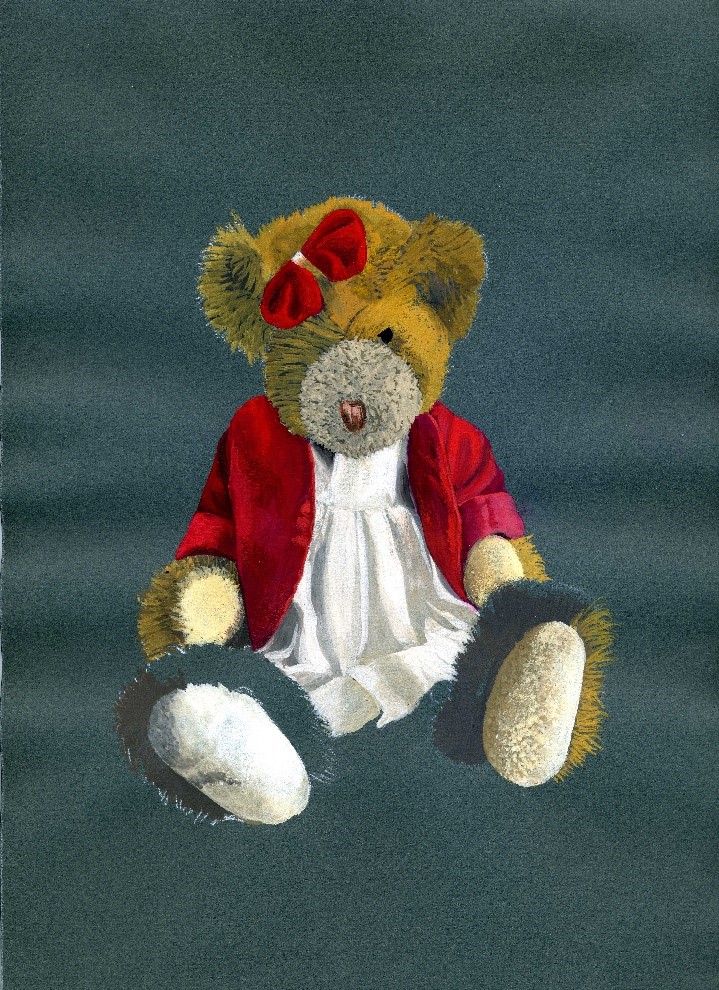
Tutorial of ‘Harriet’ the teddy bear painted in gouache. This painting on dark green pastel paper is a fine example of showing the opaque quality of gouache paint compared to watercolour.
You will need…
- Dark Green Pastel paper or mountboard 30 x 21 cm or thereabouts
- Winsor & Newton Designer’s Gouache in the following colours:
- Permanent White, Raw Umber, Burnt Umber, Raw Sienna, Yellow Ochre, Cadmium Free Yellow, Ultramarine Blue, Permanent Alizarin Crimson, Winsor Red and Ivory Black.
- Watercolour Brushes:
- Round Nos. 2 and 6, No 0 or 1 Rigger brush.
- Mixing Palette, A4 Sketchbook, Pencil, Transfer Paper/Frisk A4 White for Dark Paper or Tracing Paper, Masking tape, Water, Paper kitchen towel.
Step 1
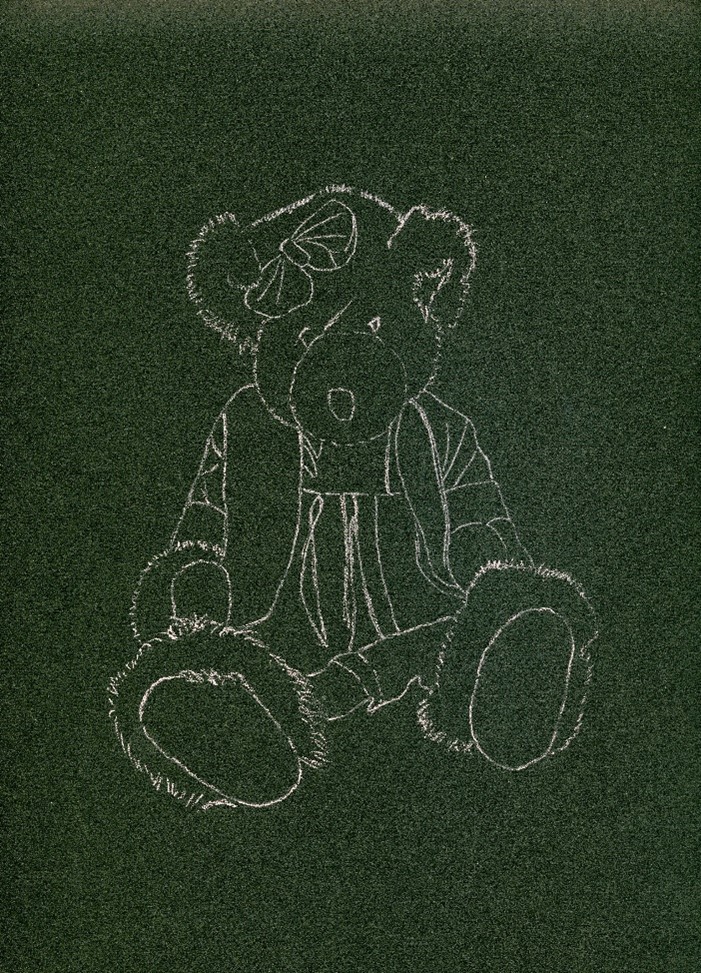
There are a variety of ways to establish the drawing on a dark coloured surface, you can lightly draw straight onto the paper with a light-coloured pastel pencil, though you would need to do this carefully if you don’t intend to paint a background.
I first drew the image in my sketchbook correcting any drawing errors as I went then I traced it onto traditional tracing paper, turned it over and drew over my lines with a white pastel pencil. I then taped this, right side up, onto my chosen paper and redrew over the lines transferring the image onto my support (paper).
Alternatively, you could use wax free ‘Transfer Paper/Frisk A4 White for Dark Paper (5 Sheets)’ as directed.
Step 2
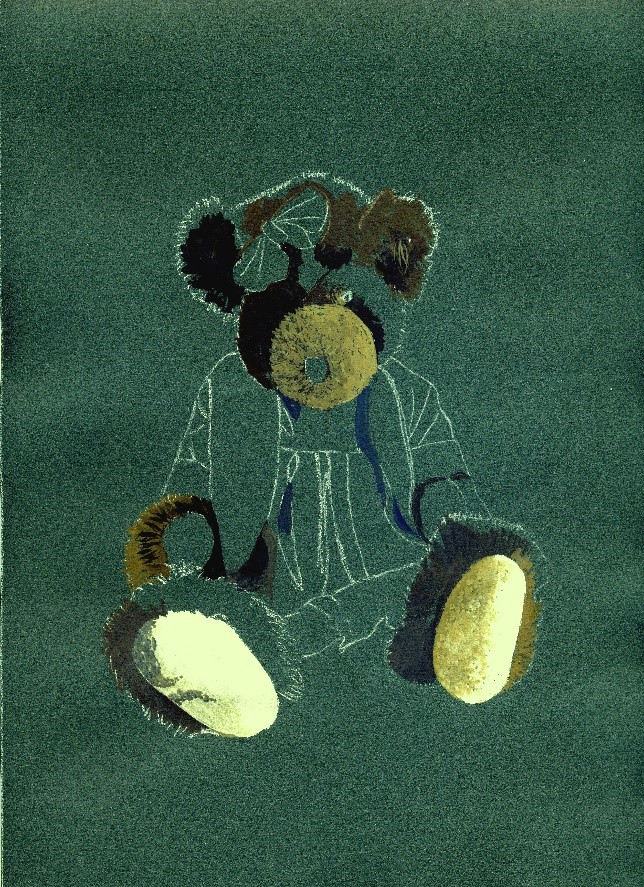
I block in the dark, shadow colours of the fur with shades of; raw umber, burnt umber with a little ultramarine blue for the darkest areas; and raw umber and ultramarine for the slightly lighter areas by the bow, around the right ear and pads of the paws.
Paint the pads with pale mixes of white with a touch of raw umber and yellow ochre.
Block in the snout using a darker mix of white, raw umber and yellow ochre using a dotting technique with the tip of the No.6 round darkening the mixture for the shadow area on the left.
Step 3
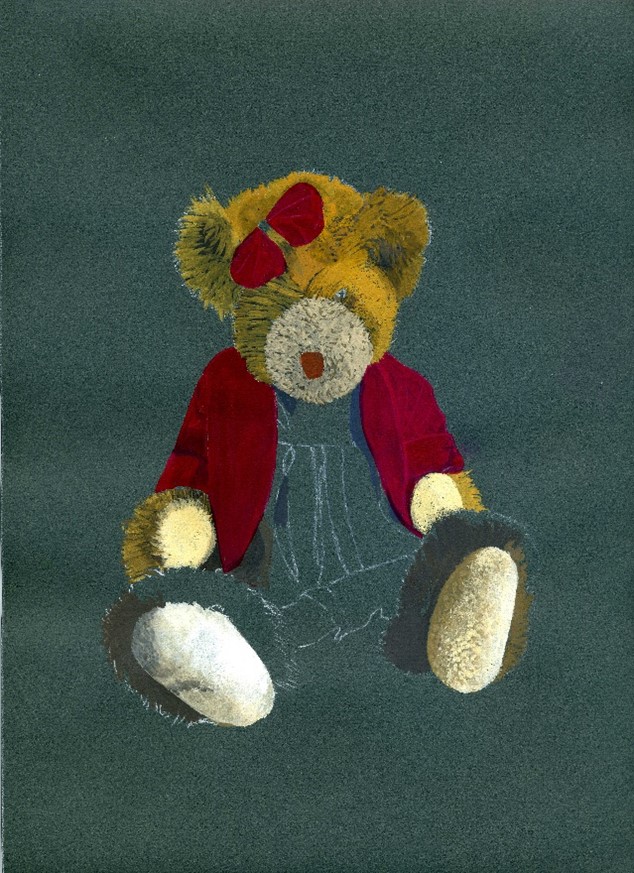
Using a mix of raw umber and ultramarine suggest the shadows on the dress under the edges of the coat.
The next step is to begin painting the mid-toned fur of the head and paws using linear strokes applied with the No. 2 round brush, paying particular attention to the direction of the fur leaving the darker, underlying fur showing through, do the same on the paws.
Next, block in the basic, mid-toned reds on the coat and bow using mixes of alizarin crimson and a touch of burnt umber and suggest the shadows in the folds of the material with a slightly darker mix.
Using the base colour that you made for the pads on the feet paint the pads of the paws.
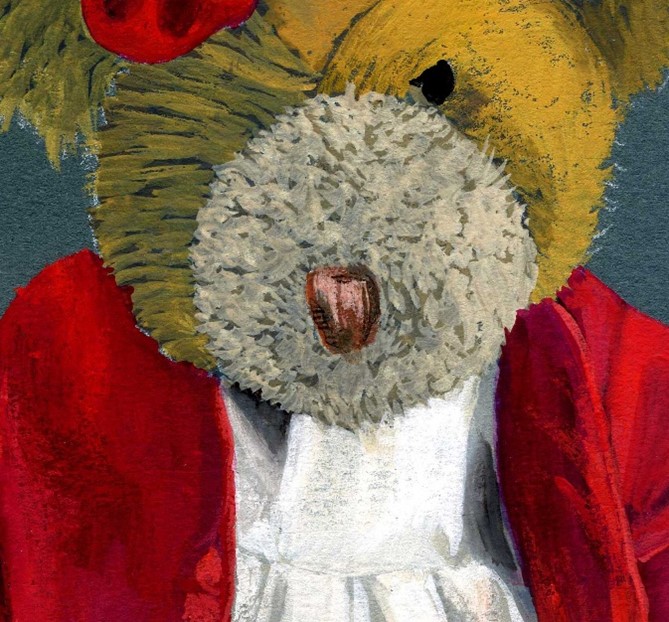
Mix a little raw umber and white and dot it over the snout, leaving some of the previously applied colour showing through.
Finally paint the base nose colour using Winsor red with a touch of burnt umber. Use strokes that suggest the direction of the embroidered stitches.
Step 4
Begin to build up the modelling of the coat and bow in varying shades of the basic red mixes. To achieve this, paint the darker shadows and the lighter folds and softly blend the two edges together to create the transition in the folds from dark to light.
Create the shading on the flatter areas of material by dry brushing – dragging the darker colour over the lighter colour. The ‘tooth’ (texture) of the paper and the chalkiness of the gouache allows subtle texturing to be achieved.
Paint the pale stitching in the centre gathering of the bow and add highlighting on the stitches of the nose using a much lighter version of the original colour by adding white.
Paint the dress and its folds with a mix of white, a little raw umber and yellow ochre. Model the folds in the same way as the red dress.
Step 5
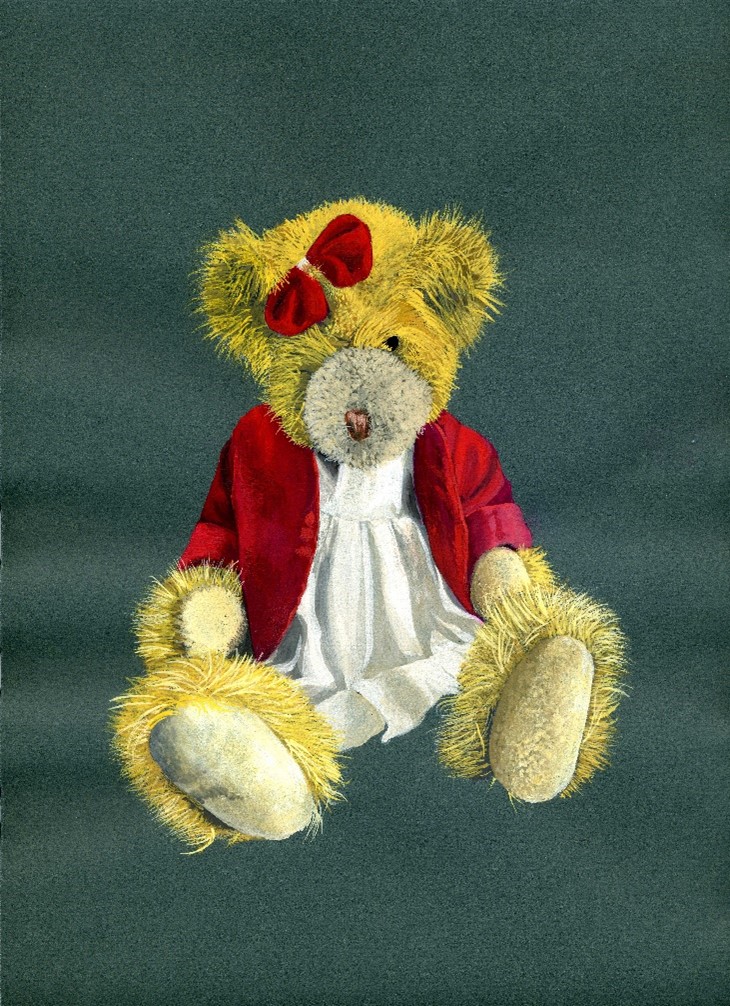
Make sure you are happy with the painting of the coat and bow then continue painting the fur using the same basic colour mixes which have been lightened with white. Here and there add a little cadmium free yellow to create a little more, golden colour.
Attention again should be paid to the Teddy bear’s fur. To paint the finer lines, I use the rigger brush, with practice the rigger brush can paint extremely fine lines. The paint needs to be thinned just enough to allow the paint to flow from the brush but not so thin as to lose the opacity of the colour. The fur that extends out over the dark background colour, cuffs, dress, and bow helps to give the illusion of a three-dimensional form.
Use Ivory black to paint the eye, be careful to leave pale hairs over the edge of the eye by painting the negative space.
The Final Step
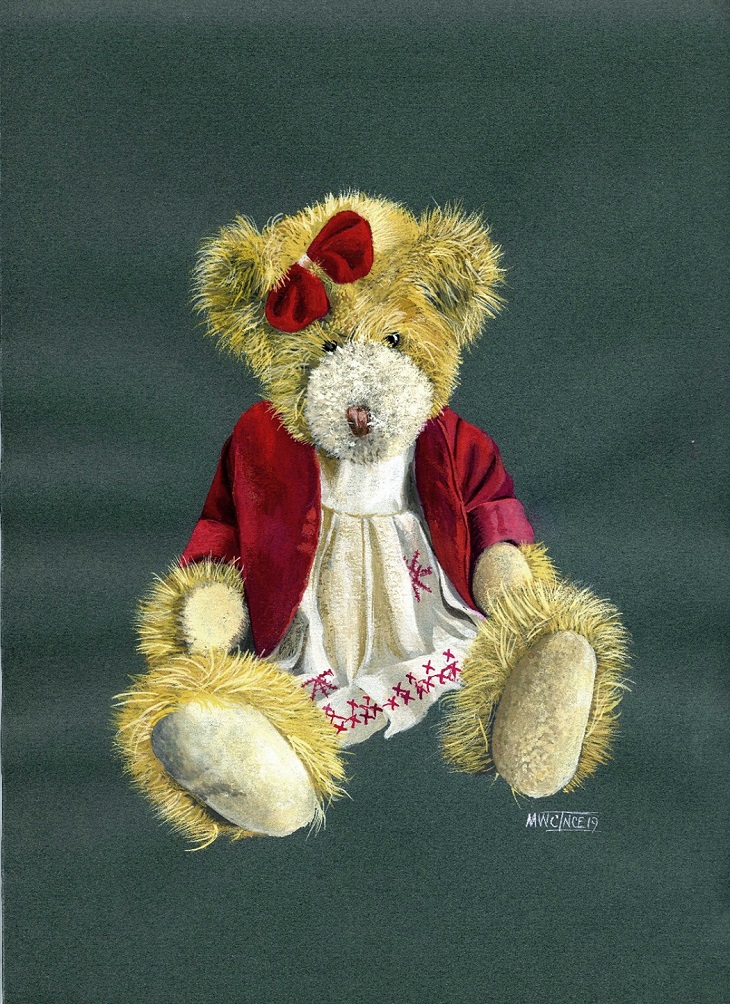
Adding the final touches is the fun part of the process and brings the entire painting together.Firstly I did dry-brush work on the dress, which is a natural, unbleached linen, for this I used a mix of raw umber, yellow ochre and white and a No.2 round brush. I then painted the embroidered crosses on the dress. I was careful to use a darker shade where the material was in slight shadow, and lighter where it was on the surface closest to the light source.
I made lighter dotting on the snout with a little overlapping the stitches of the nose. I decided to put in the suggestion of the other eye using black and added the catch-light in the right eye. I strengthened the shadows on the dress and coat using stronger, darker shades than before, finally adding the lighter fur on the head, feet, and paws.
Finally, I made a cup of coffee, studied the painting for a while, decided it was finished and put my signature on it.


I loved Murray Ince’s Harriet. I’ve been off painting for awhile but this made me want to go back to my painting. Thanks you all for the inspiration. S.P