Using Different Surfaces With Chromaflow
Cartridge paper is not the only surface option for coloured pencil artists. In this post I will show you how Derwent’s new pencil range, Chromaflow, performs on three on the most commonly used alternatives to drawing paper. Check out the examples below as I put to test Chromaflow on hot press watercolour paper, drafting film & pastel paper.
Alternative coloured pencil surfaces
Colour pencil can be applied to almost any type of paper but they will perform differently dependent on the texture and tooth of the paper. When using colour pencil you need to make sure that the surface you use is acid-free. This is important because any acid contained within the paper can damage the fibres and cause yellowing over time.
Hot press watercolour paper
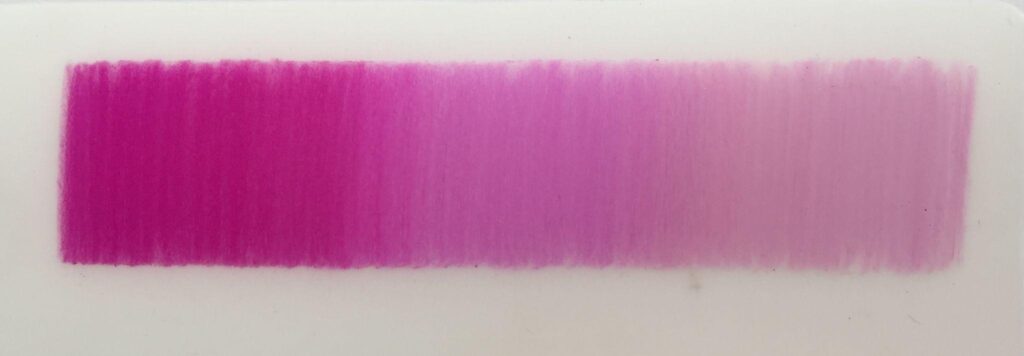
Watercolour hot press paper is a smooth or fine tooth surface. It has less tooth than other surfaces and so it makes it ideal for detailed drawing and smooth blending. I have used Saunders Waterford Hot Press watercolour paper which is 100% cotton (RAG). Cotton fibres are naturally acid-free and will not deteriorate over time as much as wood cellulose papers. If you look after your paper it can last for centuries.
Pastel papers
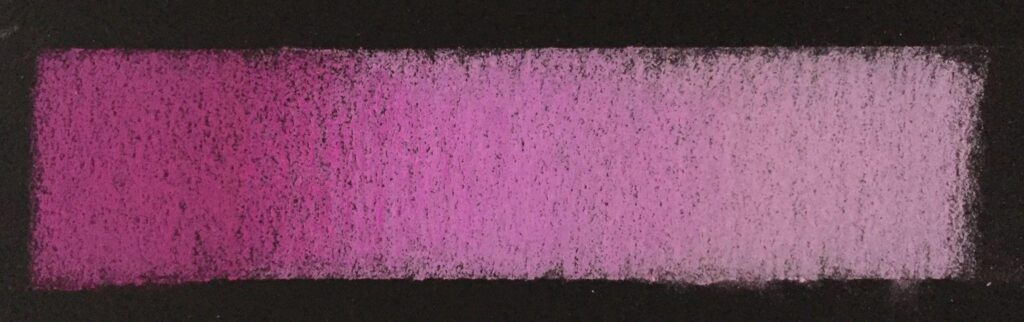
Pastel papers like Mi-Teintes touch and Pastelmat have a surface with more tooth or texture which allows lots of layers of pencil to built up. Most allow wet media to be added too without any cockling of the surface. For this review I used Canson’s Mi-Teintes Touch in black.
Drafting film
Drafting film is a translucent, non-yellowing archival quality surface. It harks back to the days when it was used by draftsmen and architects but nowadays it is becoming increasingly popular as a surface for drawing. Try to buy the double-matt version so that you can use both sides. Because the surface is smooth it allows for less layering than some of the other alternative surfaces. However drafting film is great for being able to create very fine details and the pigments remain very vibrant when laid down.
How do these surfaces compare?
So lets see how these different surfaces compare when I sampled five different techniques on the three different surfaces.
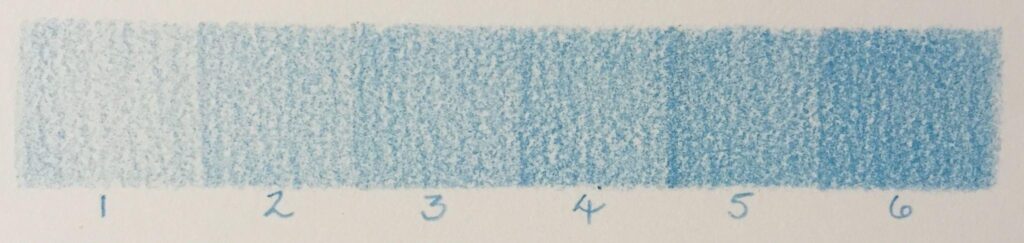
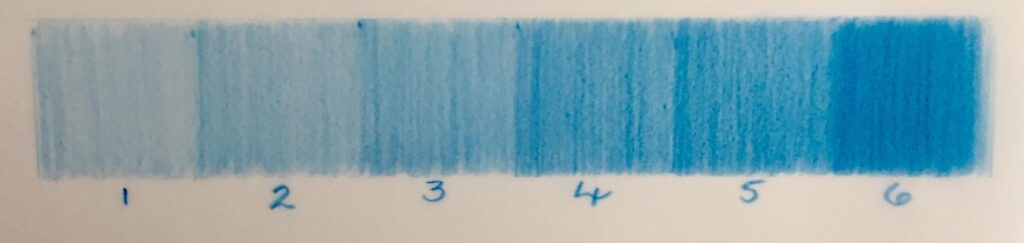
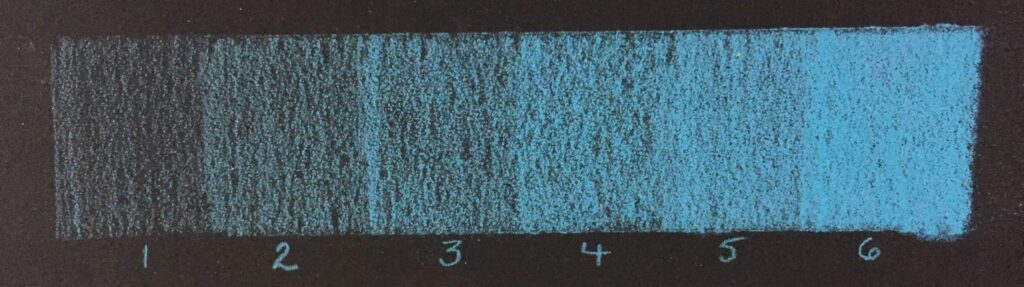
1-6 light layers of one colour
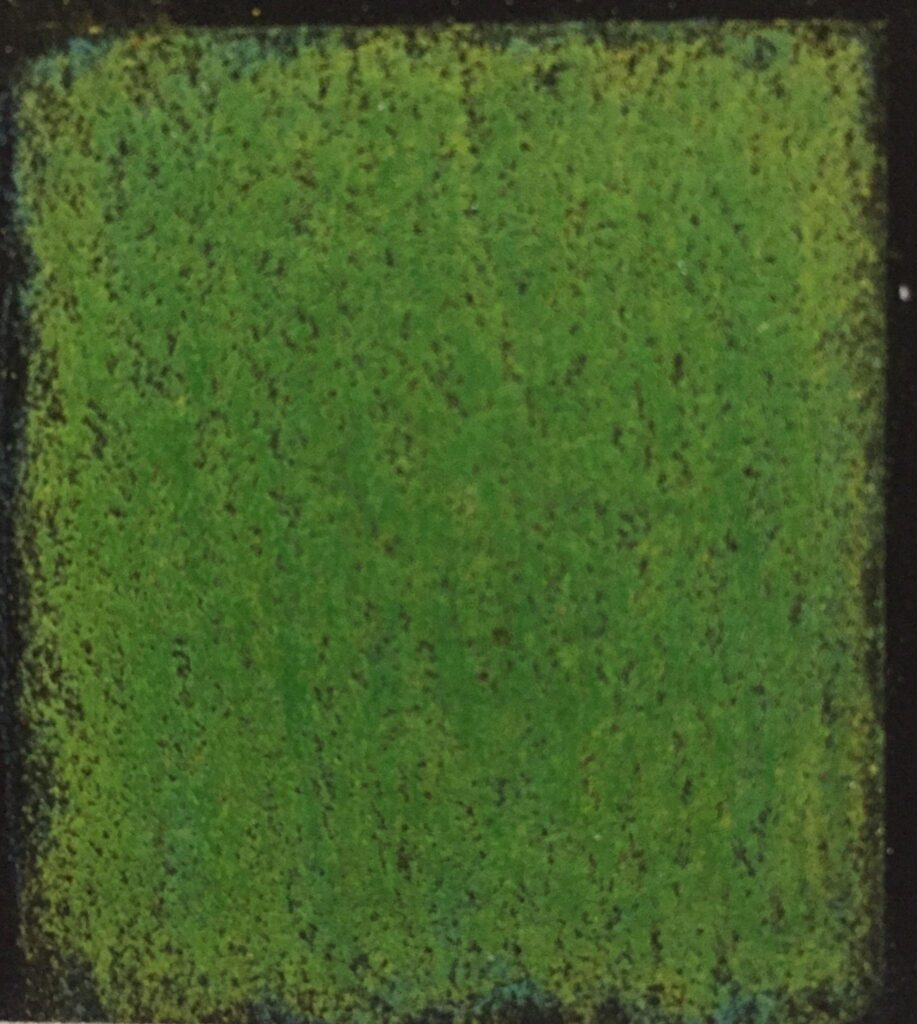
For this comparison I applied a light even pressure across the paper and then added further layers until a small section at the right hand end of the strip had six layers. You need to be looking for a surface that can take multiple layers of colour pencil because it’s this layering and blending that enables you to achieve realistic features.
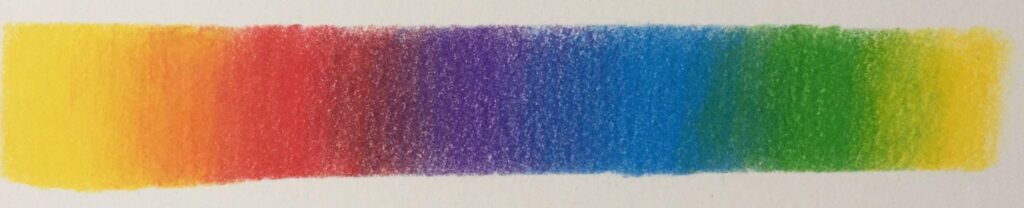
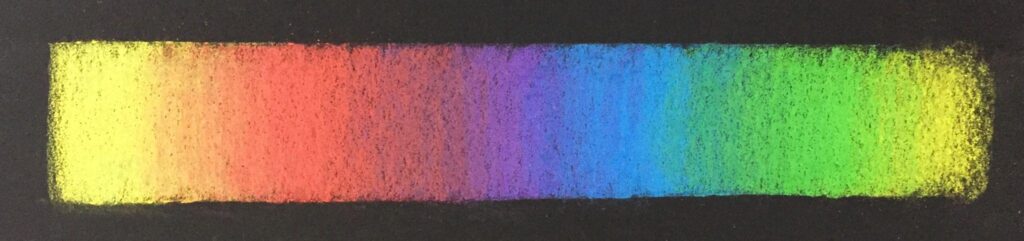
Multiple colours layered and blended
Here I have selected a rainbow range of Chromaflow pencils and layered and blended them together. Overlapping each colour slightly and adding multiple layers gives a smooth transition from one colour to another.

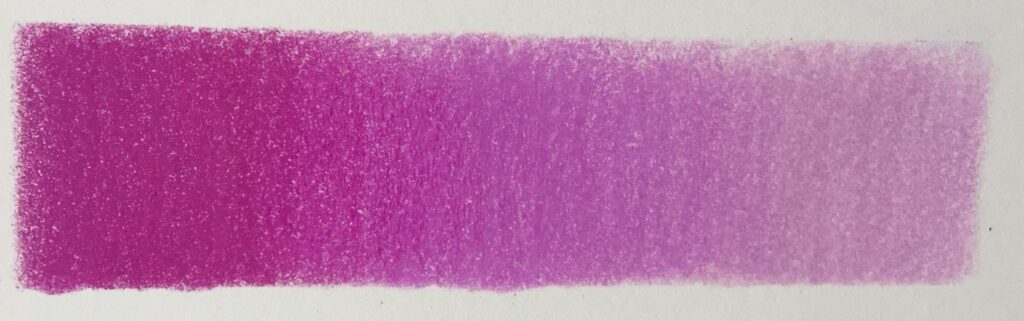
Three similar colours layered and blended
Again you are looking for a seamless transition between the shades of colour selected.
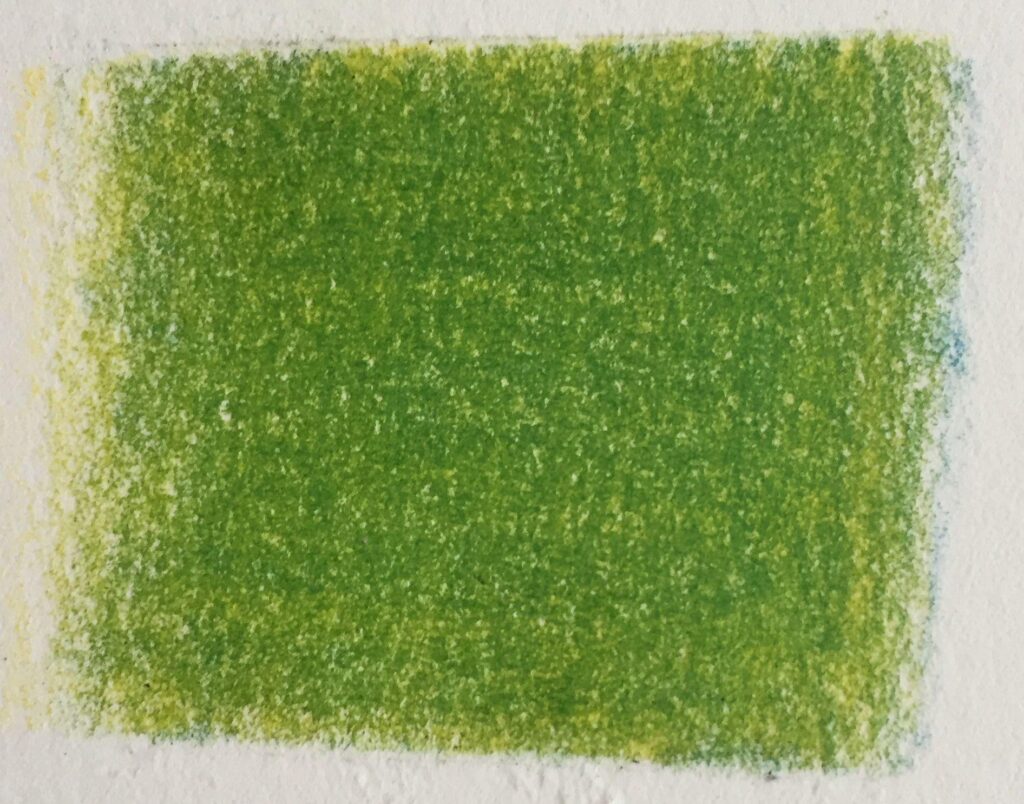
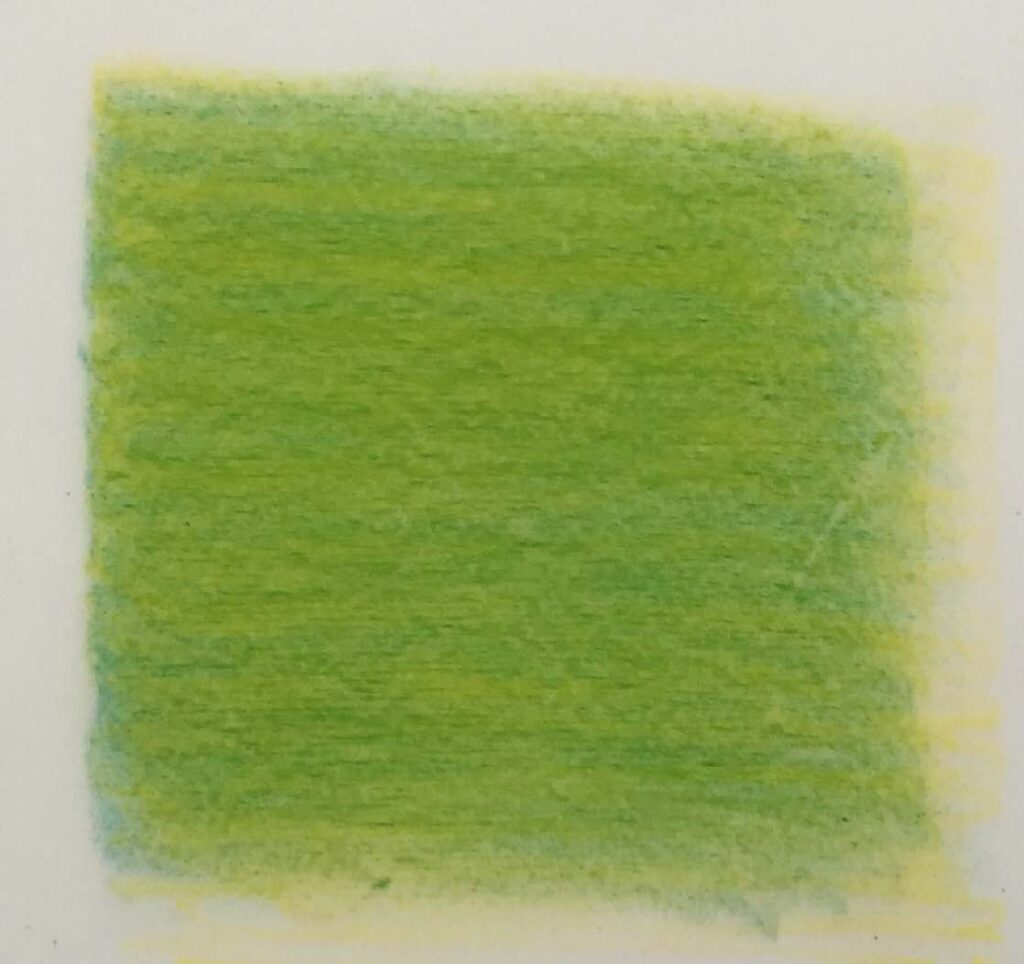
Colour mixing: yellow & blue layered and blended
Here I compared how well the surfaces performed when I created a third colour from two others. In this case yellow and blue.
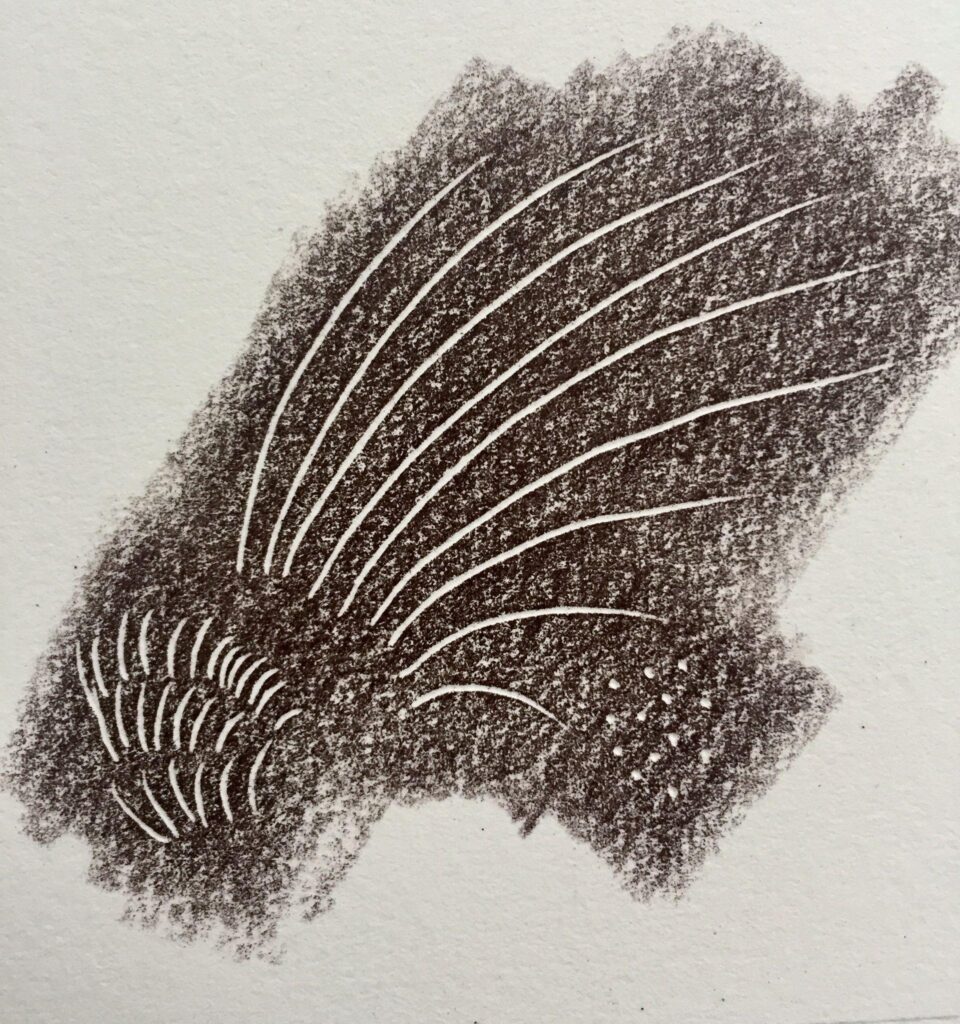
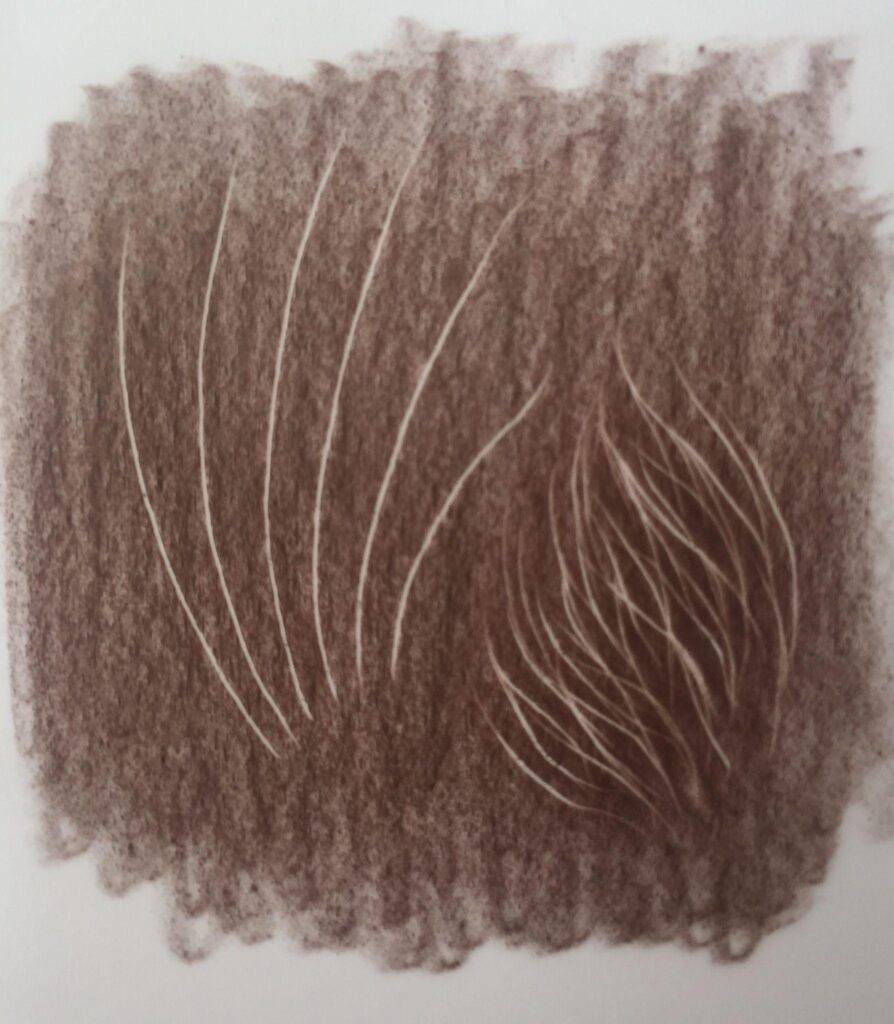
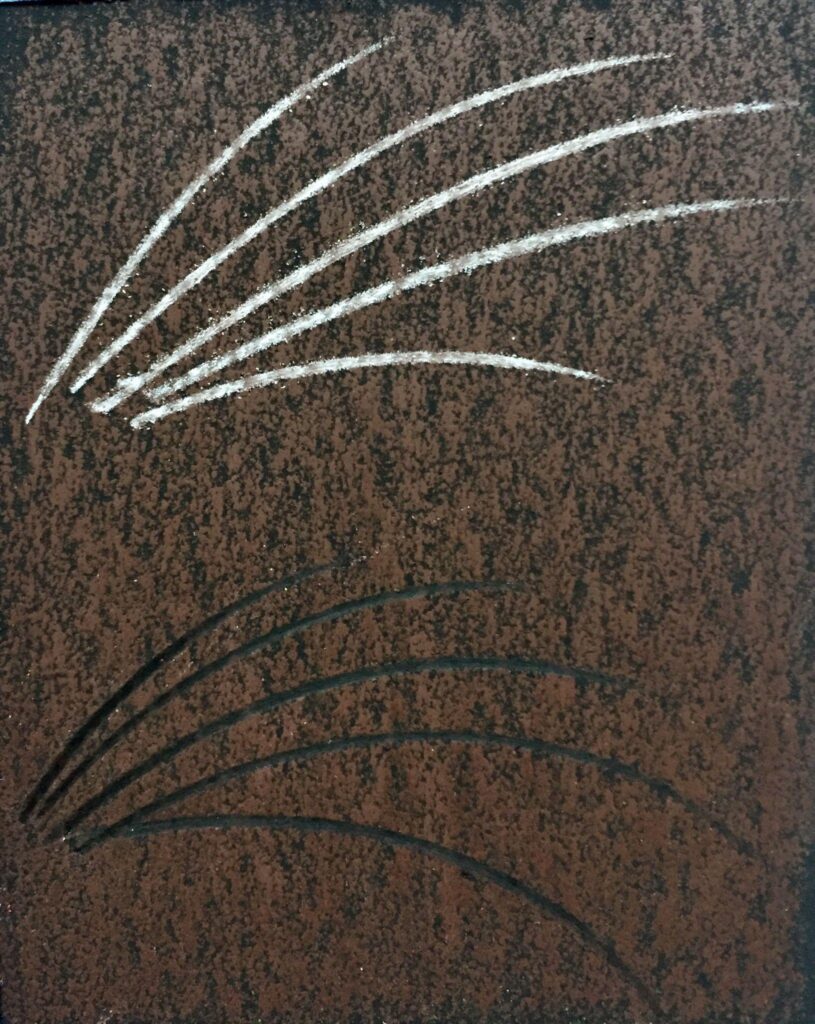
Creating white details on a dark pigment
Here I looked at how well fine white details can be achieved on each of the surfaces. This is an essential technique when you are drawing features such as whiskers, feathers, fur etc.
With the hot press paper the easiest way to create features such as fine whiskers or hair details is to etch the lines onto the paper with an embossing tool before adding the colour on top. The colour will skim over the embossed lines, leaving them free of colour.
The simplest way to create fine details on drafting film is to use a tool such as a slice blade to scratch away areas of pigment after the initial layers of colour have been laid down. Then follow up by darkening the tiny spaces between the hairs to add extra depth.
The advantage of the Mi Teintes surface over the others is that lighter colours will work on top of darker pencil layers and vice versa. This makes Mi Teintes a wonderfully flexible surface for pencil artists.
In summary
So, the Chromaflow pencils have been well and truly tested, using five of the most important basic colouring techniques on three very different surfaces. I’ve compared how each surface performs when layering one colour, when layering and blending multiple colours, when layering and blending shades of one colour, when mixing two different colours together and when creating white over dark.
The Chromaflow pigment is soft, creamy and vibrant and I was able to achieve excellent results on all three surfaces. If you’re new to coloured pencils, the range of different paper types can seem quite bewildering at first. There is no ‘right or wrong’ surface and it’s a good idea to try out a few variations so that you can practice the different techniques and discover which surface suits your personal style the best.
Whether you choose hot press watercolour paper, pastel paper or drafting film, you will be able to achieve beautiful results with Chromaflow pencils. Have fun experimenting!
If you have found this post helpful why not read our article about Chromaflow pencils? I have also written three tutorials for beginners using Chromaflow. These are written to help you create realistic textures. There is one about drawing a cat’s eye, another about fur and a final one about feathers.