
Create Your Own Cyanotype Print
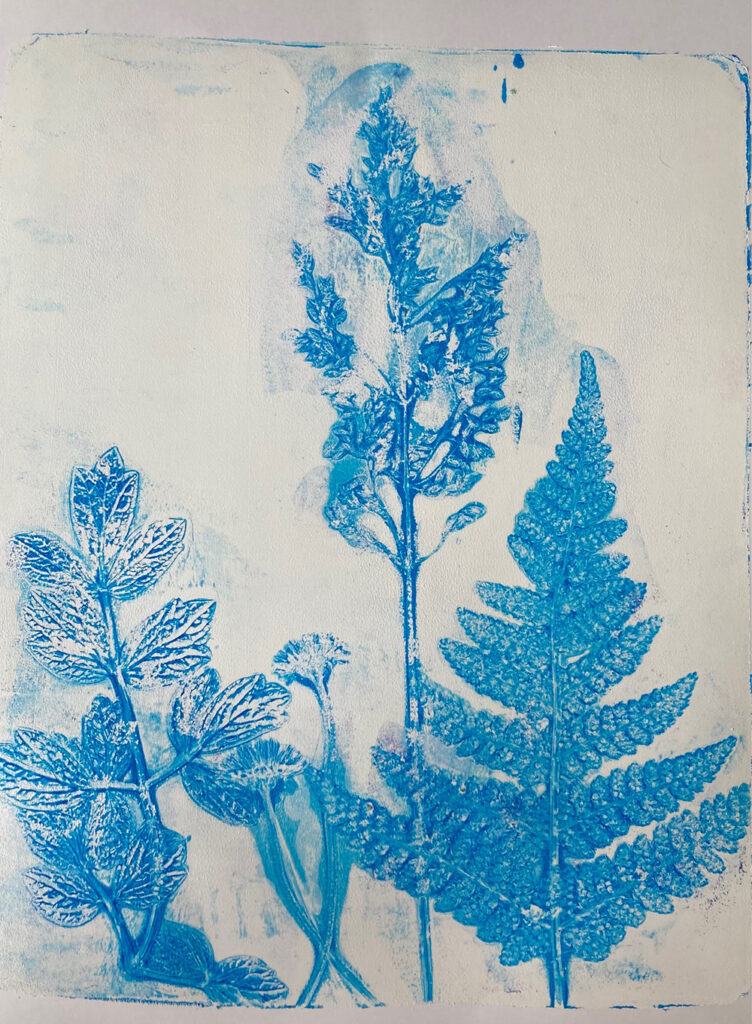
Sir John Herschel first developed the cyanotype print over 170 years ago. His process uses UV light-sensitive photographic paper which turns blue when exposed to the sun. The distinctive dark blue background is very popular in home décor at the moment. With a wealth of foliage & flowers in our gardens currently it’s easy to produce your own faux cyanotype print simply with a gel press plate.
Gather your materials
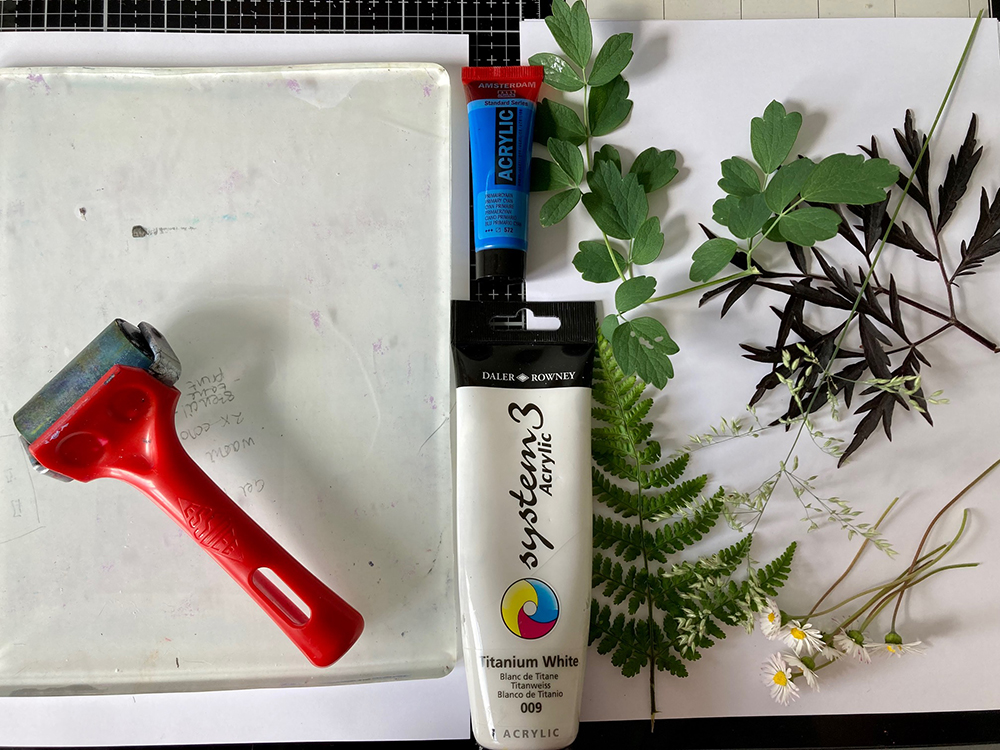
You will need:
- Gel Press Plate
- Soft body acrylic paints including a cyan
- Soft rubber brayer
- Paper – for printing & scrap
- Botanicals – grasses, flowers, leaves etc (nothing sharp as this can damage your gel plate)
Apply a base layer
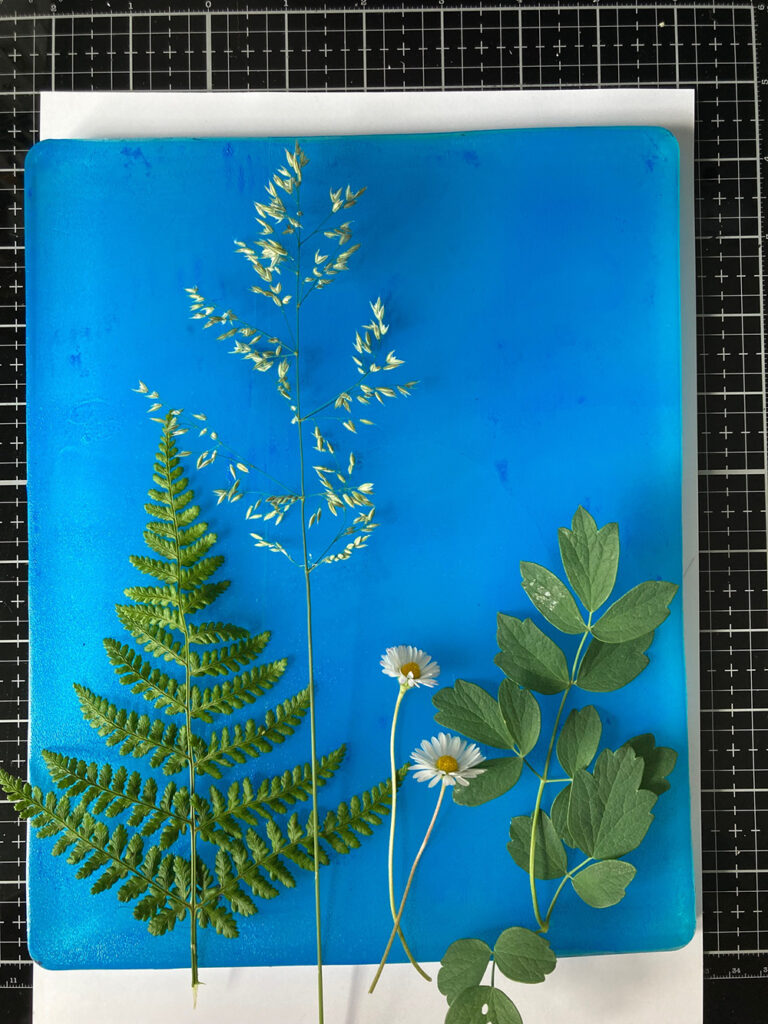
Apply a cyan coloured acrylic paint onto your gel plate with a brayer. You need to work quickly so the paint doesn’t dry out and you are aiming for a thin layer.
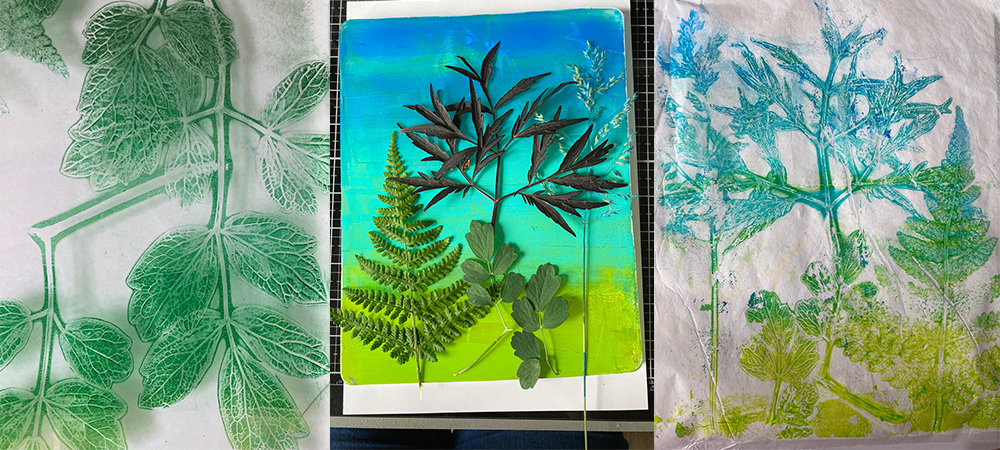
Place your botanicals onto the gel plate. You need to be quick doing this so a top tip is to try out compositions before putting any paint onto the gel plate so that you have a rough idea.
Pull your first print
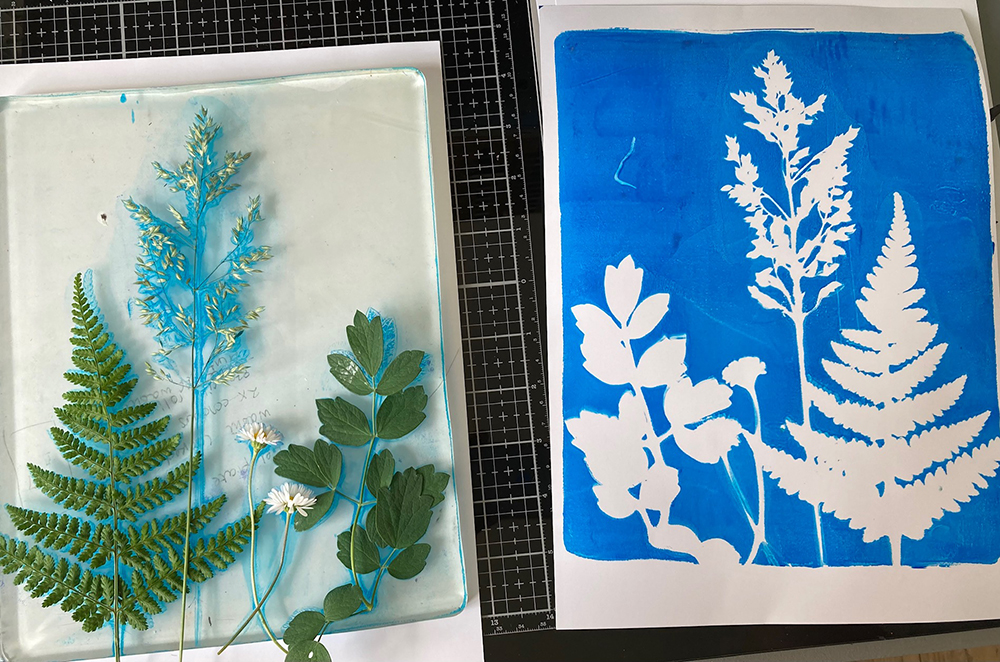
Pull you first print by placing a piece of paper over the botanicals and plate and press down with your hands. Apply pressure all over the plate, paying particular attention to the botanicals. Try and get in between the stems and around the petals. Carefully remove the paper. This is your basic print which removes most of the paint. It closely resembles the photographic type cyanotype print. Remove the botanicals and most importantly leave the remaining paint on the plate to dry before proceeding.
Prepare the next layer
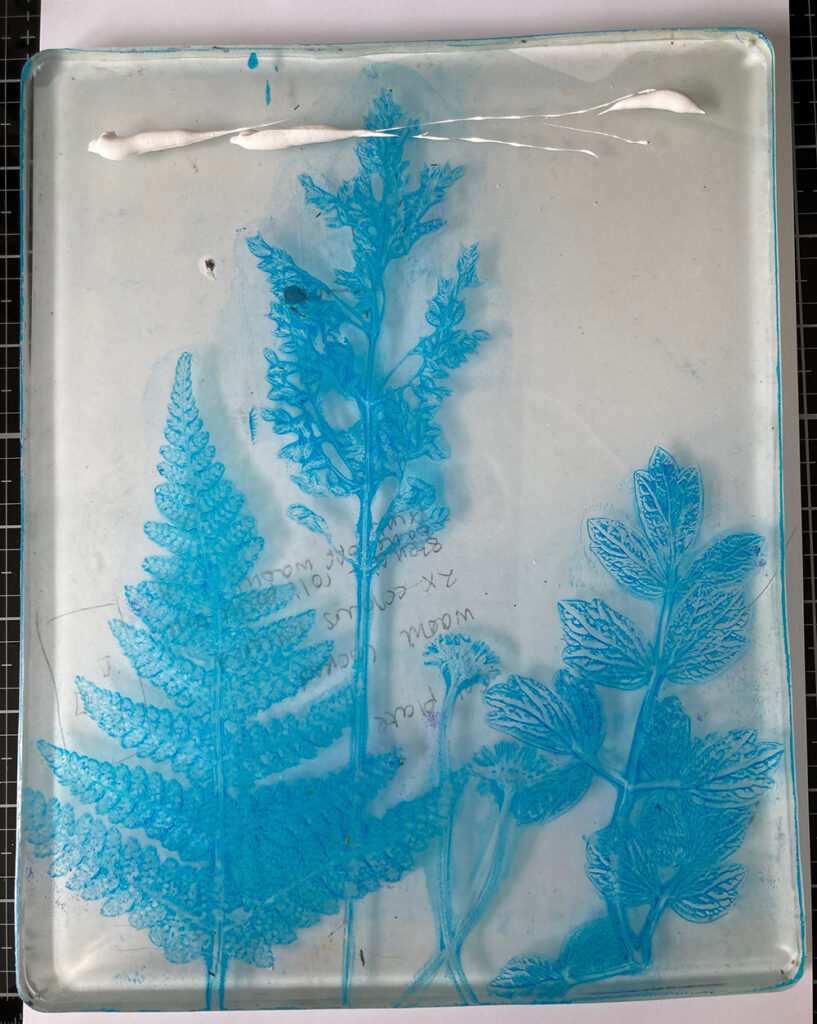
Now apply a very, very thin light coloured acrylic paint onto the plate with a brayer. If you add too much simply roll the excess off onto some scrap paper.
Pull the ghost print
Place a sheet of paper over the gel plate and rub with your hands all over the surface. Gently peel off the paper. This is called a ghost print or the second print, generally this print is lighter in colour and has a faded appearance. You will see that all the detail veining of the leaves, grasses and petals comes out on this second print.
Some more ideas
If you’ve enjoyed making your first cyanotype print why not have a go at these ideas:
- Mixing two or three dark colours onto the gel plate as your first layer. You could try contrasting colours and blend them where they meet, or colours that sat near each other on the colour wheel
- Mixing two different light colours onto the gel plate as your second layer
- Use your first prints again at either the first or second stage. Aim for lots of layers!


This is nice, but this is not a cyanotype print … it’s only using the color in an acrylic to make a faux-cyanotype. This may be confusing to those looking for instructions on making a true cyanotype sun print.
That’s a very good tutorial, I must try this. It looks easy and fun.
Found it very interesting.
This is gorgeous. I am relatively new to gel printing and was addicted from the start. Always up for new techniques! Thanks for sharing a great tutorial.
Using deli paper on the first pull gives a much better result .