
A Moorland Landscape Ink & Pastel Tutorial
In this second article artist Gerry Halpin talks about how his local surroundings inspired a change in media for his recent series of Moorland paintings. Follow his tutorial to create a landscape using acrylic inks and soft pastels. We hope you are inspired to have a go yourself and post your results in the comments below!

A change in media
In my previous post Painting Coastal Landscapes I talked about how I find inspiration for my paintings from visits to the coast. I luckily live close to the West Pennine Moors which importantly provide an immediate area of wonderful subject matter to work from.
The moors, in all seasons, are an endless source of subjects. It’s the wild ruggedness along with challenging weather conditions that take me up with sketch book and camera. Up there I find starting points which catch my attention and inspire my imagination.
Bare trees, rough hedges, old gate posts, dry stone walls and telegraph poles are fascinating objects. They symbolise the area and the weather, often quite dramatic, adds atmosphere and mood to the painting.
Whilst I usually paint in acrylics, I have recently returned to ink and watercolour for these paintings. These mediums allow me to interpret the excitement I encounter of a moorland landscape. They provide the freedom I need, by their fluidity, to express the ‘sensation’ of being ‘in the landscape’ in contrast to simply recording the seen image. The paintings capture something of my feelings for the subject and as such are works quite unique to their creator.
Materials you’ll need for the tutorial
- Watercolour paper – Arches Aquarelle 300lb 12″x16″ cold pressed block (saves having to tape the paper down on a board). Or Saunders Waterford 300lb NOT for working on a larger scale.
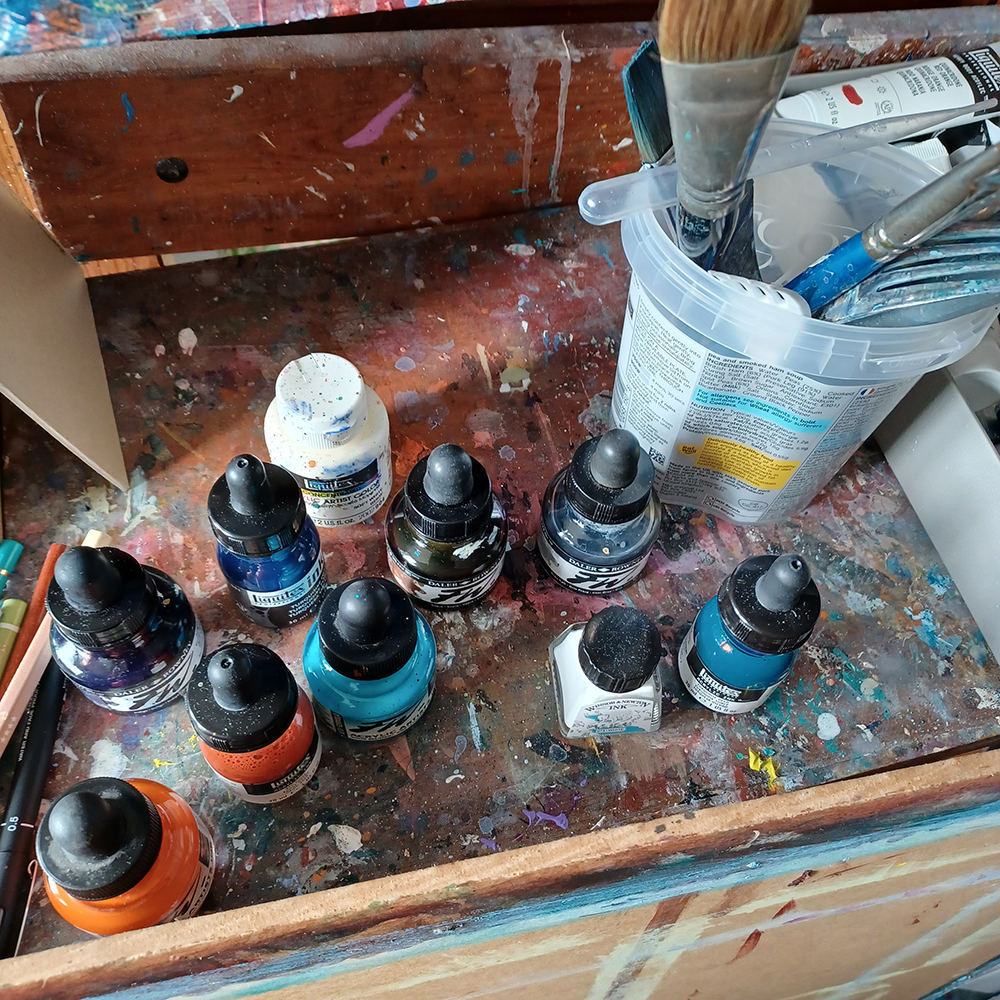
- Inks – a variety of Daler Rowney FW and Liquitex Professional Acrylic Inks. I used Sepia, Indigo, Grey, Cobalt, Yellow Orange Azo & Turquoise.
- Soft pastel – one in a contrasting colour to the inks, I have used a pale orange.
- Brushes – Winsor & Newton Cotman and ProArte Prolene brushes of various sizes, both flat and round. Synthetic brushes are best used as sable brushes are far too expensive for dipping into and scrumbling about with inks. I like scratching into the wet ink with a palette knife, fork or scraps of card to create interesting textural marks.
- Two pots of water. One always remaining clean for first washes and the other to keep brushes clean.
- A mixing tray – a deep well plastic palette or a non-stick 12 part bun tray.
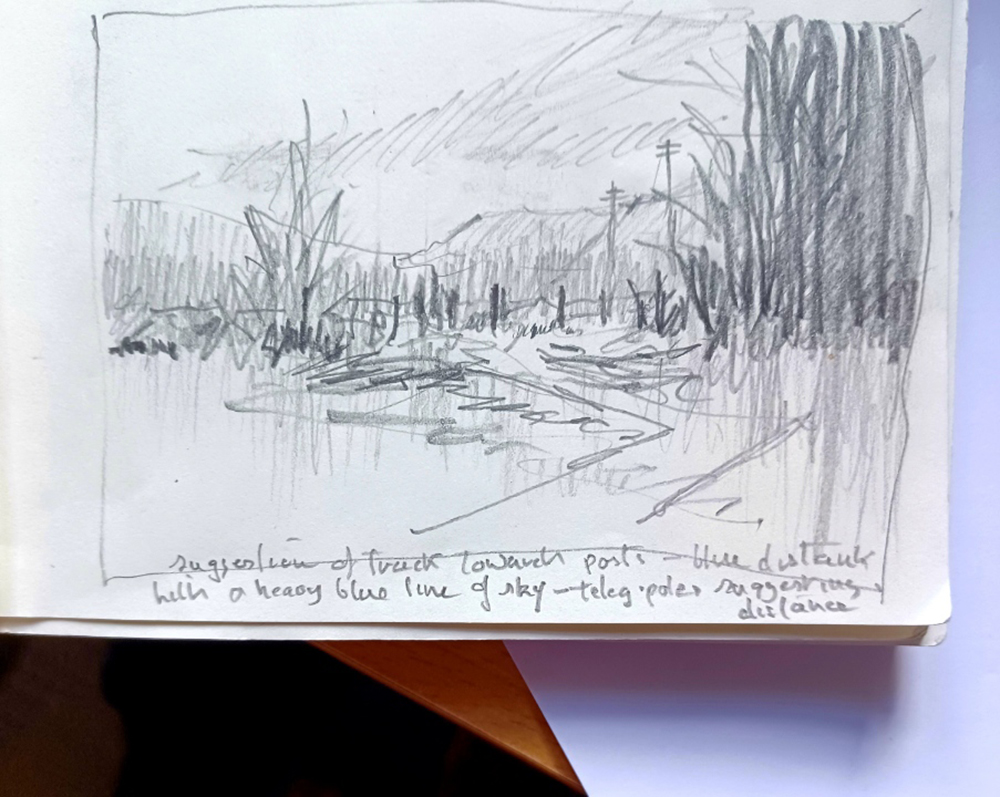
The Sketch
Step 1: Painting the sky
Paint the sky first to establish the mood of the painting. Here I’ve mixed a grey with a hint of cobalt blue. After wetting the area ready for the colour, I sweep the loaded brush across the wet surface. I do not apply water or colour over the whole of the upper surface, I love leaving raw paper in the finished painting.
As this dries (the ‘sheen’ goes off) I then flood in pure cobalt blue, using the ink bottle dropper. This partly spreads over the previous wash of grey, leaving soft areas and more intense areas of colour. This process is not only exciting but also scary! The amount of ink used and the wetness of the paper will result in a random distribution of the pigment. The freedom of the flow of wash over wash, helps to achieve the uniqueness of the painting. Undeniably, it’s a technique which requires much practice in order to maintain some control and still achieve exciting results. So, don’t despair on your early experiments, it takes courage, and the process is so rewarding.

Step 2: Painting the middle distance
A wash of yellow orange azo to suggest bracken beyond the hedge in the middle distance is painted across the already lightly wet paper. I use a square end brush, twisting as it’s dragged across the paper. I leave gaps of white paper to create the illusion of some space. Using the brush sideways, I bring a few thin lines of the orange down towards the lower part of the paper to hint at a sense of perspective, leading the eye into the painting.
Time for a coffee whilst this area dries.
Step 3: Painting in the hedge
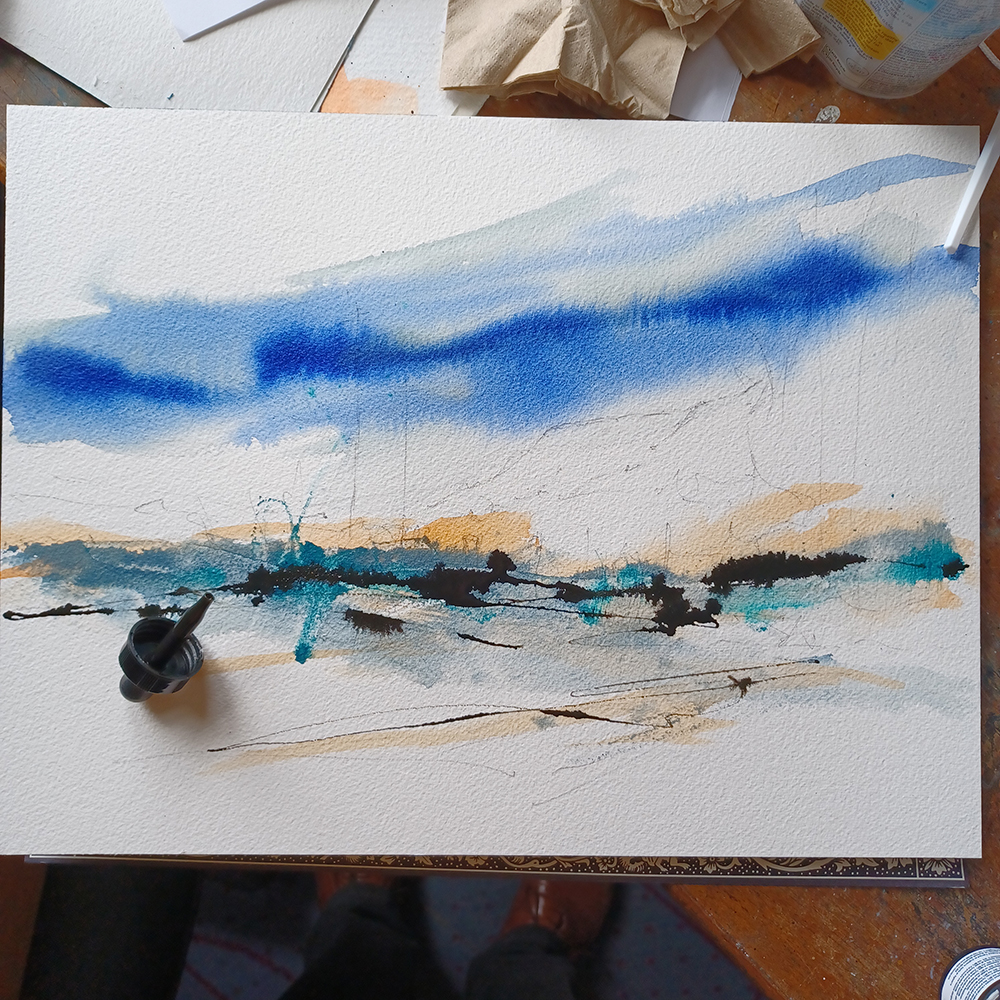
Next, I add a wash across the paper of the previous grey to establish the hedge area. I tease the pigment down with clean water, lightening its strength as an underpainting for the more dramatic dark hedge to follow. Whilst it’s still wet, some turquoise (one of my favourite colours) is randomly added to the lower edges, in this case with my finger dipped in the ink! This brings in a further colour opportunity and indicates the ‘after rain wetness’ of the moor.
Step 4: Now for the drama of the dark hedge itself

Dipped in sepia ink, a loaded square end brush is dragged across the dry paper. Lingering for extra time in three places where the two trees and a noticeable gate post will be positioned. As the ink soaks in, clean water is added to thin the pigment into a wash. This trails down and over the previous zig zag of colours to bring the perspective forward.
Whilst the sepia is still wet, a dark indigo ink is added with a dropper to those three feature areas. This immediately fuses with the sepia, emphasising them more strongly. Quickly, I drag the pigment vertically up and down with a kitchen fork, making marks suggestive of rough reeds and grasses which grow out from the tangle of the hedge.
This technique is an interesting way of showing foreground reflections, noticed in the wetness of the land. This helps in establishing the singular mood and atmosphere being aimed for in this style of painting. The moorland can be a wild and rugged place at times, which is how I experience it and which is why I have adopted and adapted these techniques to express not only what I have seen but also what I have felt.
Step 5: The finishing touches
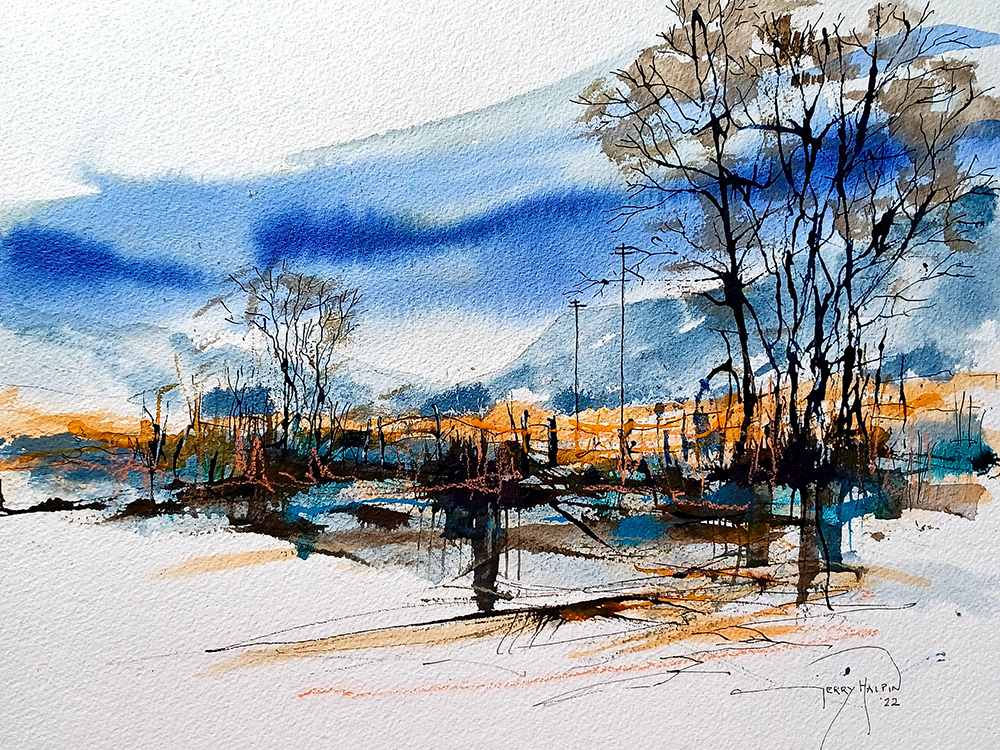
Firm up the distant hills using the same grey wash as the sky, thinned down with a little clean water. Distant bushes are suggested with some stronger drops of the same colour brushed on to the lower edge of the hills. The result is that these intense drops of colour fuse into the thin wet area of the hills producing an effect known as ‘treeing’. It is a very appropriate technique in this case, though it can be the cause of problems in some watercolour washes.
Finally, bare trees are positioned using sepia ink applied with a dropper on dry paper for the main trunks, then adding the finer branches with a dipping pen. A thin wash of sepia indicates some foliage and fence posts are added with dropper and pen.
Pale orange pastel scribbled around the hedge breaks up the dark areas without detracting from the overall impression I wish to convey of this typical view of the moors and fells of the North. Working in this manner is not without its frustrations, it doesn’t always go well. But, with continued practice, understanding and learning, it can be a most rewarding approach to painting.
Finally, have fun experimenting
As a self-taught artist, I would encourage anyone to consider trying new media, or even have an experimental approach with the media you prefer to work with. Push the boundaries of your knowledge and don’t be too precious about your results. Some paintings will inevitably fail, I’ve had my share, however, learn from those mistakes. Ask yourself what it is that doesn’t work and how it went wrong. Be self-critical and by that you will gain confidence. Become comfortable with the techniques you employ and continue to enjoy the excitement of creating an original painting. I love painting at every opportunity I have.
Gerry Halpin is a Member, a past Trustee and a Past President of Manchester Academy of Fine Arts (MAFA) and with whom he has exhibited widely since his election to Membership in 2001. Gerry was appointed MBE in 2009 for his work in Art and Charities. In 2022 he was invited to become a member of the National Acrylic Painters Association (NAPA). His paintings have been exhibited with the ROI, RSMA and RI in the Mall Galleries, London. In the 2014 ROI exhibition, he was awarded the Menina Joy Schwabe prize for an outstanding work.


How do we post our own attempts?
Hi Eric! You can share your attempts either by posting your paintings on social media and tagging us (you can use the hashtag #kenbromleyartsupplies!) or you can send us a photograph to [email protected] and we’ll take a look.