
9 Easy Pen and Ink Techniques for Beginners
Pen and Ink are the perfect partners for quick and easy mark making – especially as they are affordable and easy to transport. But working in a permanent medium can be daunting for beginners. Discover our top 9 easy pen and ink drawing techniques to get you started!
Pen and ink is an ancient drawing medium that has been popular with artists for centuries. Nowadays, we have access to all kinds of wonderful pens that artists of days gone by could only dream of! From fineliners and dip pens, to markers and brush pens – there are so many of these drawing tools to choose from. Each offer their own unique properties for pen and ink drawing.
Pen and ink can seem like a big step from pencil drawing – especially for beginners! You can’t erase pen, unlike pencil, so your mark making must be carefully calculated. There’s nothing worse than creating the perfect drawing only for it to be ruined by one misplaced line! With pencil you are able to adjust your shading by varying the amount of pressure while drawing. This isn’t the case with pens! You’ll need to rely on carefully placed lines and marks to give the impression of shading. Tightly compacted linework will give the impression of deep shadows, while spaced out linework will create an area filled with light. Juxtaposing both these tight and loose marks will create a drawing with great contrast and texture.
The 9 easy pen and ink techniques for beginners below offer a great starting point, if you are looking to grow in confidence with your pen and ink technique.
What You’ll Need to Get Started
If you’re just starting out with ink drawing there are only a few bits of equipment you will need. Compared to painting, this discipline has a fairly low cost entry level, so is great for artists who are just beginning their creative journey or who are looking to level up their drawing skills. To begin you will need the following:
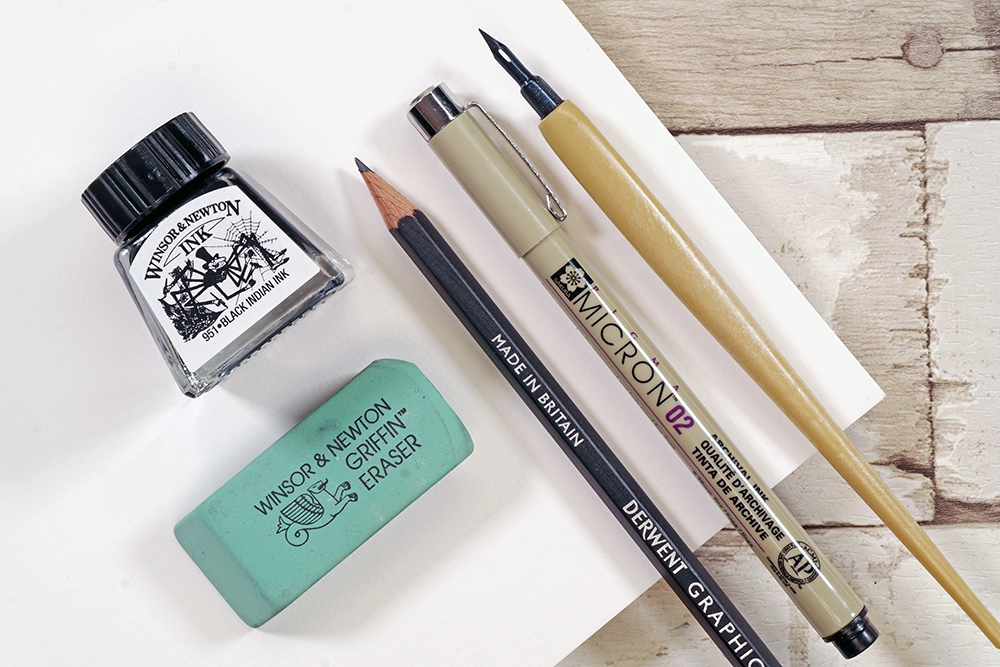
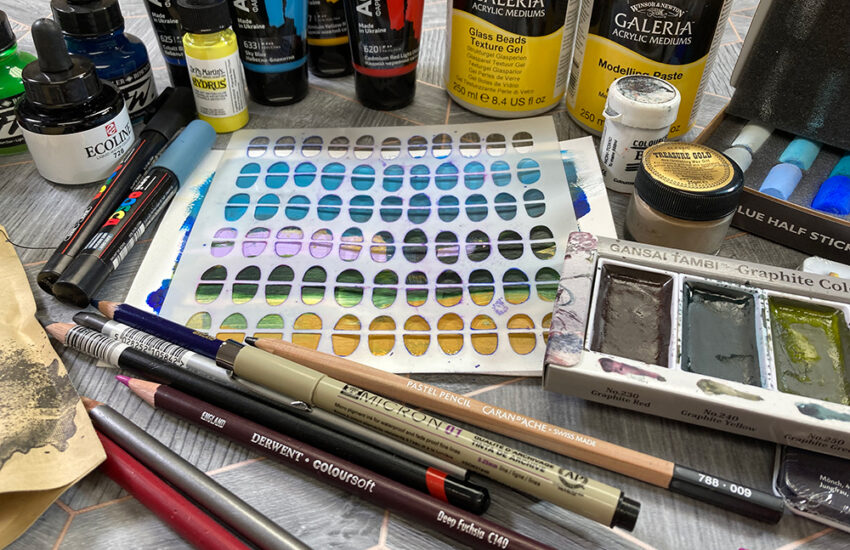
- A selection of drawing pens.
- A dip pen, nibs and appropriate ink if you prefer working with a dip pen.
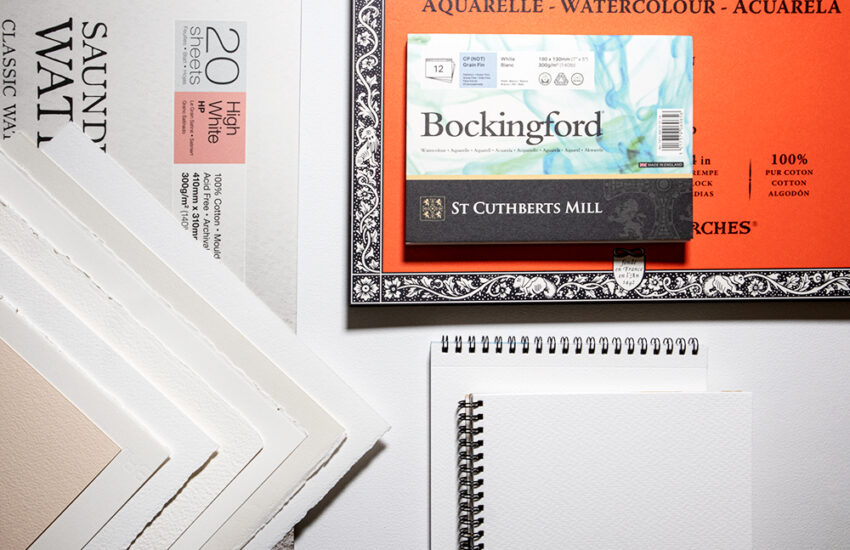
- Some Drawing paper.
- Graphite Pencil & eraser if you would prefer to sketch before you ink.
Once you have these materials you will be ready to go! Typically the materials you will need for pen and ink are easily transportable, so if you’re taking classes or working on the go creating art couldn’t be easier!
What are the Differences Between the Types of Pen Available?
There are so many different types of artists’ pens available, it can be difficult to settle on the right one for you. Especially if you’re a beginner! We’ll take a look at a few of the variations of pens we stock and explain the varying qualities they bring to pen and ink drawing.
Fineliners & Technical Pens
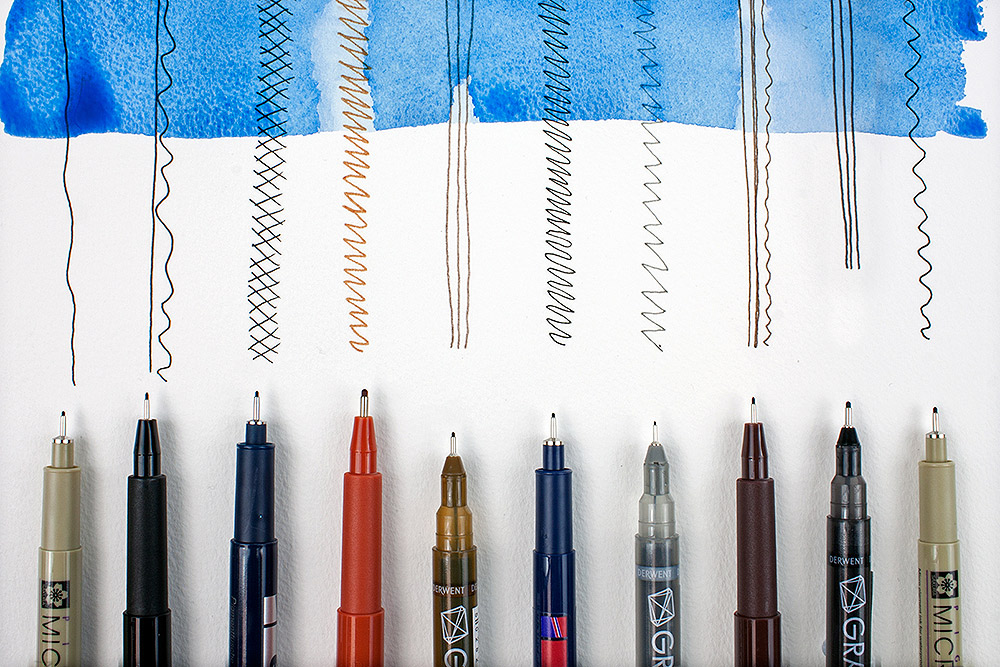
Fineliner pens have a plastic or fibre based nib held in a metal casing. They have very fine nibs, typically ranging from the smallest 0.03mm size up to 0.8mm, depending on the brand. The nibs all have a fixed width, so the line you get will be very uniform, consistent and skip-free. Most of our pens are pigment based and waterproof – so your drawings will be lightfast and can be worked over with watercolour or ink later. All of our fineliners are available in black, with select ranges available in other colours. Fineliners are the easiest pens to draw with if you’re a beginner.

Discover more about our range of fineliners and technical pens in our blog post Get to know Artists Pens – Fineliners & Technical Pens.
Brush Pens
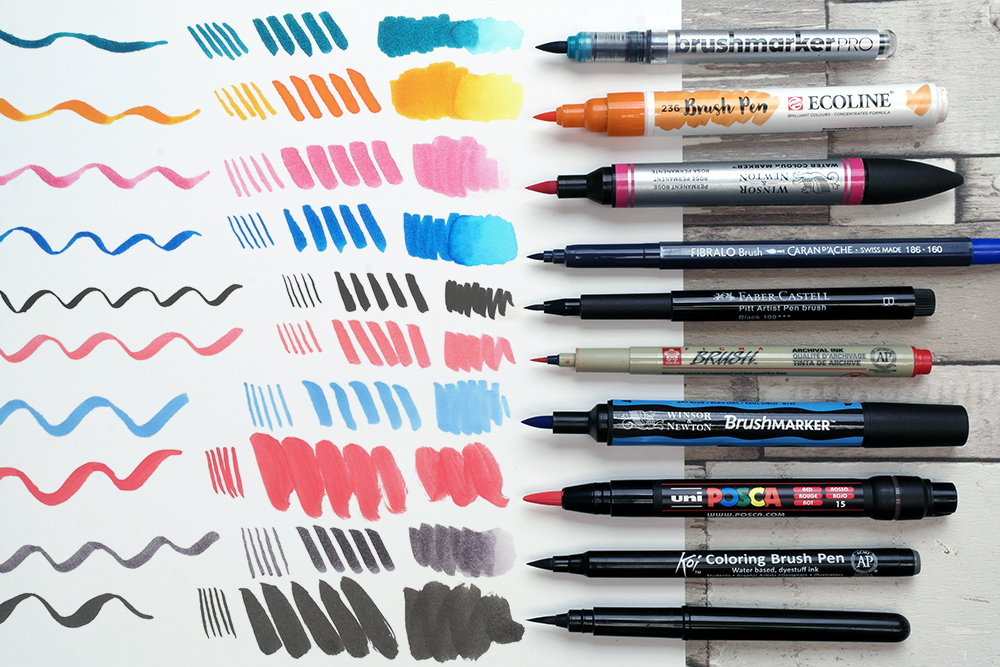
Brush pens offer more variation in line width than a fineliner pen. Their nibs have a wide base that then tapers to a fine point. Typically the nib is made of a conical piece of felt, but there are pens that have a true brush tip made of individual fibres like a paint brush. You can vary the weight of your line by adjusting the amount of pressure you draw with. Light pressure will result in a fine line, whilst pressing down harder will create a thicker line. They are fantastic if you want more diversity in line weight and style in your drawing. Or are looking for a more versatile pen to experiment with. Some brush pens are water-soluble, so you’ll need to double check this if you want ink that is permanent.
Discover more about our range of brush pens in our blog post Get to know Artists Pens – Brush Pens.
Dip Pens
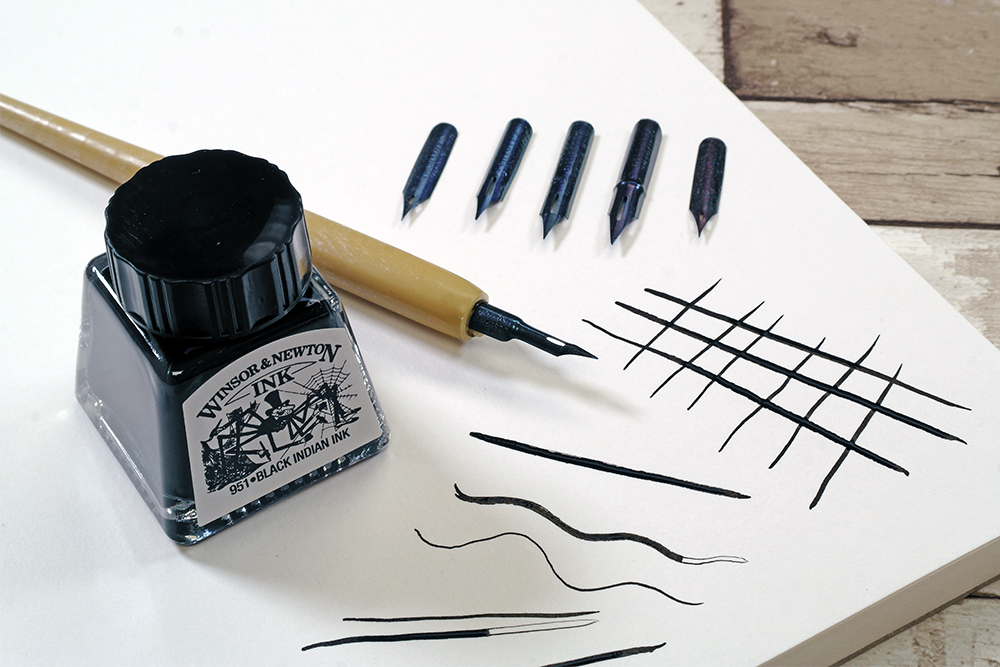
Dip Pens are not cartridge fed like fineliners and brush pens. Instead, you dip them into a bottle of ink and re-dip once the ink runs out. This technique is more akin to the types of pen and ink drawing done by artists of the past. One benefit of dip pen drawing is that the colours available are virtually unlimited. Most bottled inks are suitable for use with a dip pen, so there will be plenty of colours to choose from! You also have the choice of working with either water-soluble or waterproof inks, depending on your preference.
Dip Pens don’t give a uniform line. As you apply pressure the flexible tip of the nib will move, allowing more ink to flow from the tip. They also have a tendency to splatter ink if the nib catches on your paper. For some people this splattering can be an annoyance, but for many it is part of the charm of drawing with a dip pen. Nibs for dip pens are also interchangeable, so you’ll be able to swap them out if you fancy a change.
You can use other speciality pens, like calligraphy pens, for line drawing. These types of pens have specially designed nibs usually used for hand lettering techniques. You can use them to achieve precise marks and textures for drawing. They do require a bit of experimentation before you get the hang of using them.
Get started with the 9 inking techniques below and you should slowly and surely be able to build up your ink drawing skills!
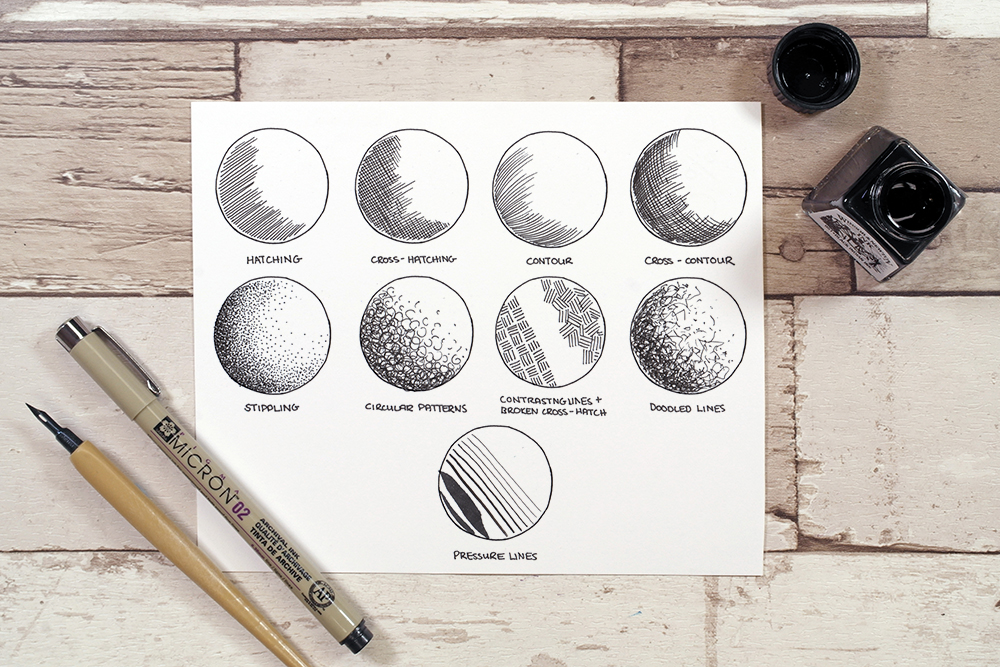
Technique 1: Hatching

Hatching is the easiest and one of the most basic ink drawing techniques. To hatch you essentially create a series of horizontal parallel lines. You can use a ruler to get sharp straight lines for an architectural look but freehand lines will give your drawings more character. The closer together you draw your lines, the more dense the shading effect they will create. The further apart they are the lighter the shading will appear. This technique is best for shading areas with medium shadow.
Technique 2: Cross-Hatching

Cross-Hatching builds on the Hatching technique. Essentially you’ll need to start by creating the same hatched lines as before. Once you’re done you’ll create another layer of hatched lines that overlap your existing linework. This second layer is commonly done at a 90 degree angle, but you can add them in as many layers and angles as you choose. The more layers you add at different angles the more dense your shading will become. Use Cross-Hatching for creating areas of deep shadows while creating texture.
Technique 3: Contour
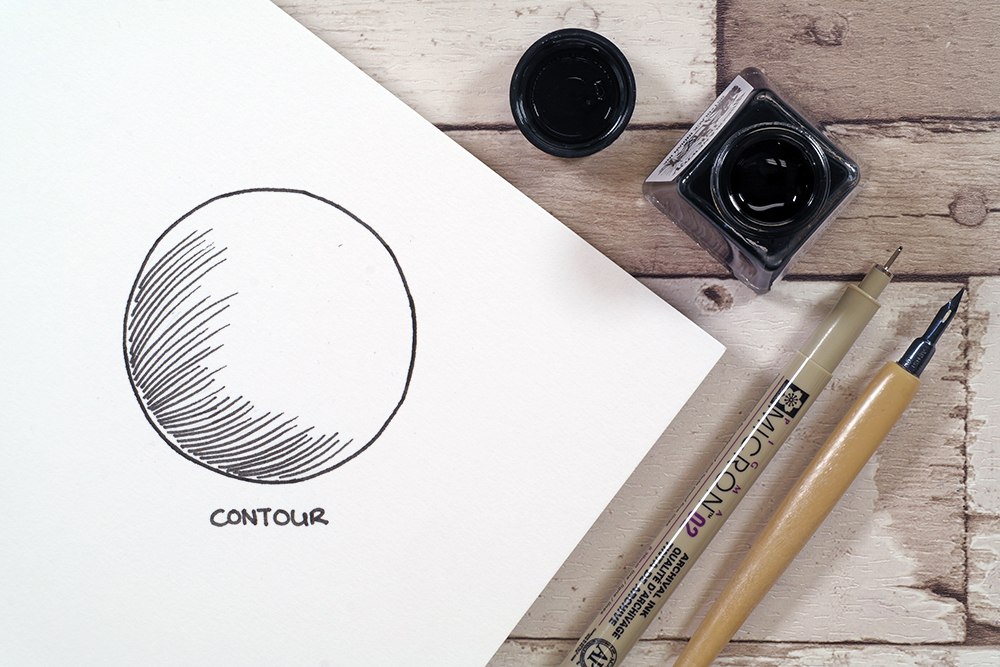
Contour shading works similarly to Hatching, but your lines will follow the curves of the object you are drawing. If you are drawing a curved object then using contoured lines over simple hatching will give more illusion of shape. Hatching can leave your drawings looking a little flat. As with hatching, the closer together the lines, the deeper the shadow effect. Don’t worry about your lines being perfect – little imperfections will give your drawing character.
Technique 4: Cross-Contour
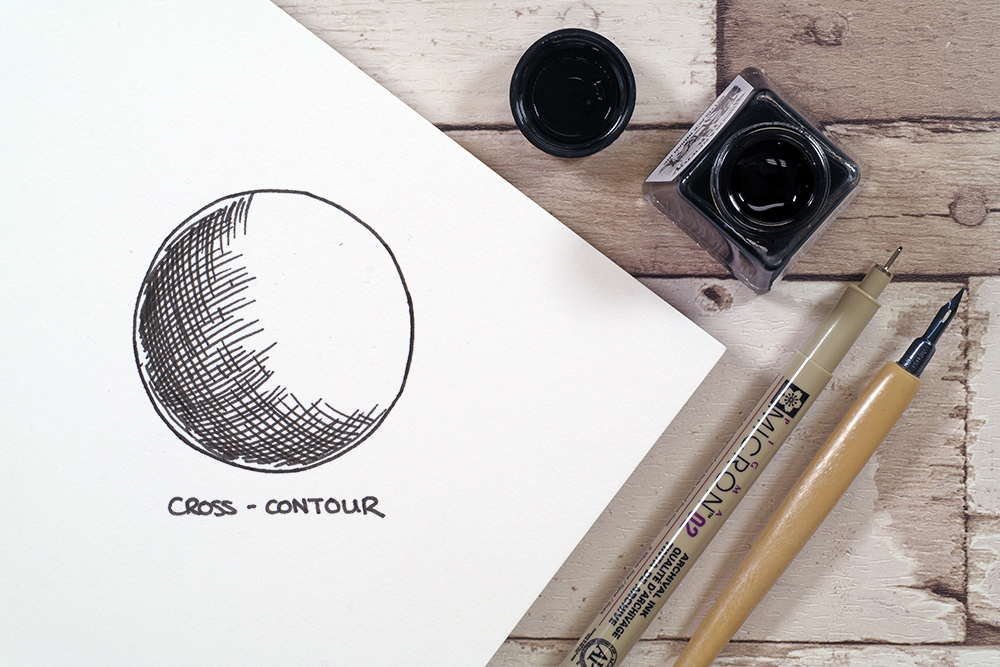
Cross-Contour works along the same principle as Cross-Hatching, only you will start with contoured lined rather than hatched lines. Again, you can add in as many layers and directions as you want to build up the shadow density you need.
Technique 5: Stippling

Stippling is one of the more time consuming pen and ink techniques. It relies on carefully placed dots to give the impression of shadow and depth. The more densely concentrated your dots, the deeper the shadow will be. Create each dot by pressing the nib of your pen against the paper – you aren’t really ‘drawing’ and filling each individual circle. The smaller the nib size of your pen, the smaller your stippled dots will be. In areas that have very little shading you will only need to place a few strategic dots here and there. It can take a long time to build up your shading, especially if you re working on a large piece. Consider the size of the nib you use and don’t lose your cool! This technique gives ultimate control over the contrast between light and dark in your work.
Technique 6: Circular Patterns
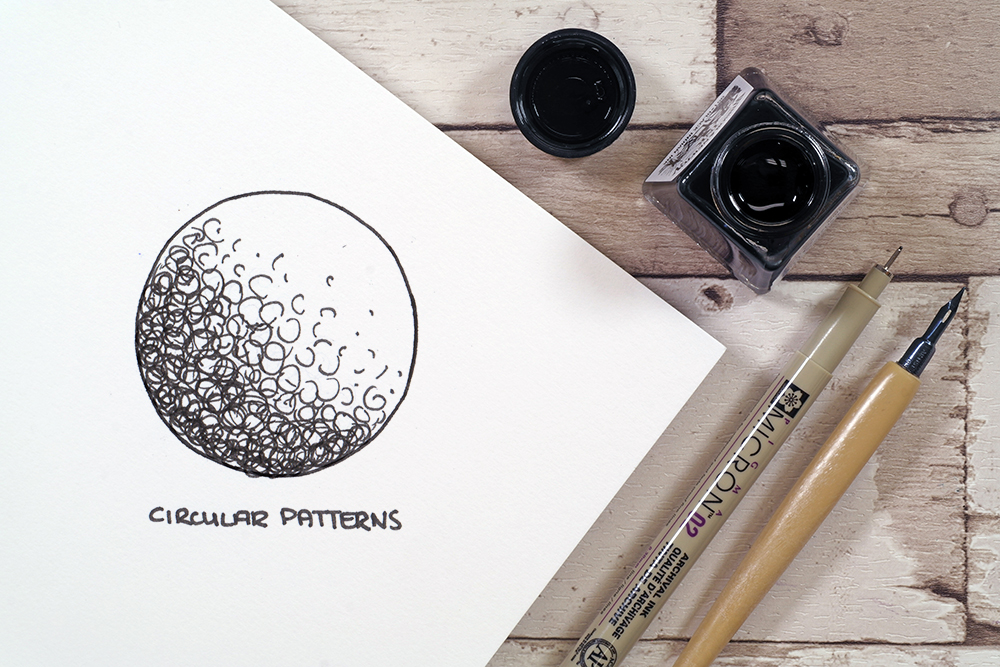
Use Circular Patterns to create areas of both light and dark shadow. The larger, looser and less tightly packed your circles the lighter your shading will be. As your circles become smaller and more dense your shading will appear much darker. This technique is great for quickly capturing natural textures in a uniform way – try using it to give the impression of foliage or scales.
Technique 7: Contrasting Lines & Broken Cross-Hatch
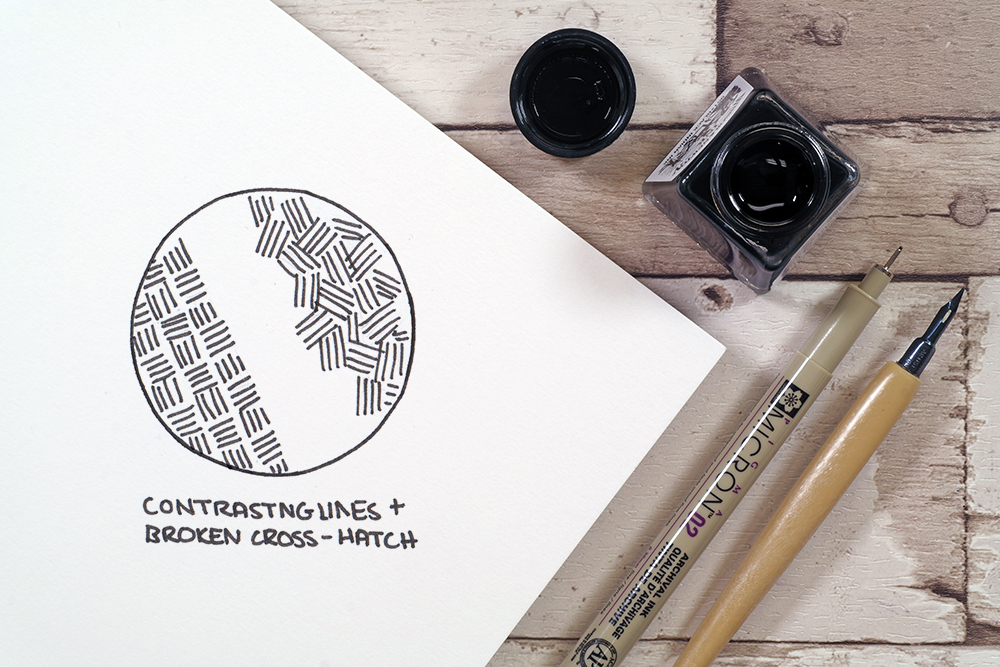
Contrasting lines and Broken Cross Hatch are two similar techniques that work the same way as a regular cross hatch. Contrasting lines (sometimes called ‘weaving’) is used to create a pattern where small groups of hatched lines are drawn at angles to each other. These lines can be made in a uniform arrangement, or placed in a more random manner depending on the texture you want to create. You can overlap these lines to create an unbroken pattern.
Broken Cross-Hatch is similar but works with groups of intersecting cross-hatched lines. The more your lines intersect the darker the shading will be. Both these techniques generate an aesthetically pleasing texture.
Technique 8: Continuous & Random Doodled Lines
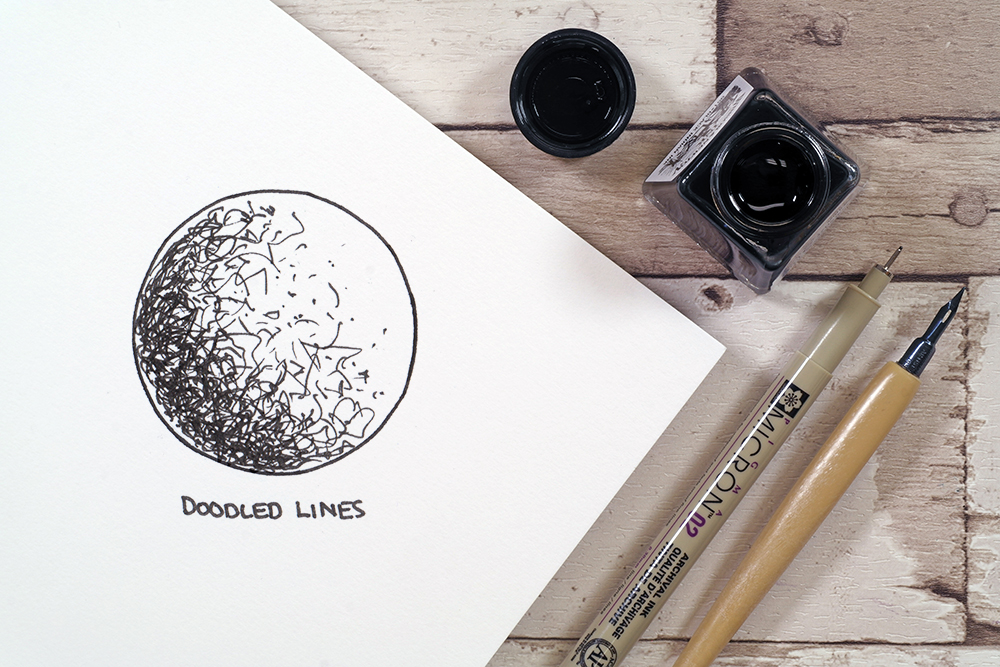
Continuous and doodled lines are usually made up of one unbroken or a few very long weaving and overlapping lines. These lines shouldn’t be made in any sort of predictable pattern. Rather, you should relax your hand and just begin to create instinctive marks. It can take a little bit of practice to let go and relax, while also bearing in mind not to go overboard. Once you’ve practiced a little you’ll soon be able to create shading that’s perfect for giving the impression of textures like leaves, bark and more!
Technique 9: Pressure Lines & Thickness

This technique makes use of the different sizes and styles of nibs available. If you are working with fine liner pens there will be lots of different nib thicknesses available to you. Using a combination of these thicknesses in your drawings will make it easier to create varying degrees of shading. Try mixing up the sizes of pens you use to see how different sizes affect the types of linework you can create.
With Brush pens you’ll find that the more pressure you put on the pen, the thicker your linework will be. This allows you to create a single line with a varying line weight – something that you can use to your advantage in your drawings. The thickest lines can be used to create dramatic shadows, while the variation in line weight will give your drawing more character.
Other Hints & Tips
- If you’re just starting out begin by practicing these techniques on simple geometric shapes. Start out with a cube and work out how light and shadow will affect each of its faces. Try and translate this contrast in dark and light into a drawing using the techniques above.
- As you grow in confidence start trying to render more complex objects. It can be useful to draw these objects from life to see how light and shadow appear in a real life setting. Try capturing mugs, glasses and other household items.
- If you’re nervous about putting pen to paper try planning your drawing with pencil first. This planning will help you work out where your lines need to be placed, without worrying too much about making mistakes.
- Try pens with specialist nibs, like the Pilot Parallel Pen for some interesting mark making techniques.
- Try mixing up different techniques to help define the form of the object you are sketching. Cross hatching and contour are commonly used together.
- Use a mixture of different pens in the same drawing.
- Change the way you hold your pen. Holding your pen at the bottom will allow for more free, expressive lines, whereas holding it close to the nib will allow you to work in more detail.
- Add water to water-soluble linework to add character and interest to your drawing.
- Use dry pens for texture. Using a dry marker, felt tip or brush pen can add texture to your work as they create a broken stroke of ink.
- Use coloured pens to add a bit of vibrance to your drawings.


So cool! Well done thanks
Good morning
Novice in the world of art.
So, would you suggest sketching in pencil and high ink with in-house for depth?
I am in Canada, Nova Scotia.
Hi Brian. Thanks for your comment. Sketching in pencil before you commit to ink is entirely optional. You can go straight to working in ink – but you’ll have to work with confidence as it’s much harder (if not impossible) to correct any mistakes. Pencil is erasable, so you can work and rework your ideas until you’re happy to add ink. Unfortunately I’m not familiar with the technique you’ve described. Just let us know what you want to do and we should be able to advise.
thank
Awesome
you have explained basic of nib drawing in a very simple way..thanks