
Which Is The Whitest White Pencil?
I don’t know about you but as a mixed media artist I’m continually on the search for the best white pens, acrylic markers and pencils to use as highlights on a variety of surfaces. I’m always on the look out for that strong bright whitest of white! In this article I will share with you some of the pencils that I have tested on different surfaces to find my favourite. I have also included a fun tutorial for you to follow using just a white pencil and some black paper.
What I look for in a white pencil
For me ‘whites’ fall into two categories, wet (markers, posca pens etc) or dry (colour pencils, dry watercolour pencils, un-activated inktense etc.) and I use different products for different things. For the purposes of todays fun exercise I’ll be looking at dry media.
So what do I look for? Well…my main criteria for my studio work is opacity (how well does it cover), blendability (does it play well with other mediums), flexibility (does it work on different supports) and brightness (I want a white that shines out).
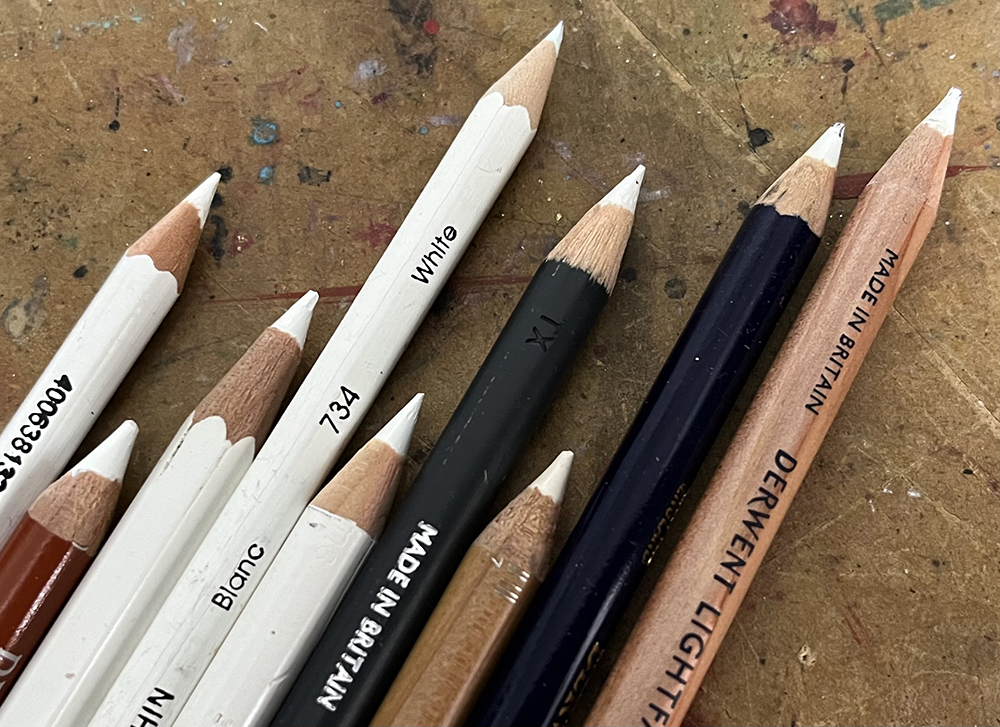
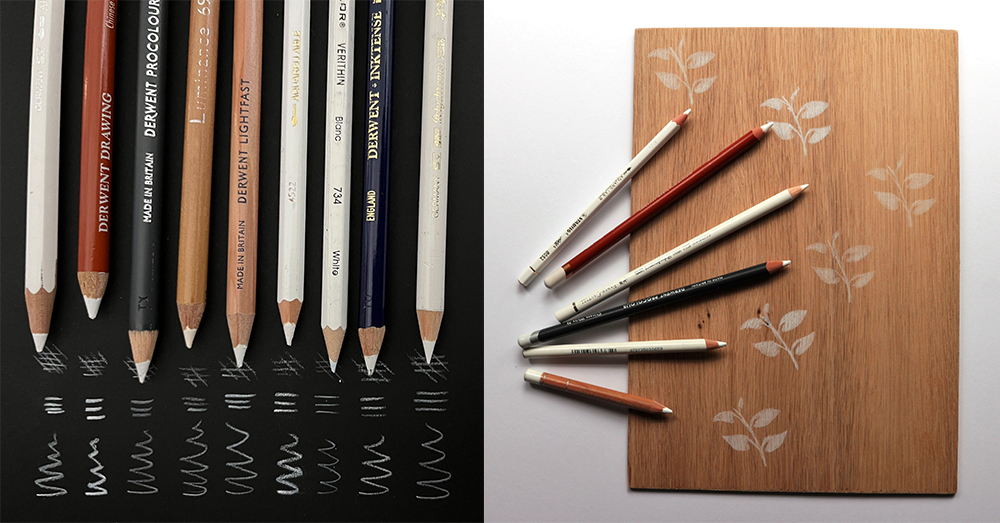
I’ve used a handful of different white pencils on two challenging surfaces, black card stock and a sanded wood panel …. just look at the difference!
Stabilo ‘Write All’ 8052
All purpose marking pencil for glass, plastic, metal and wood. It has highly pigmented colour which gives strong lines and it’s easy to sharpen. It is however water soluble so will wipe off with a wet cloth.
Derwent Drawing ‘Chinese White’ 7200
Soft creamy textured pencil with a unique waxy consistency that produces a smooth velvety opaque finish on wood without having to press too hard. It sharpens to a great point and have a light fast rating of 8 (very high). In these two tests it produced the brightest, most stable, saturated colour on black paper and it was the easiest pencil to use on sanded wood.
Derwent Procolour ‘Chinese White’ 72
Procolour Pencils are the perfect combination of a strong point and smooth lay down. The texture of the lead is quite firm and works great on paper with the strong covering power of a wax, yet glides like an oil pencil. However on wood the firmer lead tends to skip resulting in a patchy cover, even on a well sanded surface.
Luminance 6901 ‘White’ 001
Luminance pencils are also another fabulous lightfast pencil range and are created with exhibition and collectible artworks in mind. They layer really well and have a wonderful creamy, saturated coverage. I really love their muted colour range and often integrate the pencils into my mixed media work. The white is a lovely soft ‘angels’ white rather than a ‘brilliant’ white. Remember though … this experiment was using just one quick pass of the pencils.
Derwent Lightfast ‘White’ 2718
The Lightfast coloured pencil is one of Derwent’s premium pencils and another one of my absolute favourites on paper or pastel boards. They also layer wonderfully with Polychromos pencils. They are an oil based pencil and can be sharpened to a lovely point for the most intricate of detail. I find them rich and beautifully pigmented. The pencil covered well on the sanded wood panel however, it didn’t cover as well in one pass as the softer, more waxy pencils.
Prismacolor Premier ‘White Blanc’ PC 938
The soft waxy, thick cores are perfect for laying down blanket cover and bright highlights. The pencils are lightfast and offer richly saturated pigments, however they require constant sharpening to maintain a sharp point and the lead breaks very easily. This pencil came a close second in both tests. Prismacolor Verithin ‘Blanc 743’ is similar but has a thinner lead.
Derwent Inktense ‘Antique White 2300’
A fabulous versatile ink based pencil with intense saturated colour and lots of secrets up its sleeve. They can be used dry or wet and are fabulous for mixed media projects.
Faber Castell Polychromos ‘Weiss White’ 9201-101
Polychromos are my normal go-to for coloured pencil work because they offer highly light-fast vivid colours as well as smudge-proof and water-resistant properties. However, on wood the harder oil based leads, although highly break-resistant, tend to skip across the grain resulting in a patchy weak colour.
In Conclusion
If you’re looking for a go to ‘dry’ white pencil with an bright creamy coverage in just one simple pass then the top spot (and one of my absolute favourites for such purposes) is the ‘Derwent Drawing Chinese White 7200’. It covers well on a number of surfaces including wood and even on black card, and I’m continually impressed by its ease of use, strength of colour and robustness of the lead (it’s nice and chunky).
I would happily use many of the other pencils and pencil ranges for different projects and art pieces. If I was looking for blendability, realism, colour range or working in a particular surface I would maybe reach for something different. My motto is always play and explore with your materials. What works for one may not always work for another and constantly keep in mind your purpose and the outcome.
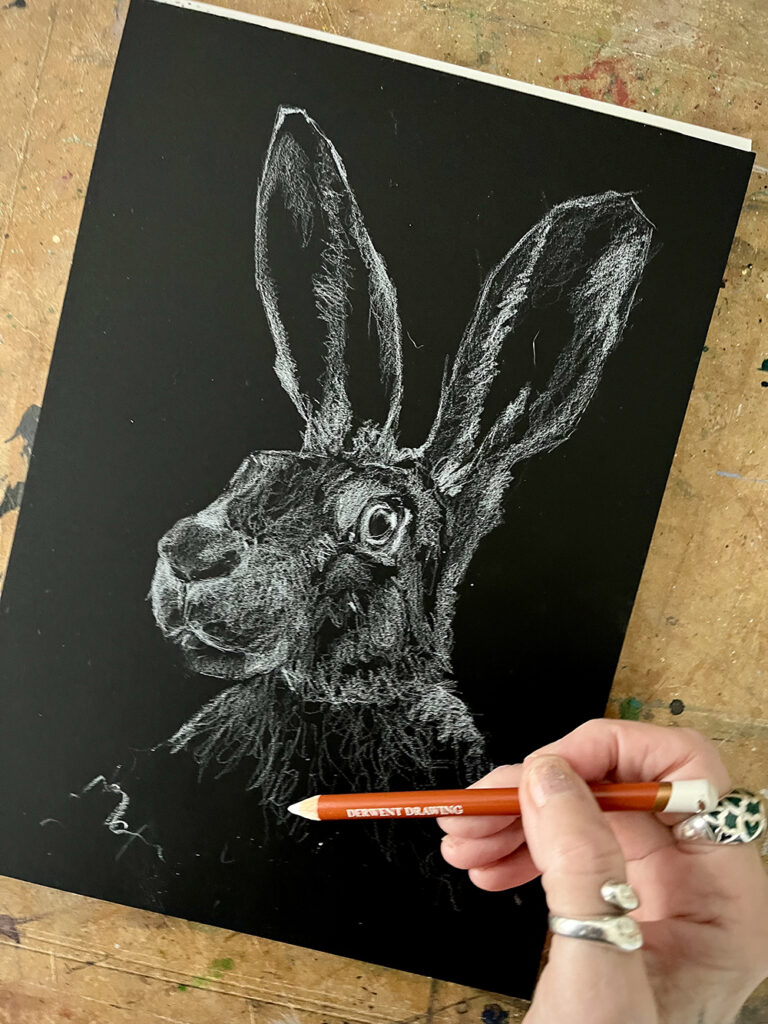
Mr Whiskers Tutorial
So now I’ve shared my favourite white dry pencil, lets have a bit of fun! White pencils don’t have to be just for highlights & snow. They are happy to take centre stage too! It’s amazing what you can create with a humble pencil, a sprinkle of drama and some contrast. Here’s a fun mini tutorial to create ‘Mr Whiskers’, a handsome hare full of character based on a wonderful photograph taken by Frances Crickmore.
Materials
Derwent Drawing Pencil ‘Chinese White’ 7200
Koh-I-Noor Kneadable Putty Eraser in Box
Faber Castell Grip 2001 Trio Pencil Sharpener
Golden High Flow Acrylic – Iridescent Gold (Fine) – optional
Cocktail stick or spotter brush – optional
Step 1 – Marking Out
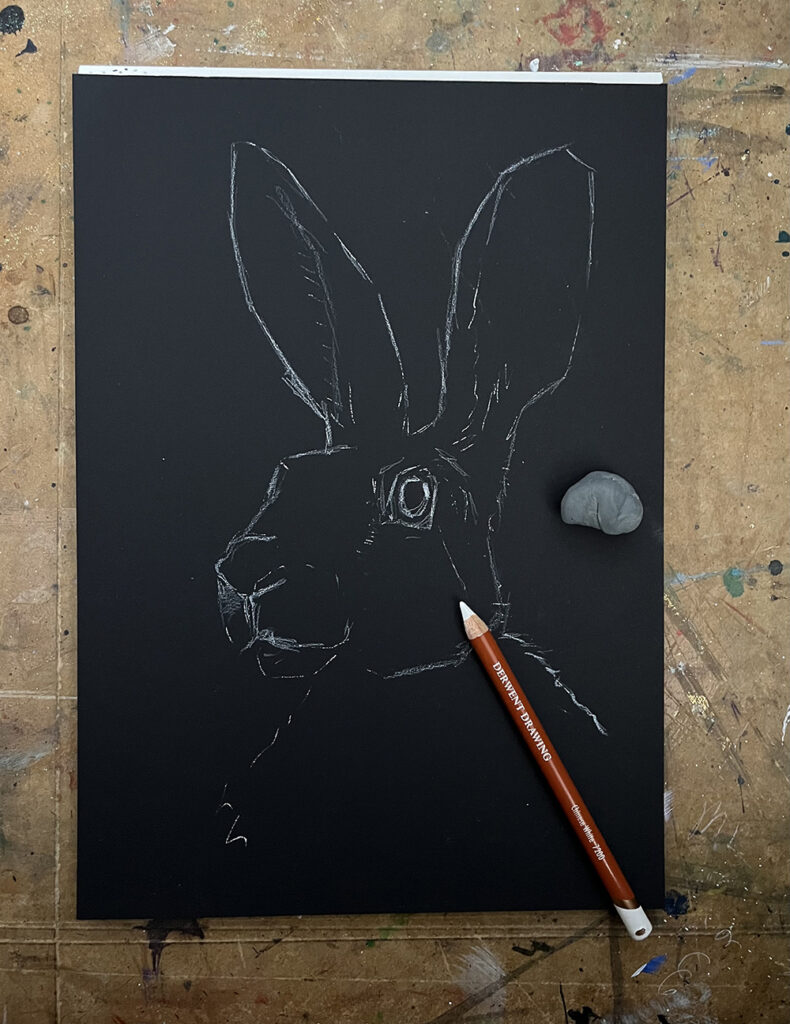
Mark out/transfer the basic outlines and main structure of the hare onto your paper. Feel free to use this line drawing to help you. Keep the lines light, knock back with a putty eraser if needed.
Step 2 – Blocking in
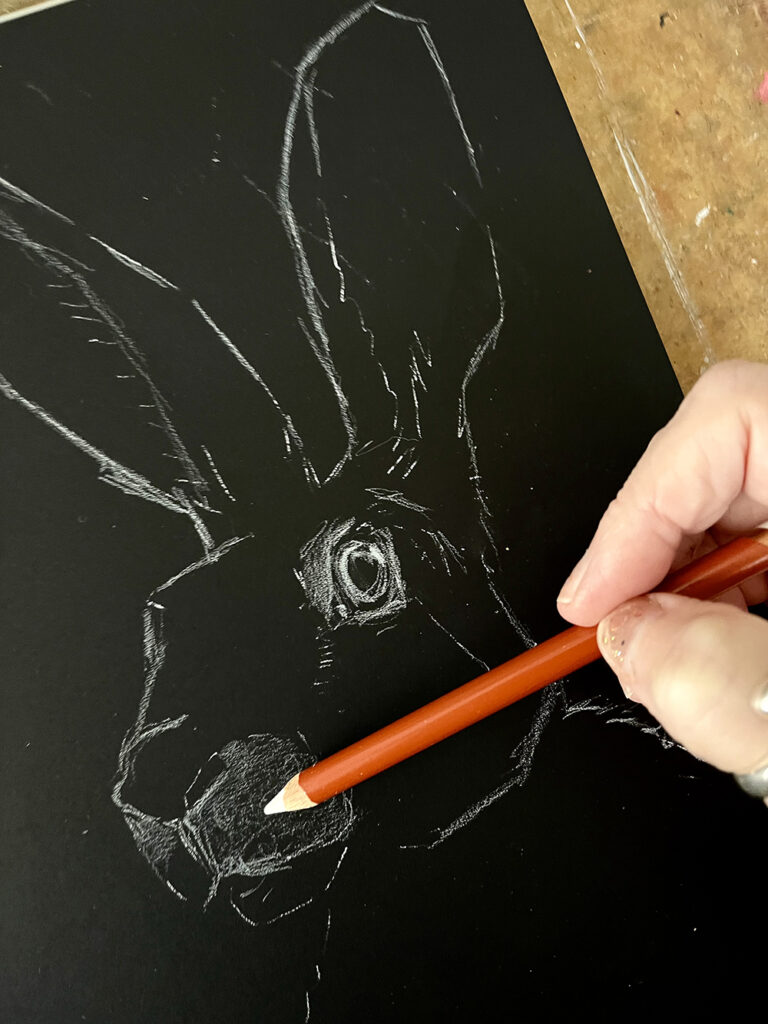
Using a scribble technique, where you keep your pencil moving in light loose random patterns, start blocking in the lightest areas around the nose on the muzzle and the eye. Hold your pencil loosely in your palm and towards the back of the barrel. This helps keep your marks fresh and lively. Keep the tip of the pencil relatively sharp so that the marks are nice and crisp. It helps to keep an edge on your lead by gently rotating the pencil as your draw.
Step 3 – Doodle the shape & form
Squint your eyes at the reference and try and identify the lightest areas, shapes and mid tones. Doodle in the shape and form of these areas with loose expressive scribbly marks. Don’t over think it! Try and respond spontaneously and keep the marks moving and undone, following the fur, shape and the form of the hare. Remember this is the first layer so keep it light and reserve the paper for the darkest areas. You also want to try and keep the focus on the eyes and nose, so allow your marks to become less defined the further you get from your focal point.
Step 4 – Time for layer two
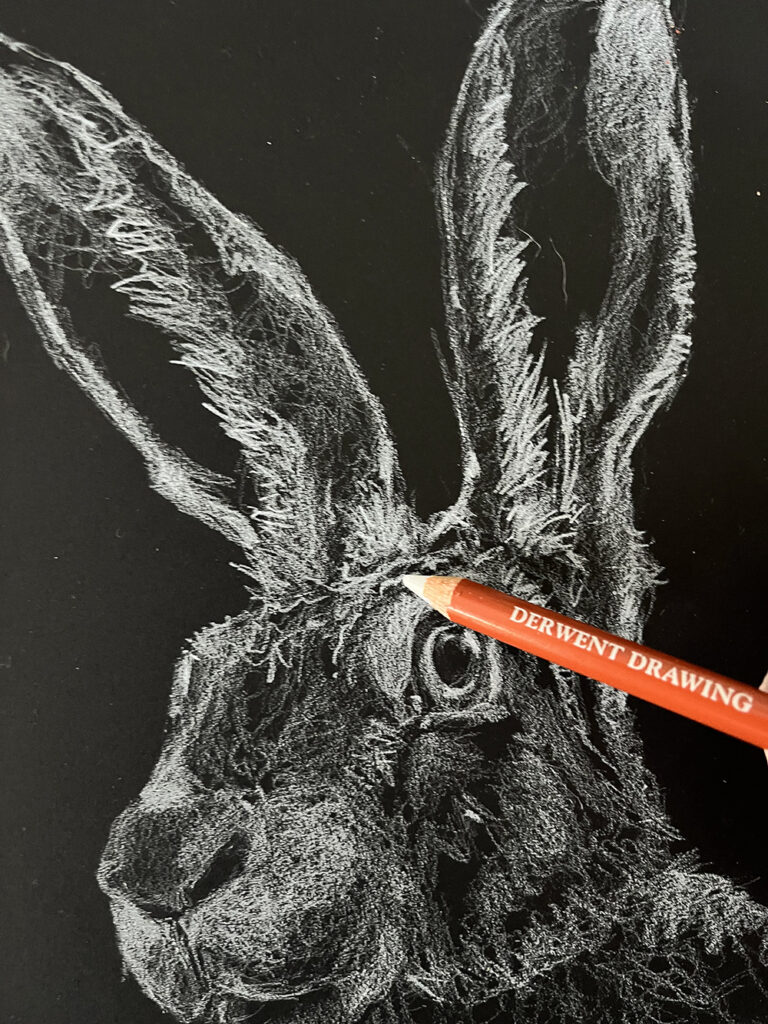
We’re ramping up the lighter contrast areas and adding interest. Look at your reference and identify those lovely bright areas and interesting scruffy fur shapes. Where does the fur overlap on the ears? Where are the brightest areas? What does the fur do on the forehead? Sharpen your pencil and draw what you see in loose confident scribbly marks. Remember less is more, don’t add marks unless you feel its necessary.
Step 5 – Layer three
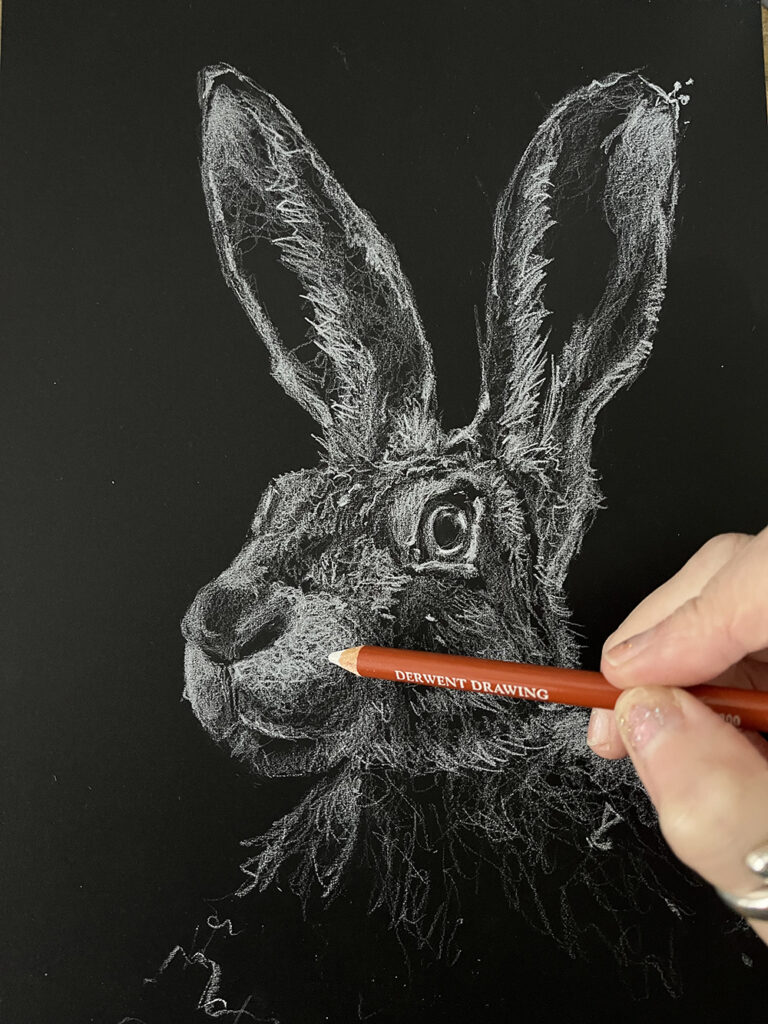
Those lightest lights. Look at your reference again and note those light areas on the hare that are coming towards you. Muzzle, eyebrow etc. Add a final layer to those areas to saturate and intensify the whites and highlights. You want those areas to jump off the page and come forward. Be really careful not to obliterate your lovely mark-making beneath, so increase the pressure of your marks but keep it scribbly! If you’re unsure which areas to work on, take a photo of the reference on your phone and then turn it to greyscale (monotone). It really helps you see.
Step 6 – Whisker time
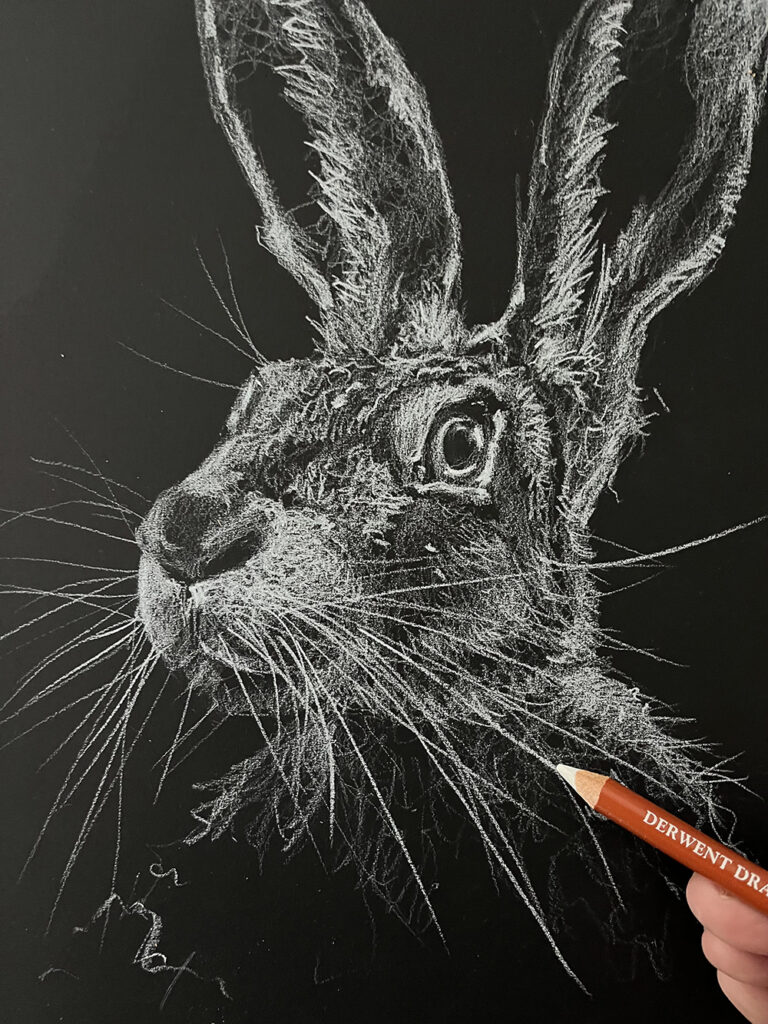
Now the fun bit … adding his beautiful whiskers. Sharpen your pencil. Whiskers are all about confidence and smooth movements. Hold the pencil about half way down the barrel and offer it at about 45 degrees to the paper. Look at where the whisker starts and finishes. Place the pencil in the start point and try and draw from the shoulder and not the wrist in a smooth constant motion. The easiest way to think about it is to imagine a plane taxiing down the runway ready to take off. As you complete the line ‘take off’ with your pencil. You will always get a smooth curved, confident line with no wobbles! Add as many whiskers as you fancy and don’t forget the hairs from his brows.
Step 7 – The finishing touches
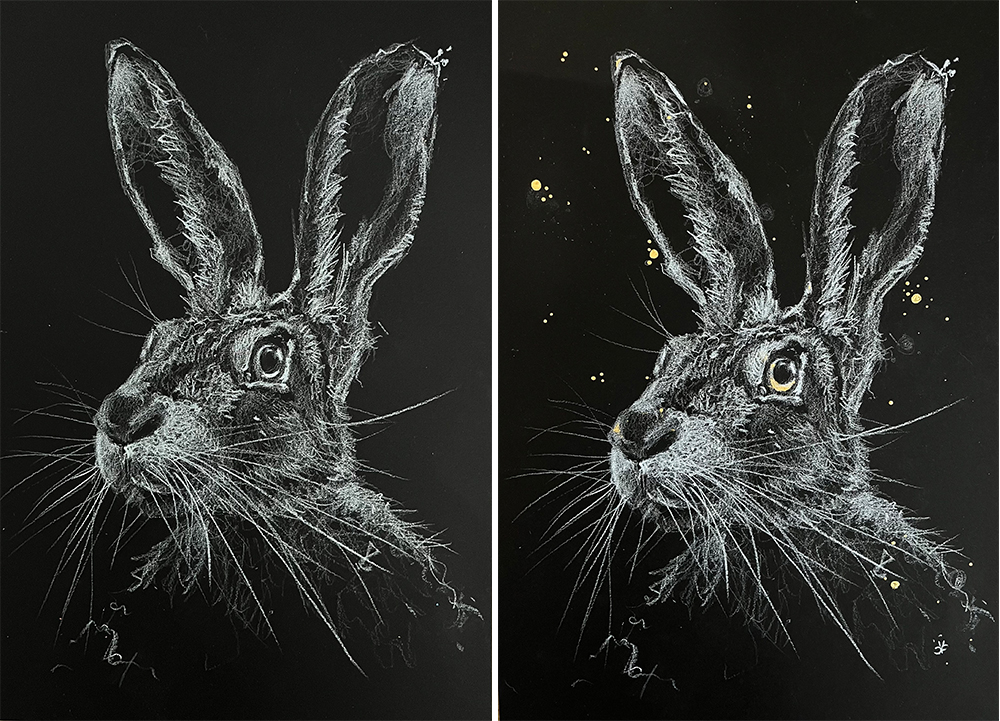
If you fancy taking things one step further and enjoy a little bling (and who doesn’t) try adding a touch of gold. It works wonderfully against the black paper and adds a layer of drama & interest. Simply take a wooden cocktail stick and dip it into a small puddle of Golden High Flow Acrylic – Iridescent Gold (Fine). Dot it on the black paper to create perfect stars and subtle highlights on the hare. It’s so quick and easy! Alternatively, use a small spotter paintbrush.
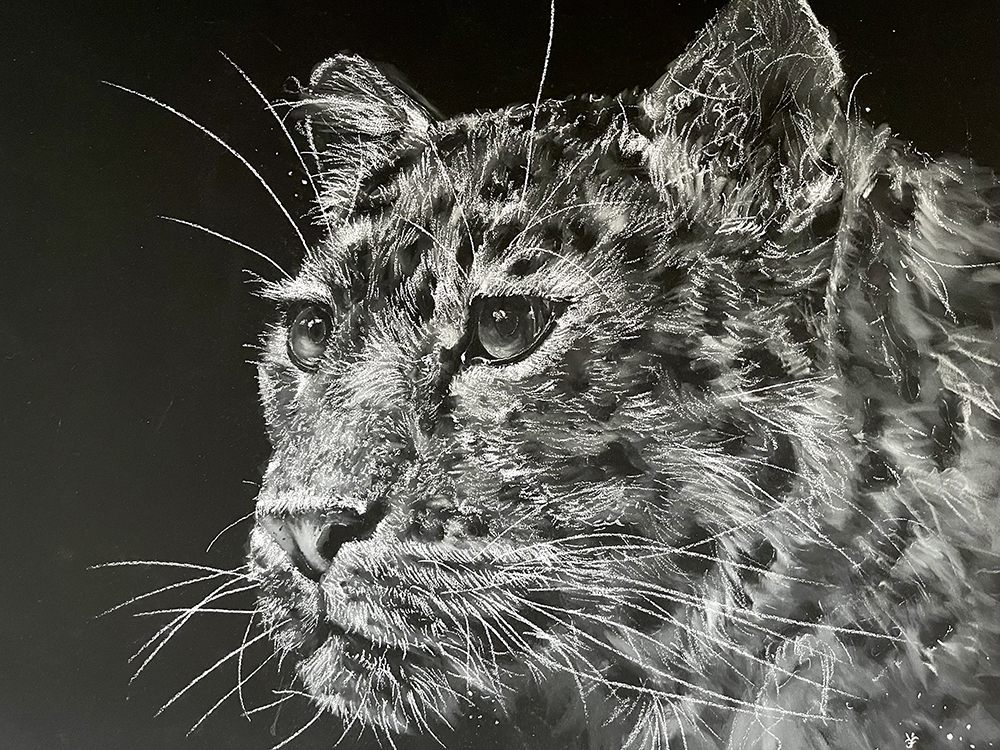
If you enjoyed this tutorial then why not experiment using similar techniques on different creatures … enjoy!!


I had a go using Derwent Chinese white, plus a Faber and Castell polychromes white and a Caran D’Ache Luminance white and a Sennelier acrylic iridescent gold on Frisk A4 Black paper 135 gsm . A very enjoyable and interesting exercise . I did a few and have now started doing a Snowdrop in white and coloured pencils on black paper
Hi Jerry. Thanks for your feedback, I am glad you found the article helpful. Good luck with the snowdrops!
that not even close enough to white what I am looking for.
The best white in my view so far only CaranDache Museum White! try it for yourself.
A really informative and educational article; easier (for me at least) to read if the narrative had appeared alongside the pictures.
Great demo. I love your description of how and where to hold hte pencils to get the correct t ype of marks. I do v ery detailed coloured pencil work so this would loosen up my work a lot
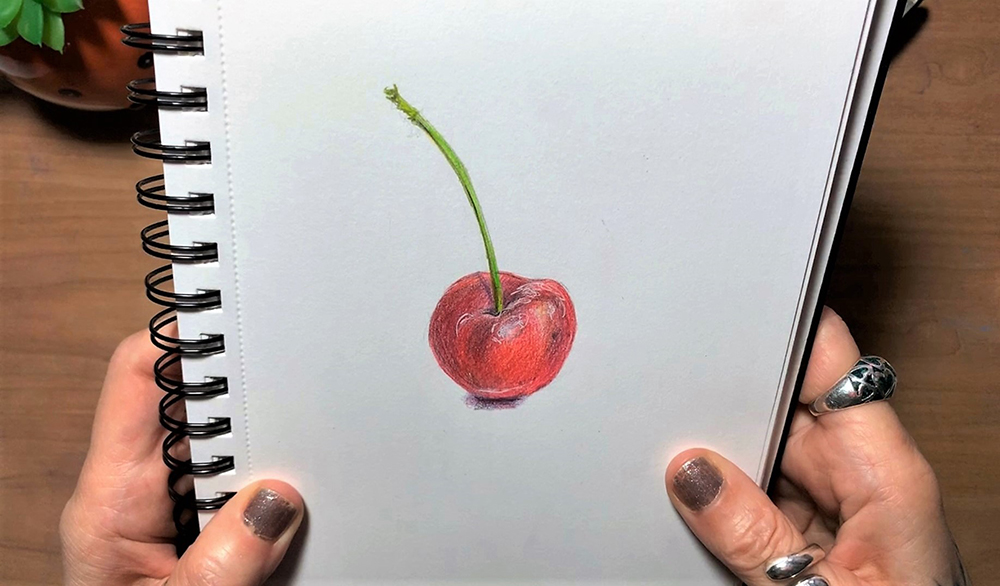
Cherry excellent work thank you for sharing and thanks for the excellent advice on white pencils very helpful kindest regards Steve
Try the Holbein too. Its amazing.
An Invaluable information and testing report that saves us from making wrong choices in our purchases – and having disappointing results in our work. Really useful work – thanks!
Hi Chris! Thanks for your feedback. So glad you found Cherry’s blog post helpful!
Interesting article and tutorial, thank you.
Really helpful and so well written. A must for anyone interested in using a white pencil.
Great article and tutorial!