
Make Your Mark With Ink
In my first Inktober article ‘A Beginners Guide To Indian Ink‘ we discovered the unique properties of Indian Ink. In this post we take a look at the different mark making tools available for use with ink. I also try my hand at making some of my own!
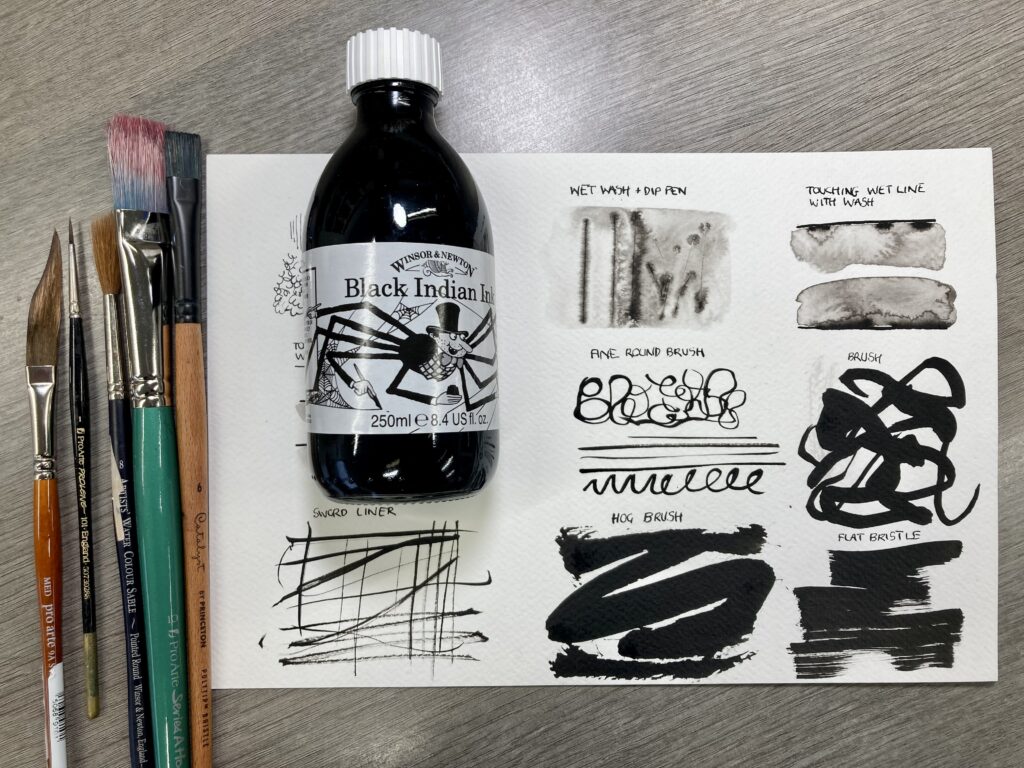
Brushes
I like to use soft synthetic watercolour brushes with ink, I use a range of rounds, riggers and flats. Hake and hog brushes also work really nicely producing scratchy, dry, broken lines. Dip your brush into the ink up to about two thirds. Fully dipping your brush will cause the ink to mix with the glue in the ferule and slightly change the shape of your brush. Make sure you give your brushes a good clean with brush cleaner when you’ve finished painting with them.
Dip pens
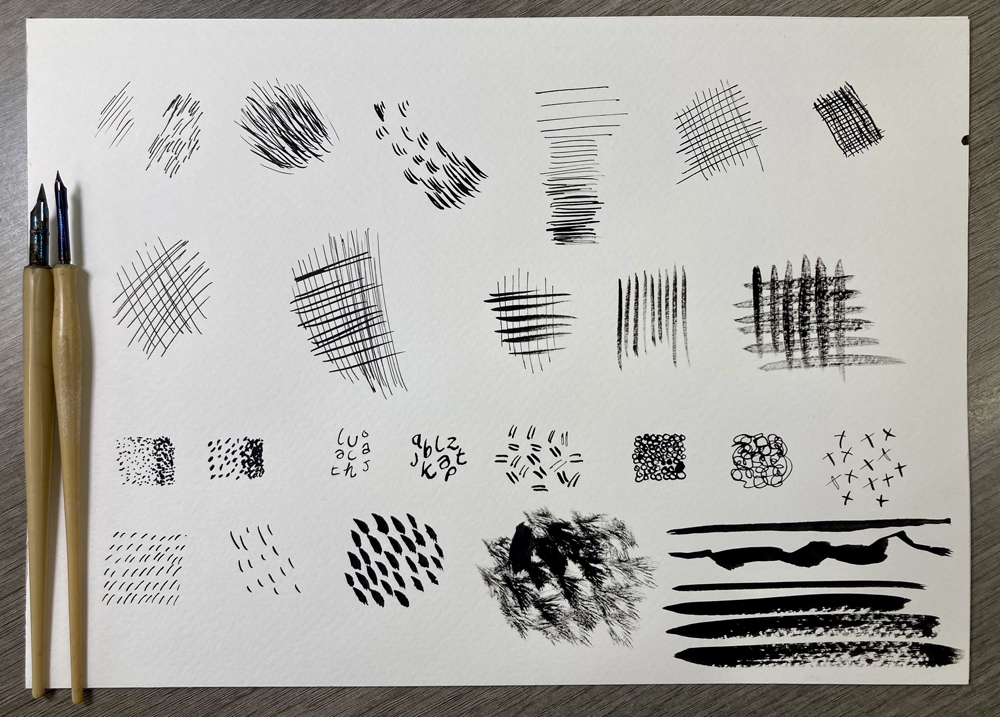
Dip pens consist of a handle with interchangeable nibs that are slotted into the pen holder. They are prefect for use with a large variety of different inks . The best one to start with is the Joseph Gillott Manga Pen Set. It contains two handles which means you don’t need to swap the nib as frequently. There are a number of calligraphy pens also on the market, so if you are after some interesting marks make sure you check those out too.
Most dip pen nibs come coated in wax to stop them tarnishing in storage. You will need to submerge the nib in hot water for approx 30 seconds to melt the wax which then allows the ink to flow freely. It is important to wash and dry your nibs completely after every use to stop them rusting.
Experiment with pressure, creating different widths of lines and cross hatching. Get used to the feel of the dip pen and where to hold it for the best angle to draw with. The first mark you make with the dip pen can be unexpectedly bold. Sometimes the dip pen will produce a scratchy broken line when the ink is running out. If you don’t like your handwriting it is often helpful to be more patient and just slow down your handwriting for a neater finish.
Indian Ink fine line pens
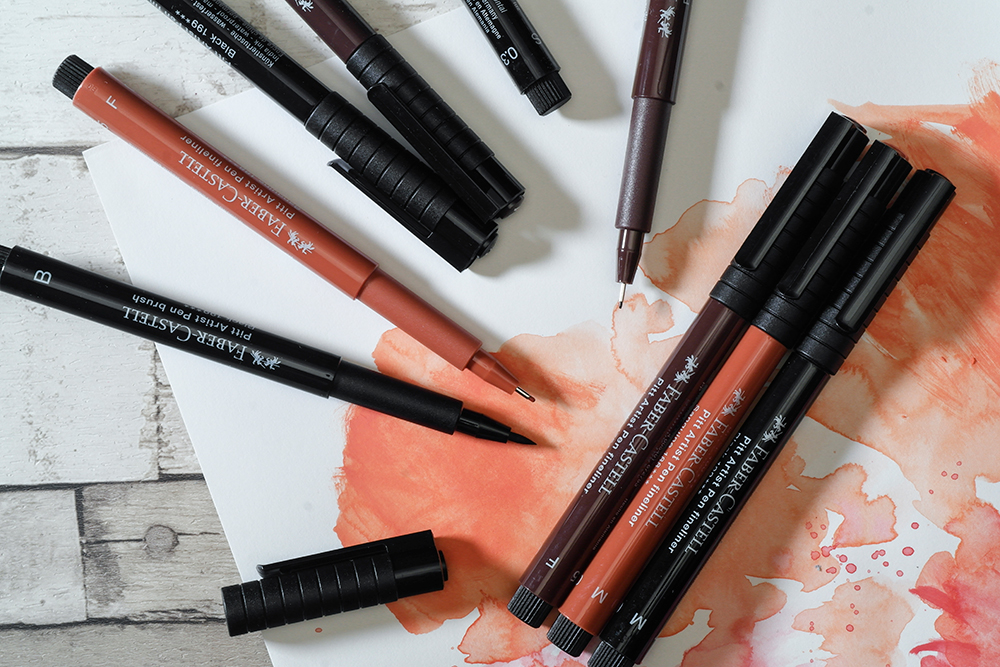
If you paint on the go you may find pens are generally a little easier to transport and use for urban sketching. The Faber-Castell Pitt Artist Pen contains waterproof, lightfast pigments in black, sepia & sanguine. These pens use a plastic dispersion resin binder, rather than shellac or gelatine. The black pigment is derived from oil, coal or wood. So you are able to achieve similar results as a pot of Indian Ink with the convenience of the pen format.
Derwent Mixed Media Paint Markers range is another great option. These pens are great as they allow you to fill with whatever medium you want. Just wash after use and then re-filled with another product.
DIY – Bamboo pens

I have made my own bamboo pens from dried bamboo sticks. The sticks are hollow which acts as a small reservoir when the pen is dipped into ink. I keep my pens long as this encourages unpredictable and expressive marks when they’re held at the end. Bamboo pens do not hold a lot of ink so you will find that they need dipping fairly often. Bamboo pens are best used to make textural marks rather than long lines. I’ve made mine with a flat nib and I like that this creates a wide range of marks. If you make one with a round nib then this will produce finer lines and marks.
DIY – Quill pens
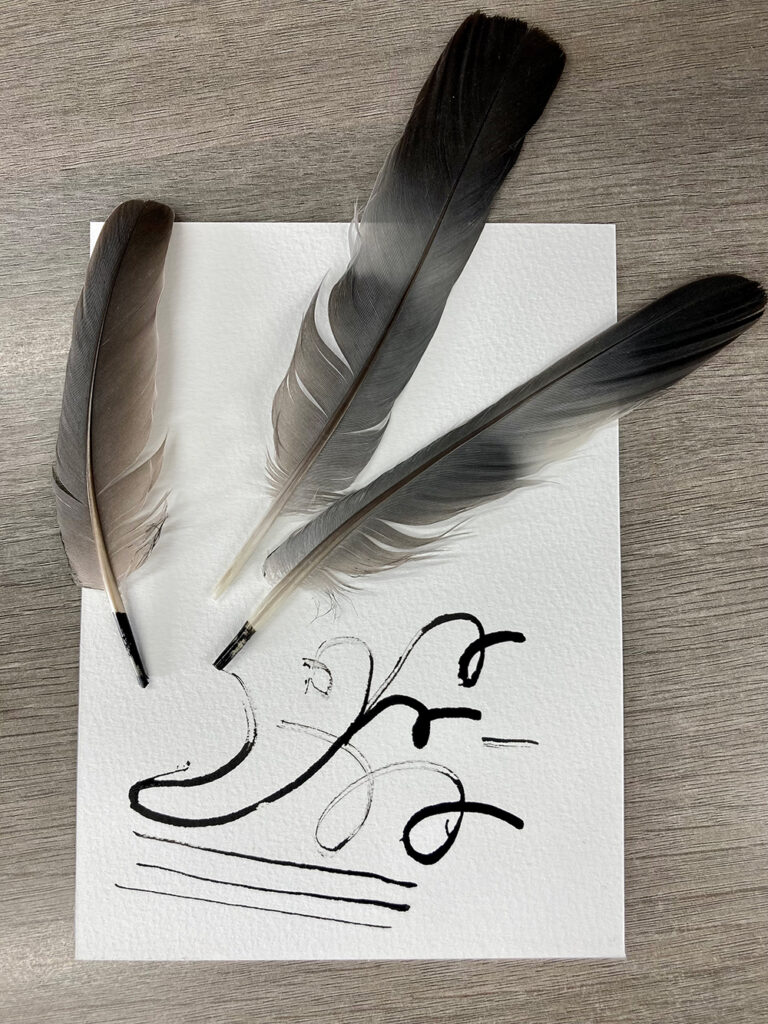
I have recycled found feathers and made them into quill pens. Firstly I gave mine a good wash with soap & water to get rid of any germs. Next I shaved off the fibres close to the quill end then I cut the hollow shaft end at forty-five degrees. Finally I cut a slit up the middle of the nib to create two tines.
DIY – Cola pens
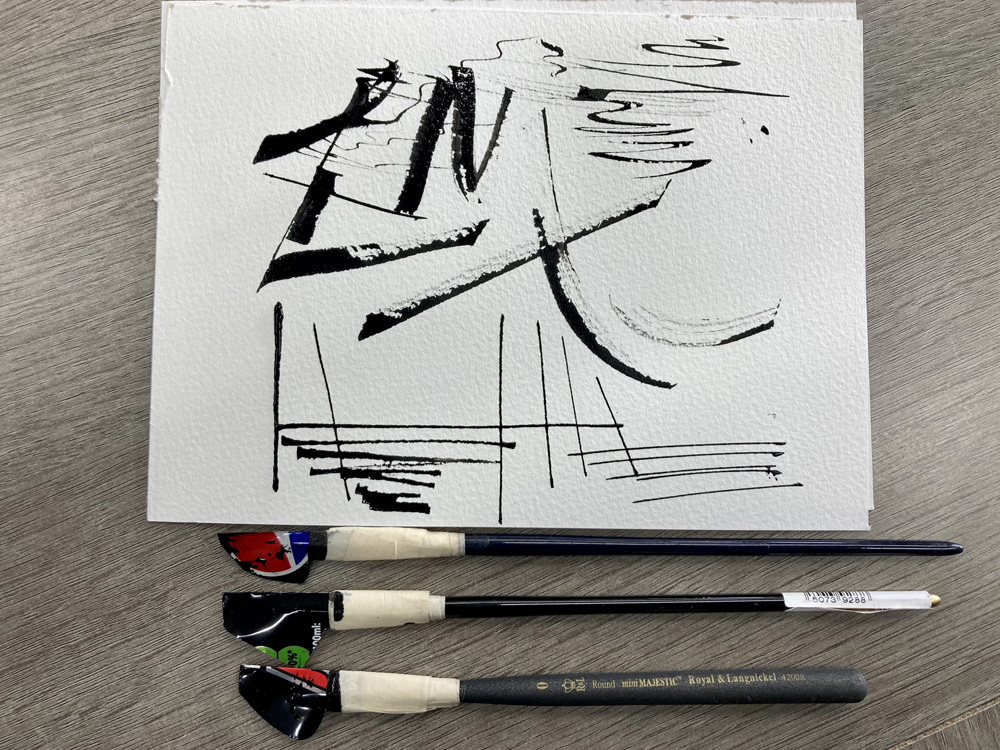
I really enjoyed making my own cola pens and deciding what size and shape of nib I wanted. I re-cycled some battered old brushes for the handle on mine. The results were pleasantly surprising! The nibs held far more ink than I was expecting so I didn’t need to keep dipping into the ink as often. A large range of marks was achieved from wide sweeps through to very fine lines.
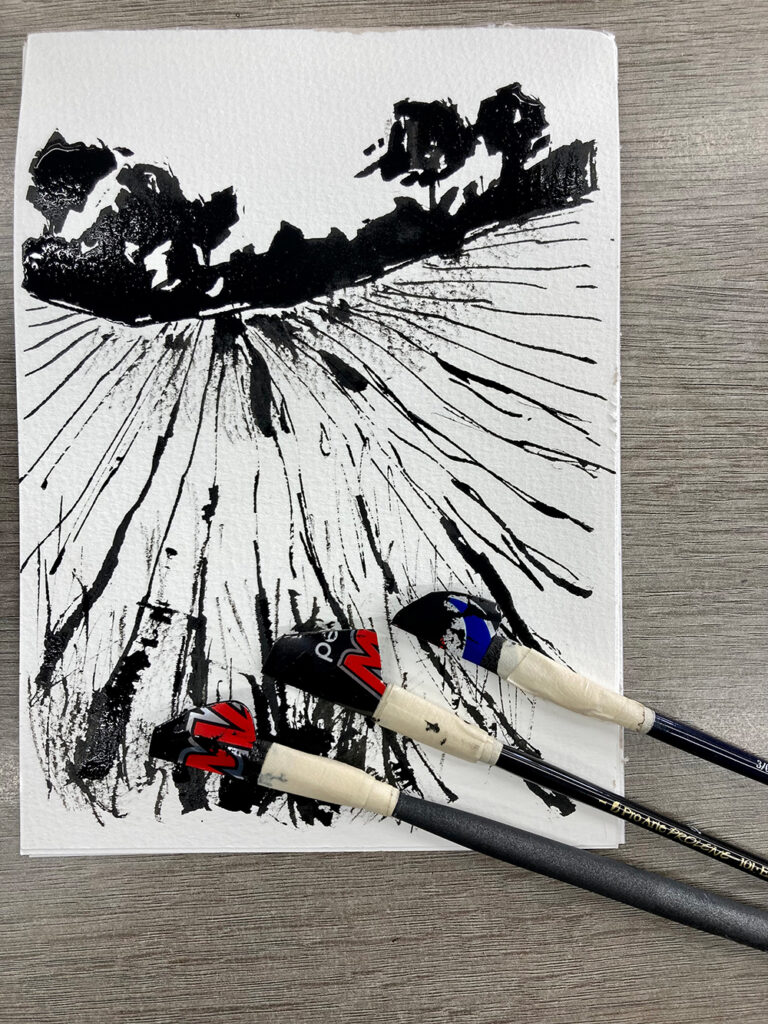
I used a cold pressed watercolour paper and I really enjoyed the dry brush effect where the nib only touched the bumbs on the surface. I was able to control the fine lines really well too, turning my pen around and using it on the cut line.
If you enjoyed reading this article you might like A Beginners Guide To Indian Ink, A Beginners Guide to Artists Inks and Pen & Ink Drawing Ideas – 24 Curated Video Tutorials & Demonstrations


As an elderly amateur Watercolour struggling artist, I am always entranced by your videos on different products. Having purchased some acrylic inks from you some time ago, I absolutely loathed them until I found them again and had another GO completely inspired by your video. Love ‘em now !!! Splodgy flowers, dramatic monochromed landscapes, great !!! Thank you so much. xx
M
That’s great! Glad to hear that you were inspired to give inks another go!