
How to Clean Acrylic Paint Brushes – Keep Your Brushes in Top Condition
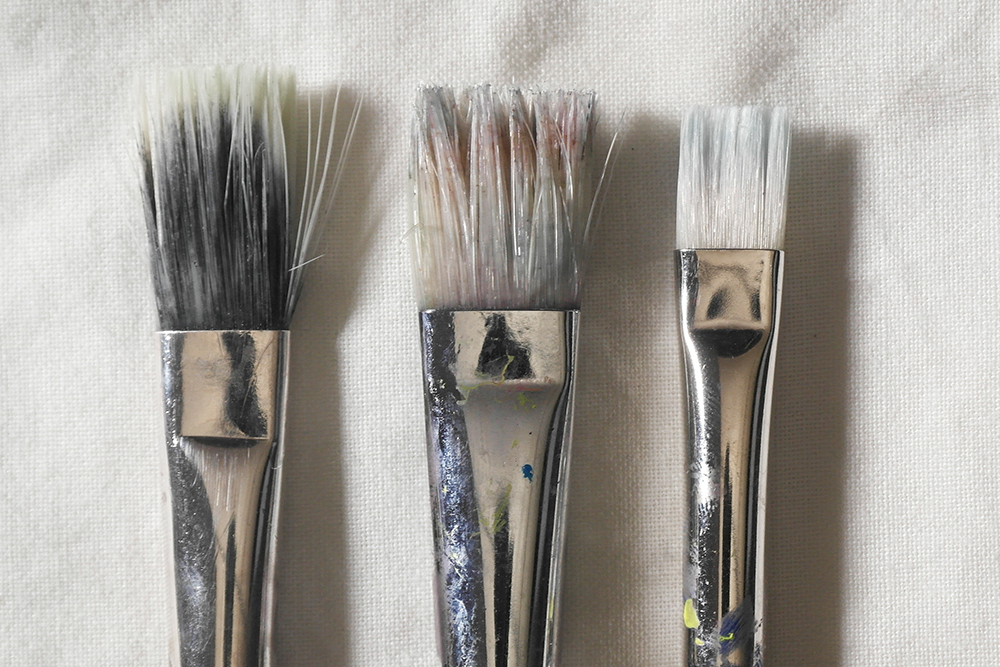
There’s nothing worse than getting started on a new acrylic painting, only to find that your brushes are clogged stiff with acrylic paint! Notoriously stubborn to remove, dried acrylic paint can be a nuisance to even the most experienced acrylic artists. Here we share the best way to clean acrylic paint from your brushes so you can spend less time cleaning and more time painting!
Last updated April 2025 to include new product recommendations and tips.
Acrylic paint is quick-drying and versatile, but that also means your brushes can suffer if not cleaned promptly. Cleaning acrylic paint brushes properly helps prevent paint build-up, extends their lifespan, and keeps bristles in good shape for smoother results.
It’s no secret that most of us want to spend as much time painting as possible – cleaning brushes only eats into your painting time! Brush cleaning can seem like a chore, but by streamlining your cleaning process you can save time to ultimately leave more time for painting.
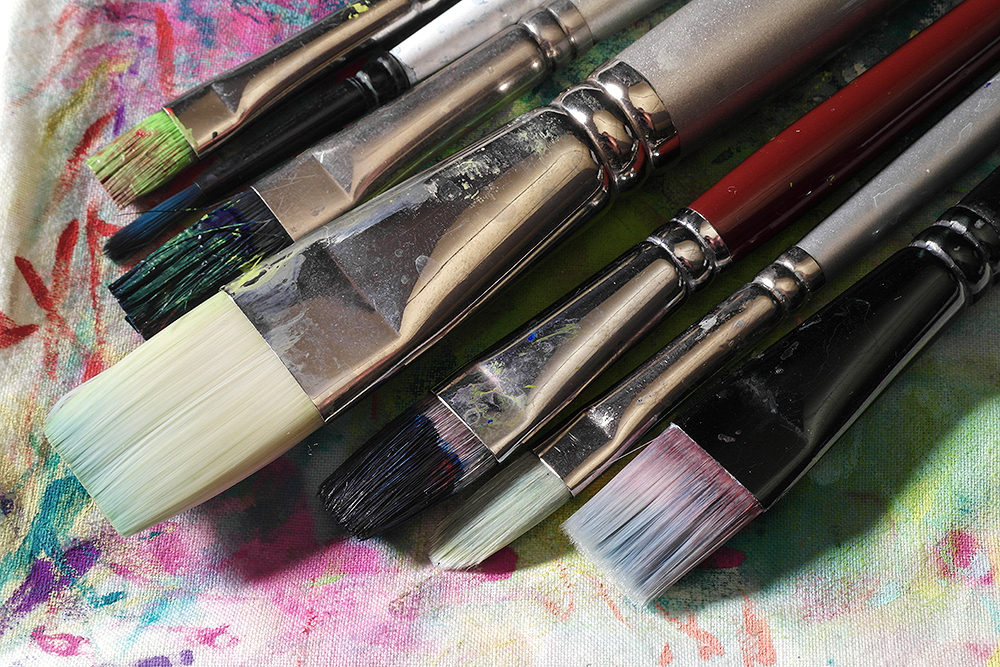
Brush cleaning and overall maintenance should be something you consider from the moment you pick up your brush. It’s also something you should be thinking about while you paint, as well as when you finish painting. Buying a broad range of acrylic brushes can be one of the more costly investments you make as a beginner. The last thing you want is for them to become crusty and unusable. Read below to discover our tips and tricks for keeping your brushes in the best condition, or navigate to the topics using the links below.
- Do I have to use an Acrylic Brush Cleaner?
- What are Artists’ Brush Cleaners and Soaps?
- Our Range of Artists’ Brush Cleaners
- How to Clean Your Acrylic Brushes Step by Step
- Can you get dry acrylic paint out of a paint brush?
- How to Get Rid of Acrylic Waste Water Responsibly
- Acrylic Brush Cleaning Hints & Tips
Do I have to use an Acrylic Brush Cleaner?
Some artists will clean their brushes and other painting tools with the first soap they come across. In most cases this ends up being everyday dish soap or hand soap. While these soaps clean brushes to some degree, they won’t leave your brushes in as good or clean condition as a dedicated brush cleaner. To extend the working life of your brushes as long as possible, we would always recommend using brush cleaner. Artists’ brush cleaners include nourishing oils and moisturisers that regular soaps don’t. The effect of regular soap can be drying, especially on natural hair brushes. Art soaps will not only clean your brushes thoroughly, but will also care for your brushes while doing so.

What are Artists Brush Cleaners and Soaps?
Artists brush cleaners and soaps are available in liquid or solid forms. Unlike household soaps, artist soap both cleans and cares for your painting tools without drying them out. The moisturisers and oils they contain will nourish your brushes and keep their hair in the best condition for longer. The objective for cleaning your brushes should be to get them as close to the condition that you originally bought them. Artist soap is the best product to do that.
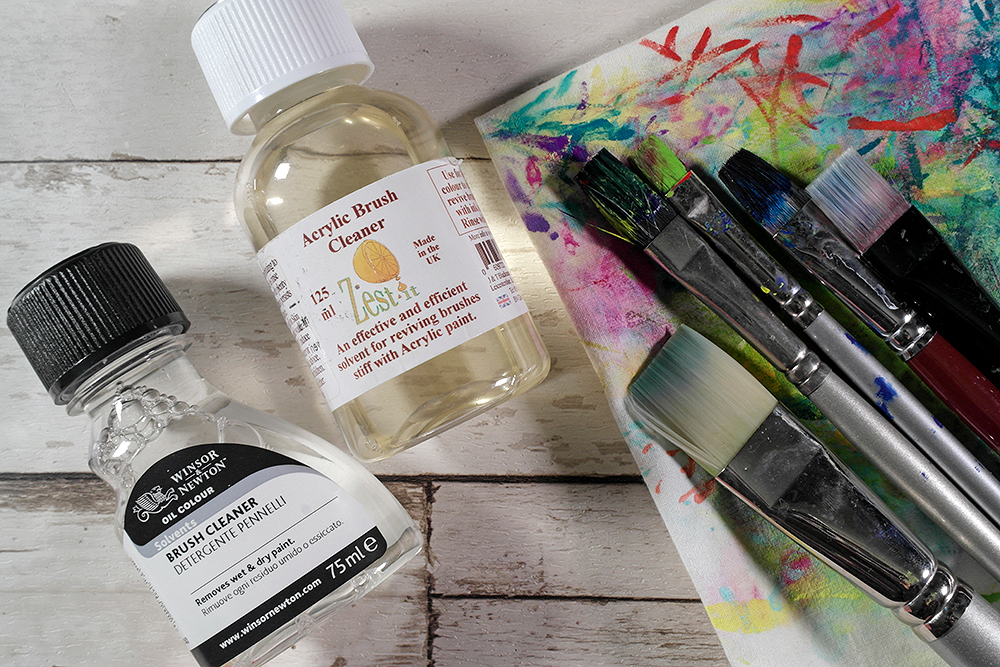
Our range of Acrylic Brush Cleaners
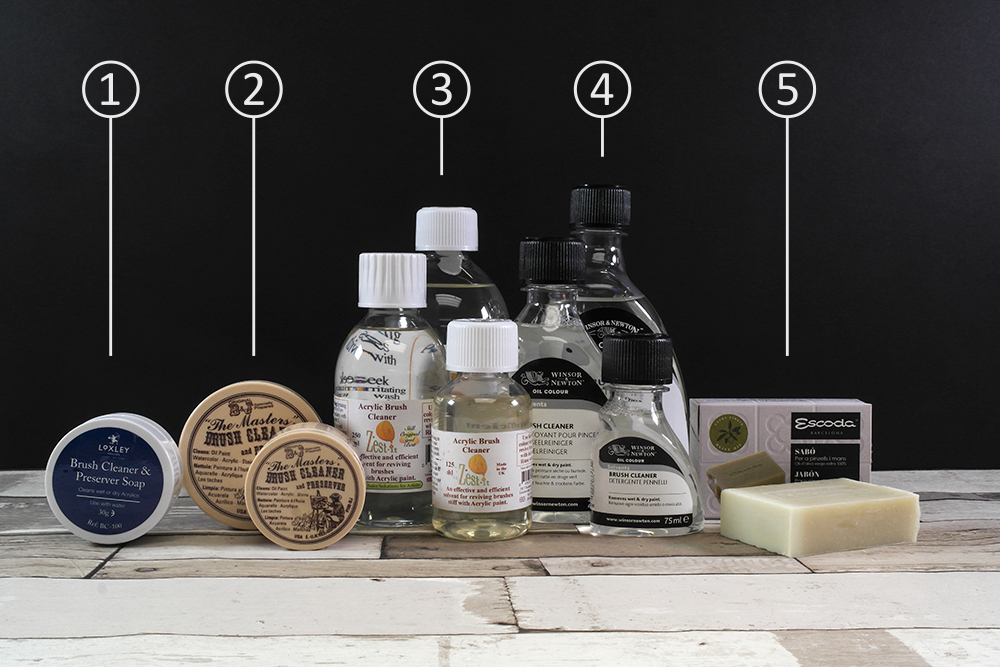
We stock a broad range of soaps and cleaners in the Brush Cleaning section of our website. Both solid soaps and liquid cleaners are available to suit all your brush cleaning needs. Our range includes:
- Loxley Brush Cleaner and Preserver – A solid soap contained in a shallow plastic tub. Wet brushes can be swirled into the soap and rinsed with water. It can also help restore the condition of hardened brushes.
- The Masters Brush Cleaner and Preserver – A deep cleaning and conditioning soap contained in a plastic tub. Like the Loxley soap, you use it by swirling a wet brush into it. It is a very popular cleaner that is fantastic at restoring your brushes to their original condition.
- Zest It Acrylic Brush Cleaner and Reviver – This is a solvent-based liquid cleaner. It is popular with artists who are looking for a strong cleaner to remove stubborn, caked on paint.
- Winsor & Newton Brush Cleaner – This is also solvent-based. Similarly to Zest It, it can be used to loosen dried on acrylic paint.
- Escoda Brush and Hand Soap – is a mild, nourishing soap block that provides gentle cleaning for both hands and brushes. While it won’t remove dried acrylic paint, it is great for removing wet paint and nourishing your brushes – especially natural hair.
Other Brush Cleaning Accessories
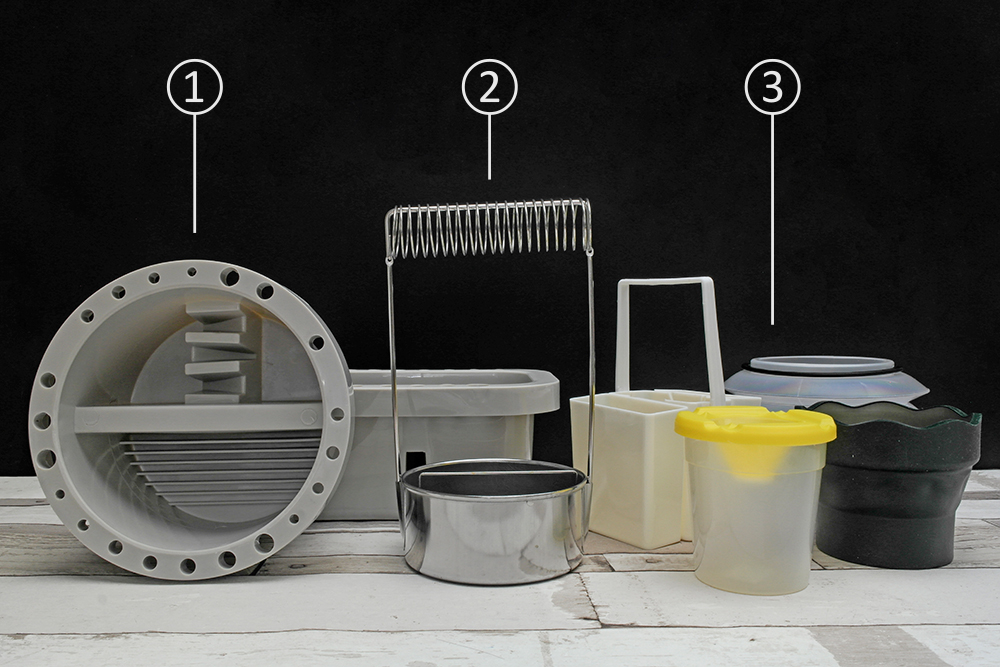
While you can get your brushes perfectly clean with artists’ soaps, we stock a range of brush cleaning accessories that can make your brush cleaning more efficient.
- Jakar Brush Tub with Palette Lid and Artists Brush Tub – These tubs are great for storing brushes, but also include wells for cleaning. Each well has ridges and raised areas that you can use to work paint residue out of your brush. One of the sections also has an angled wall that can be used to soak brushes.
- Aluminium Brush Washer – This accessory is essentially a well with a spiral handle that you use to suspend your brushes so they can soak or drip dry. In the well base there is a removable mesh that aids cleaning and also allows paint sediment to settle.
- Brush pots including the Faber-Castell Clic & Go Water Pot, Lantern Water Pot and Non-Spill Paint Pot. These paint pots are great for taking to classes or painting trips if you don’t want to carry around glass jars. The Trio Water Pot is particularly popular as it allows you to keep three lots of water – so there will surely be some clean water for your final rinse! If you are looking for a larger size, the Mijello Brush Washer Water Bucket is perfect. It holds 2 litres has three large chambers, two of which have cleaning ridges on the bottom. The handle also doubles as a brush drying rack.
- Rinse Well – The Masterson’s Rinse Well is a great brush cleaning accessory, especially if your studio doesn’t have a sink. It offers more stability than moving around multiple jars of water, and allows you to flush out the cleaning well with fresh water as you clean. Just the press of a button will drain water into the waste tank and flush fresh water in from the reservoir bottle. The well also includes moulded ridges to aid cleaning.
How to Clean Your Acrylic Brushes Step by Step
Regardless of your medium, it’s important to clean your brushes at the end of your painting session. In fact it couldn’t be more important when painting with acrylics! Improper cleaning can leave your brushes clogged with dry paint, that won’t shift with water alone. While you’re painting, try to remove as much paint build up from your brushes as possible. Doing so will mean your brushes will need less intensive cleaning at the end of your session. Follow the steps below once you finish painting to give them a proper clean.
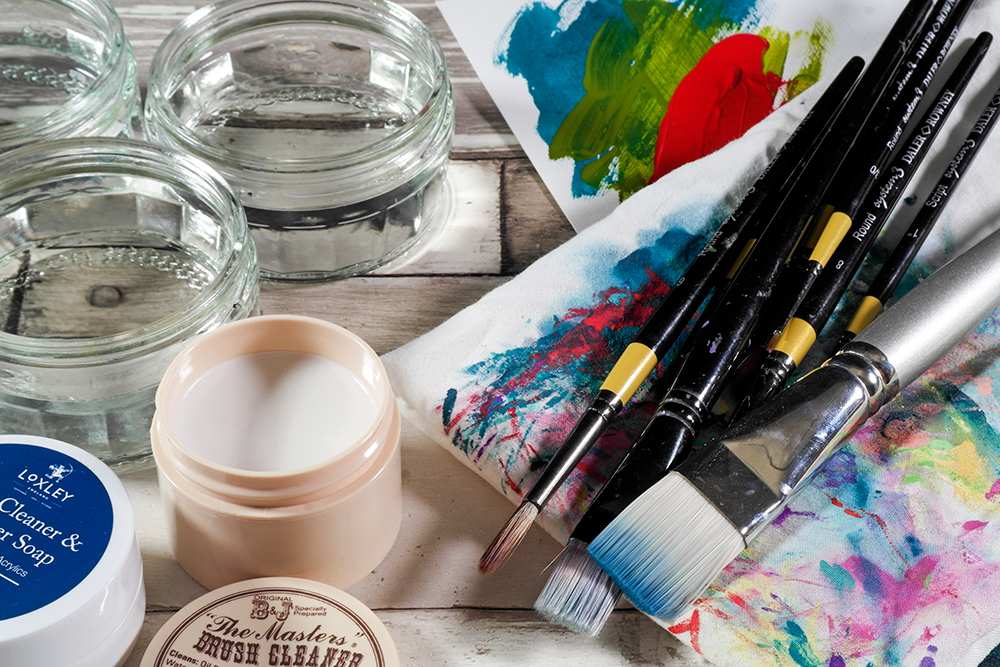
What You’ll Need
- Jars, buckets or pots for your water. At least three would be an ample amount for thorough cleaning – one for your initial rinse, one for soapy water and another with clean water.
- Paper towel for blotting excess paint. Painters rags are more environmentally friendly option if you’re looking to cut down on waste.
- A brush washer or something to hold your brushes upside down when they dry.
Method
Step 1 – Prepare your cleaning space
It’s much better to have multiple jars of water ready, rather than fumbling around emptying and refilling the same jars over and over. A jar or tub for each stage of the process will help ensure you always have clean water available for your final rinse. Having a single bucket for your acrylic waste water will also make disposal easier.
Step 2 – Blot excess acrylic paint from your brush
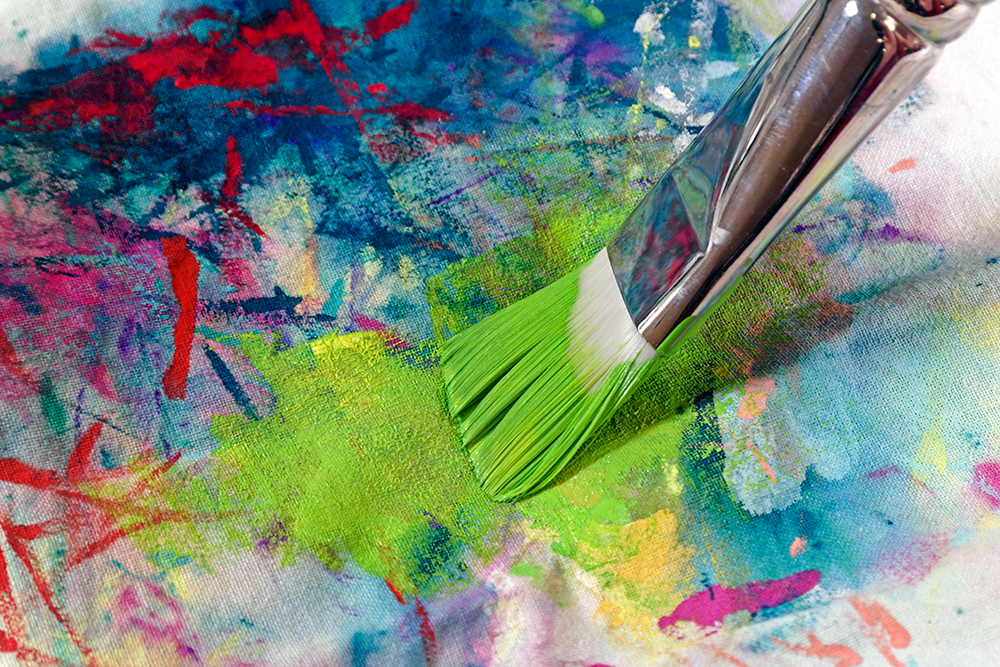
Do this on a paper towel or rag. If you use heavy body acrylic or mediums you can work it out from the base of the ferrule towards the brush tip with a gentle squeeze. Getting rid of the majority of the acrylic paint will reduce the amount of paint solids in your waste water and lessen the chances of releasing particles being into the water system.
Step 3 – Rinse Brushes in Water and Wipe Excess Acrylic Paint
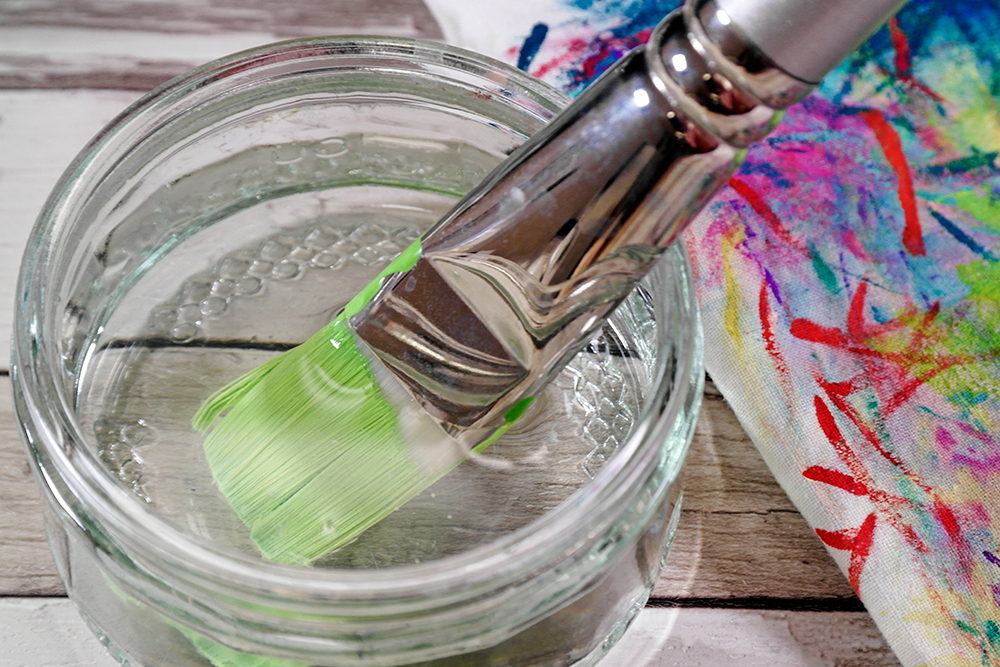
Use lukewarm water and try to remove as much of the paint residue as possible. You may need to shake off excess water, blot and rinse again to get rid of particularly stubborn paint. Using a brush tub for this initial cleaning is great as you can loosen the paint with the ridges on the tub. Once you’ve removed as much as you can, shake of excess water.
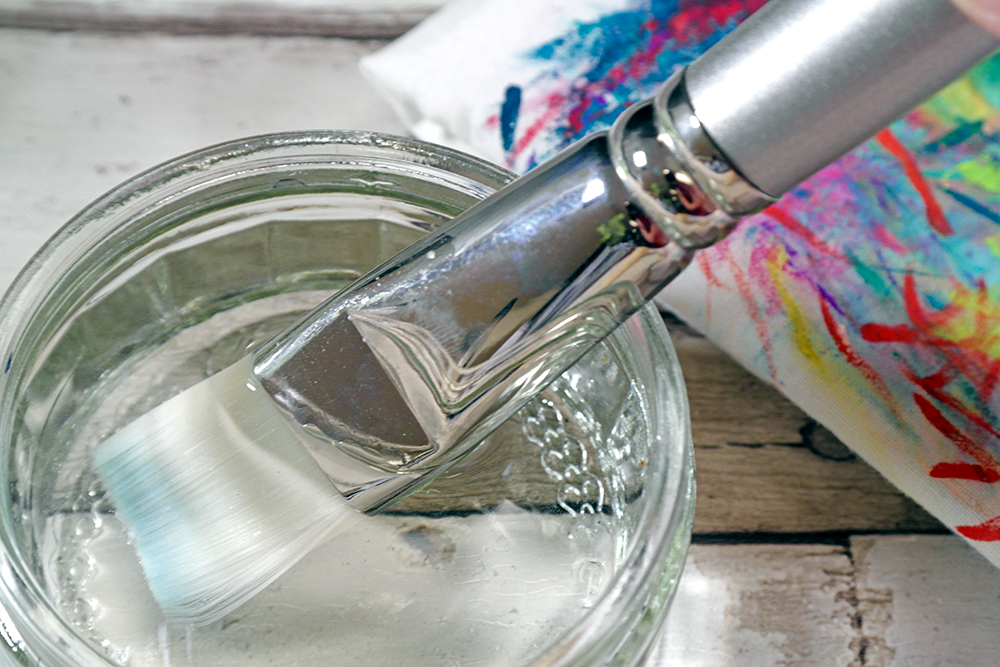
Step 4 – Use a Brush Cleaner or Mild Soap

Swirl your brush into your soap and gently build up a lather. Do not work your brushes into the palm of your hand to build up lather. Most brands advise against doing this as it can drive pigment into the skin. Although most paints are non-toxic, it’s best to be as cautious as possible when dealing with art materials coming into direct contact with skin. Instead, swirl the brush onto a ridged surface to create lather. Rinse your brush out in your second tub of clean water. Repeat this process until the foam is white and blot off as much of the soap residue as you can.
Step 5 – Don’t soak your brush
Give your brush a final rinse in clean water. Your third water jar should be full of completely clean water. As you remove the majority of the paint and soap there should be very little discolouration in the water. Rinse until your brush is thoroughly clean. Avoid Soaking Brushes – It Can Damage Them.
Step 6 – Dry Acrylic Brushes the Right Way

Reshape the brush tip and leave to dry. You can gently reshape with your fingers. Make sure you don’t twist your brush too harshly as it can damage the hairs. Don’t try to reshape your brushes in your mouth. It’s important to leave your brushes drying in the correct orientation. If possible, the very best option is to leave them drying with the brush tip facing down. This will ensure any residual water runs into the hair rather than into the ferrule. Water sitting in the ferrule will cause the glue to rot over time, causing the hairs to drop out. Water can also drain into the wooden brush handle, causing it to expand. This will make the paint and varnish on the handle crack. If you can’t dry your brushes upside down, lying them horizontally is the next best thing. Drying your brushes flat or with the bristles pointing down is a key part of acrylic paint brush care. It helps them keep their shape and stops water from loosening the glue inside the ferrule.
Can you get dry acrylic paint out of a paint brush?
It happens to the best of us. Even the most dedicated acrylic painters get distracted, and quickly brushes can seem to be unusable. But don’t throw your brushes away just yet! Some of our more intensive cleaners can be just the thing for removing that crusty, dry paint. In fact it may surprise you how easy it can be.
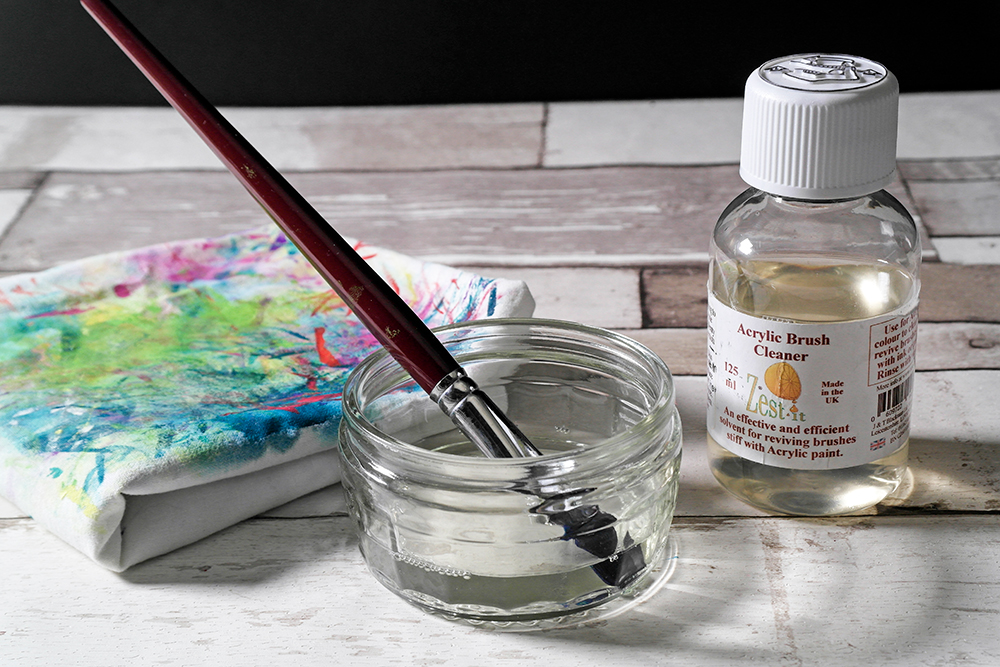
Acrylic paint dries to what is essentially a plastic film, so cleaning with water won’t cut it. While Master’s Brush Cleaner and Brush Cleaner & Preserver can get rid of a little dry paint, some brushes are so clogged they need a more intensive treatment. This is where a solvent-based cleaner can be particularly useful. Winsor & Newton Brush Cleaner and Zest-It Acrylic Brush Cleaner and Reviver are ideal for this purpose. You can even use Liquitex Pen Cleaner. If you’ve got a brush that looks to be beyond saving, follow these simple steps to restore it.
Step 1
Take an empty jar and fill it with enough cleaning fluid to cover just the tips of your brush. It’s important not to let the fluid touch anything other than the hair as the solvent can soften the paint and varnish on the brush handle. Use a product like the aluminium brush washer to suspend your brushes upside down to submerge just the tip.
Step 2
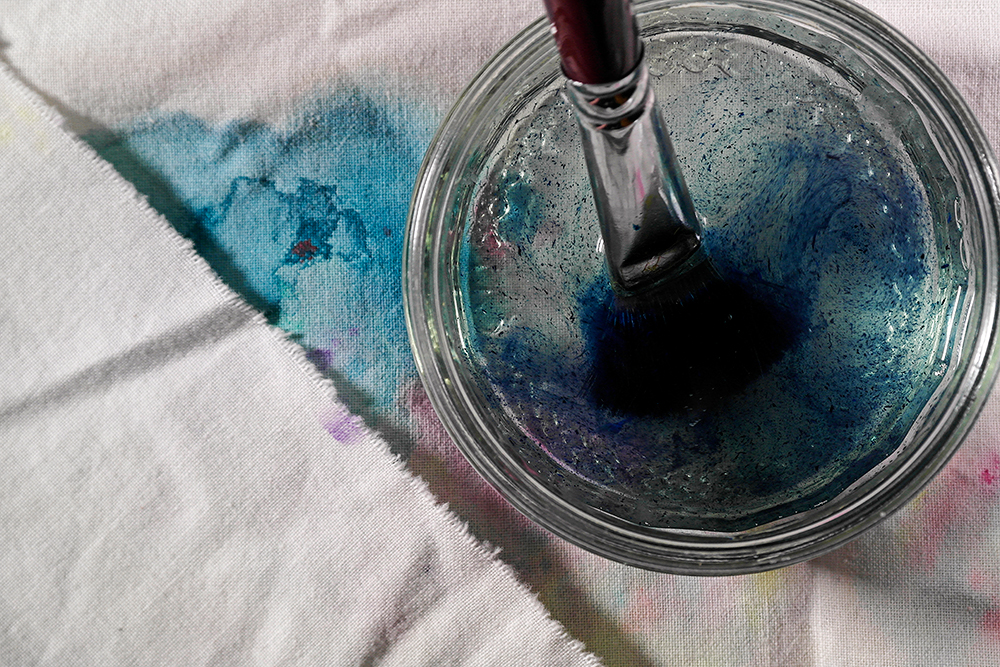
Leave your brushes to soak. Minimally clogged brushes may only need a short time soaking. Keep going back to check your brushes. You should notice that the crusty paint begins to dissolve. If not, leave them to soak a little longer. Heavily coated brushes may need up to 48 hours soaking before the paint will shift.
Step 3
Swirl your brush around in the cleaning fluid and then blot as much residue out as possible. Once you blot them you should be able to rinse and clean your brush using the steps above.
The images below show some clogged brushes before and after 48 hours soaking in brush cleaner. After soaking they were followed up by a thorough cleaning in Masters Brush Cleaner. While some of the hairs have a few stains and are slightly misshapen, the brushes are very flexible and still perfectly useable!
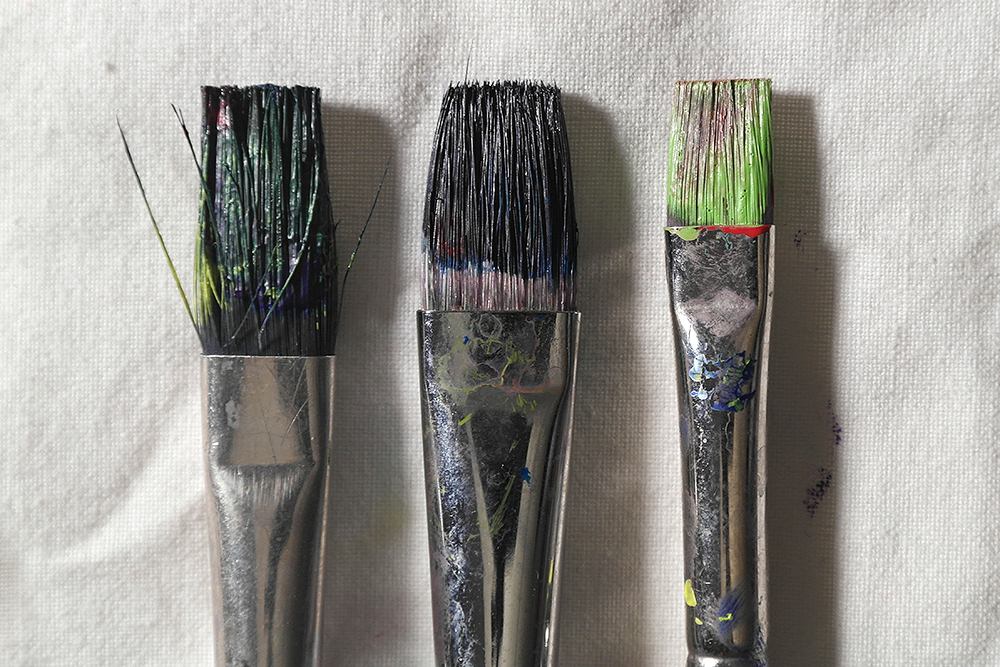
This isn’t a 100% guaranteed process – some brushes may just be beyond saving. But it’s worth giving it a try to avoid perfectly usable brushes going in the bin. While you don’t want to make a habit of letting your brushes get in this condition, this deep cleaning is certainly a lifesaver in emergency situations.
How to Get Rid of Acrylic Waste Water Responsibly
Cleaning acrylic brushes can generate a lot of waste water. It’s important that you dispose of water from both your painting and brush cleaning process in a responsible manner. Not only is dumping your waste water down the sink bad for your drains, it’s also damaging to the environment. You should dispose of all paint waste appropriately, but even more so with acrylics. Acrylic waste water includes small particles that you shouldn’t introduce to water systems. Some pigments are also known to disrupt marine life and cause environmental damage.
The easiest way to get rid of your waste water is to allow it to evaporate. This will leave a sludge of acrylic solids that can be left to dry and disposed of, or repurposed into a painting ground. Dried solids can be collected and disposed of according to your local waste regulations. Golden Artists Colours have some great advice on removing water-based paint solids from rinse water and general waste disposal.
Acrylic Brush Cleaning Hints & Tips
Cleaning your acrylic brushes is quite straightforward, and keeping a few of these hints and tips in mind will help keep the process efficient. Here are some general takeaways that will help you:
- When painting try not to let any acrylic paint dry on your brushes, especially close to the base of the ferrule. Dry paint near the ferrule is difficult to remove and will make it harder to reshape your brush. Rinse your brushes as you swap colours and tools to prevent build up.
- Never leave your brushes sitting in water. Not only with this misshape the tips, the glue will rot and the handles will crack.
- Never let your brushes dry with the tips facing upwards. Again, the glue will rot and the handles will crack.
- Don’t rinse your brushes under running water that goes down the drain. Allow water to run into a bucket or jar.
- Do not clean your brushes in the palm of your hand.
- Dispose of waste water accordingly.
- Allow your brushes to dry thoroughly before storing.
- Reuse any solvent-based cleaners. Allow the paint solids to settle then decant off the clear cleaner into a new container.
Look after your brushes and they can last a lifetime
Although it’s a bit of a chore, it is well worth taking care of your brushes. After all, you may have spent considerable amounts of money sourcing the brushes that are perfect for you! Getting into a cleaning routine is definitely worth it in the long run, and with proper care you will get many years of usability out of them. Even worn, clogged brushes can become interesting painting tools. Don’t be tempted to throw them in the bin straight away. See what marks they create, or try cutting them down to make a unique shape. You might find that they bring all kinds of interesting textures to your paintings.
Visit our website to see our full range of Brush Care and Water Pot accessories, or visit our Acrylic Brush department if you’re looking to replace some of those brushes that are beyond repair!


I just finished my first dry brush with acrylic. This article was a great help!
That’s great Michael! Glad to hear that the article was helpful.
Great article! I care for my brushes but learned important ways to improve what I do. Thank you! Will keep this article as a resource and reminder in my painting journal.
Thanks for your feedback Eve! We’re glad to hear that you found the article helpful!
thank you for the article
Great lesson. Now pls give the same lesson for oil color brushes… please.
Hi Naomi. Thanks for your comment! Glad to hear you found the blog post useful. We do have an article for cleaning oil painting brushes in the pipeline, so please keep checking back!
Suppose it is good for sales.. how many people use natural hair for acrylics?.. synthetics do not benefit from those fancy nutrients .. wipe off any excess… keep your brushes wet.. a clean pot and a dirty one.. and your paint will not cake.
And your palmar skin is thick and impervious to pigments as long as you avoid the historic mercury based reds… just don’t lick it.
Great tip to save your waste and reuse as a painting ground.
Oh my….I have been doing it all wrong for too long. No wonder they are a mess. Thank you for this great lesson.
I’m relatively new to painting my pottery with acrylics, and I’m experiencing some problems. I’ve cleaned with both water and brush cleaner. After reading your article, I now know the specific products and cleaning instructions. So thank you for that.
Even brand new brushes after only one use, start losing their shape (hairs going every which way), fraying and the tip of the brushes always curling to one side. I don’t know what I’m doing that’s causing these problems.
I would very much appreciate your advice, because I’m spending so much money replacing brushes after just a few uses.
Hi Dakota. Sorry to hear about the trouble you’re having with your brushes. Brushes could be misshapen for many reasons – for example if there is paint build up in the ferrule or if brushes are left sitting tip down. Good quality synthetics – like our Pro Arte Acrylix Brushes – are incredily durable and should snap back to their original shape if they’re regularly cleaned and maintained properly. If your brushes are synthetic and are slightly misshapen you can reshape them in boiling water. Just boil some water, pour into a cup then dip the end of your brush into the water. This should straighten out the fibres and restore their shape.
Boiling water , yes, but need to shape and fix with cooling whilst still shaping.
oooops….we’ve all been there! Good luck…Jb
Useful article, thanks folks. I’m now going to try and revive some brushes I mistakenly put into a pot of water….minus the water and left all day!