
An Introduction to Line and Wash: Which comes first pen or wash?
Line and wash is where drawing and painting meet. If I had a penny for every time I’ve been asked which comes first, ink or wash, I would be a rich woman! The honest answer is whichever you wish and swapping things around can keep your work fresh.
- Layers need to be dry before switching your media
- Often the media you use first tends to (not always) play the most important role
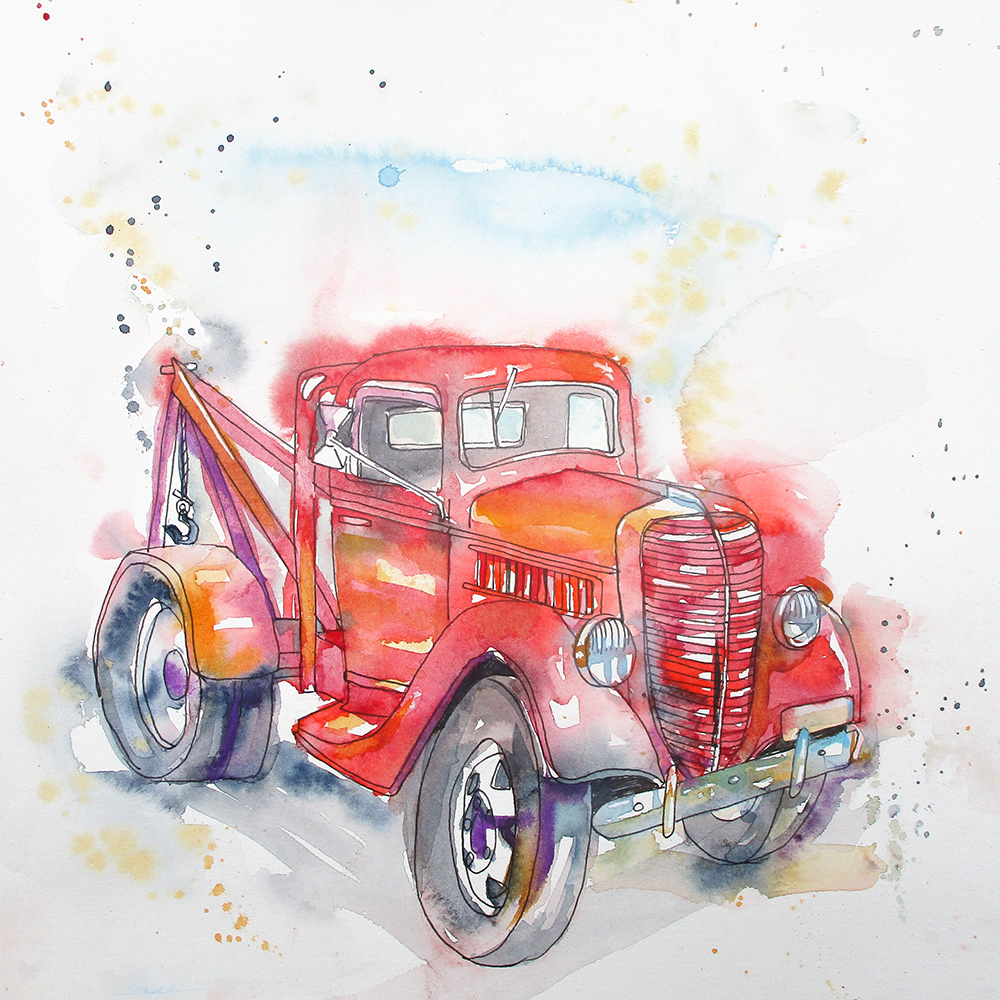
If you want to concentrate on edges and pattern, developing detail then maybe start with ink. If emotion and atmosphere is important to you, reach for the washes first. We are always looking to play to the strengths of the different media, so that the sum of the line and wash adds up to more than the individual elements.
It doesn’t have to be either/or
You can always add more colour or more line once the previous work is dry, but it is hard to take it away. So stop when you are 85-90% finished, whichever media you start with.
If you want to loosen up your watercolour why not do washes first and then regain control with line? Or you might save a failed painting with the addition of line work. It can add the contrast and impact you might be missing.
Try it both ways!
Select a simple subject from the fruit or veg basket and try drawing/painting it starting with the line first and then starting with the colour first. Try staying within the lines, try splashing outside them. It’s amazing how quickly you will develop your personal style and preference.
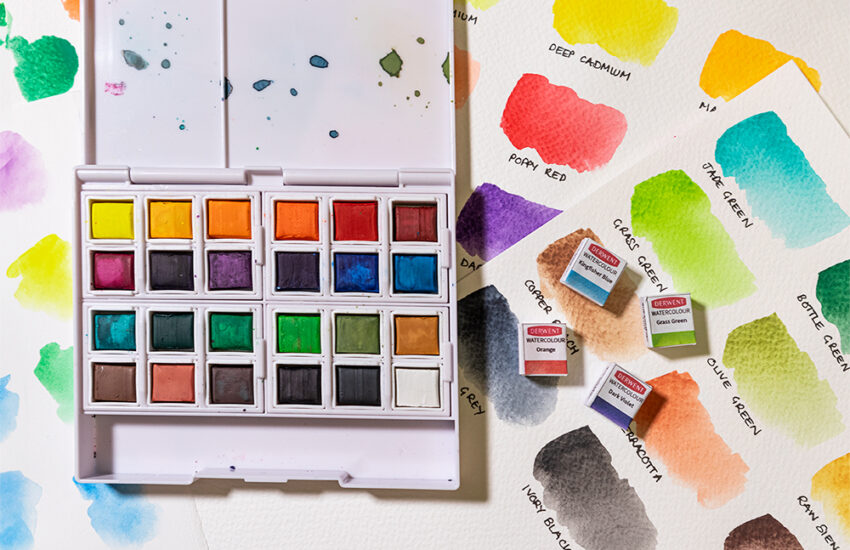
Materials You’ll Need
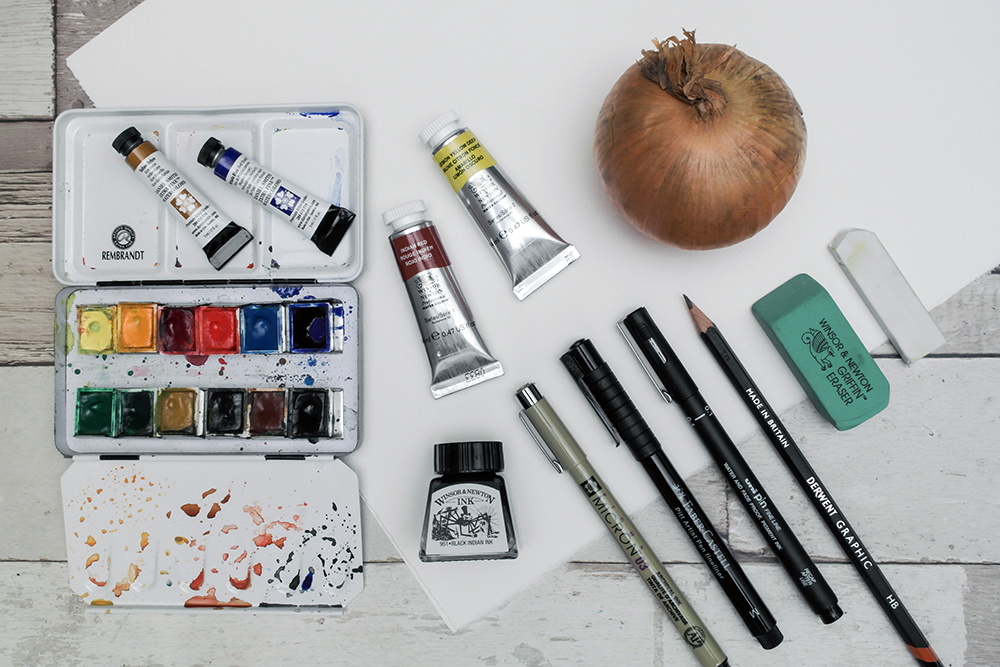
- Watercolour paper – NOT (Cold Pressed) surface, 140lb/300gsm
- Waterproof fineliner pen in black 0.4mm (if you have a few other widths or types of pen you can add them into the experiment)
- Watercolour paints and watercolour accessories of your choice
- Graphite Pencil and a pencil eraser
- An item of fruit or vegetable which gives enough detail to make a fun drawing
Pen First
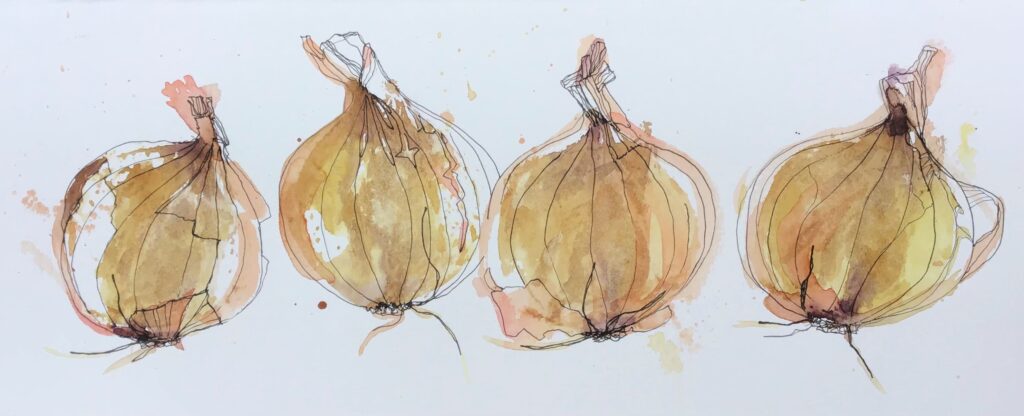
I chose an onion and regretted it when I cut it in half!

If possible don’t do a pencil under-drawing, be brave and start drawing your subject. Draw it at least twice, hopefully more. Draw it from different angles and make a pattern with it on your paper. Vary your marks, add texture, break up the lines, use different pen widths. If you have other pens and ink, please feel free to use them, just make sure they are waterproof as we will be adding washes and you do not want a muddy puddle!
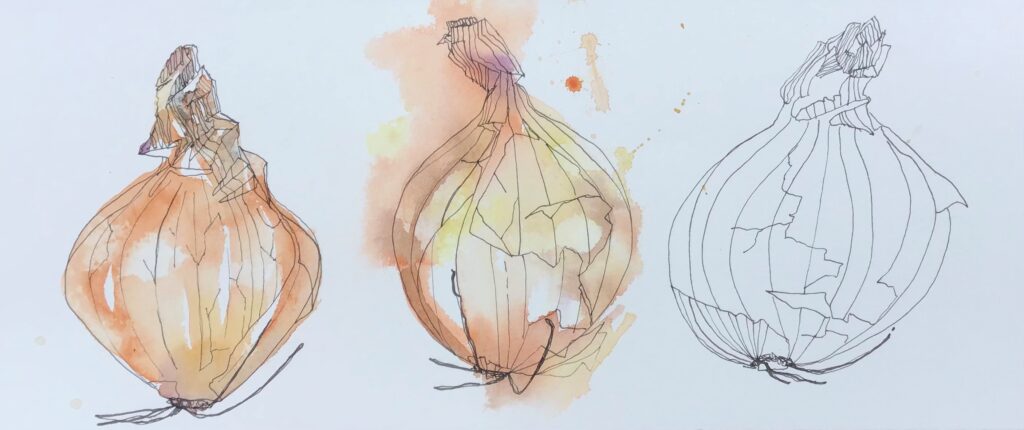
Now add watercolour washes. On your first aim to stay in the lines, on the second deliberately ignore the lines. If you have done more, wet the paper and paint the subject wet in wet. Add spatter to another. Spritz the next one with a water spray to soften edges in a random way. Finally, pick out the best bits from the previous ones and combine them.
Wash First
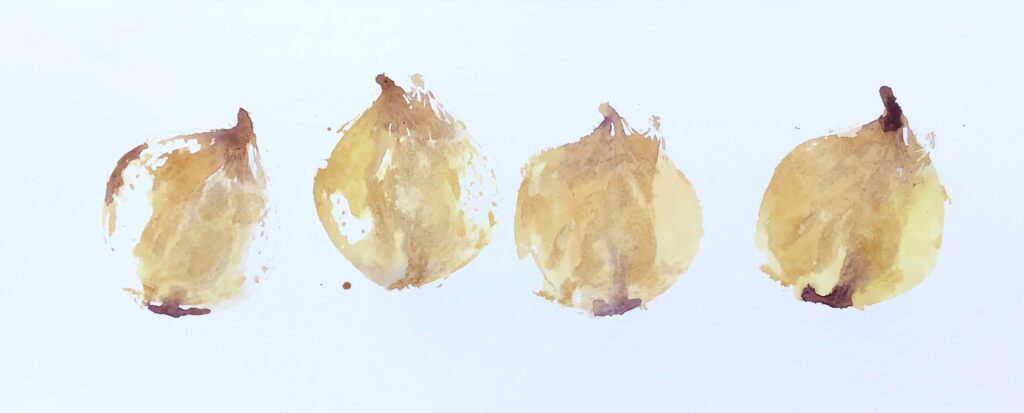
Paint your subject using appropriate watercolours. The temptation is to paint it precisely, so if your subject can be used to create a print, it makes a great alternative. If you struggle to loosen your watercolour (and wish to), then this will really help you. It gives a naturally simple and loose layer.
Once dry, use your pens to draw your subject. Again vary marks, break up lines and draw from different angles. If you have printed you might want to outline some of the paint marks or ignore them all together. Do you need to add further watercolour? Avoid the temptation to tidy things up!
Compare and contrast
Now, stop and compare the drawings. Which has more energy and charm? Which has captured the essence of your object? I am not aiming for photographic likeness but rather the gestalt – the very being of the subject.
You should be able to see the strengths and limitations of both approaches and be well on your way to finding your favourite way of working.
If you would like to see this exercise in action (with a pepper, not an onion), hop over to YouTube:


Thankyou, can’t wait to get started,
Enjoyed this … great advice and clearly given . Thanks 🙏
Great technique, we’re starting up an art group once a week and I think this technique will be great for new comers and fun too