 Paint
Paint Drawing & Illustration
 Paper & Canvas
 Brushes & Painting Tools
 Accessories
 Crafts
 Beginners
 Brands
 NEW
NEW Gifts
Gifts Offers
Glazing
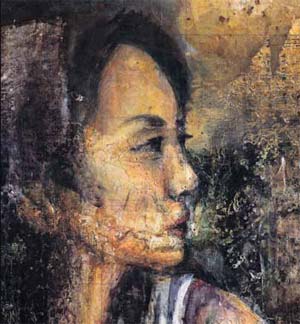 Acrylic glazing is a process where a medium is used as a base and tinted with transparent or translucent colours, creating a colour mix that contains transparent layers. Glazing produces rich surfaces with great colour depth and jewel-like finishes. Imagine holding up a red lens. Now hold a blue lens in front of it, and look at the purple colour that results from the first two. You’ve just made use of the basic painting concept of glazing, or mixing colour by using transparent layers. Glazing produces rich surfaces with great colour depth and jewel-like finishes.
Glazing was the signature method used by artists like Leonardo da Vinci, Rembrandt, and Vermeer. They glazed because the pigments in their palette would turn black if they mixed them together directly. If they wanted a purple, they had to lay down a layer of transparent red, let it dry, then put down a layer of transparent blue to visually blend the colours, rather than physically mixing them on the palette. The light passing through the transparent layers gives the painting a special glow, which can shift and shimmer, depending upon the light. In this way, a very real depth of the painting can be achieved.
Liquitex Soft Body Acrylic Colours are ideal for glazing.
Choose transparent colours. Transparent pigments will deliver the best results producing clear, clean glazes. Most modern pigments have very powerful tinting strength, so it only takes a little to tone the medium.
Use the following ratio for the ideal degree of flow and brushability:
Transparent Colour, Soft Body (1 part)
Glazing Medium (10 parts)
Note: For more “open time” add a small amount of Liquitex Fluid retarder to the mixture to slow drying or lightly mist the working surface with Liquitex Palette Wetting Spray.
TECHNIQUES
Mix the glaze with your palette knife rather than your brush. If the glaze is still too thick, add some Airbrush Medium and stir the mix completely.
Choose an area you are comfortable you can cover in about 15-20 minutes time. Do some practice strips to get a feel for the media.
Brush your glaze colour using a soft bristle brush. Brushing in a single, uniform direction will create a smoother glaze. Let this layer dry for approximately 30-40 minutes.
You can now add a second glaze by repeating the process, with a different colour. You'll find that, by building layers of colour, glazing helps you bring a deep, burnished glow to your images.
In order to create thick relief glazes using paints and gel mediums, it is advisable to apply several successive layers. To achieve the highest degree of translucency, allow each layer to fully dry before applying the next. Over time the colours will become brighter and deeper as the gel clarifies.
The more glaze layers, the more visual depth the image will have.
Gloss Medium and Slow-Dri Blending Fluid can also be used for glazing.