 Paint
Paint Drawing & Illustration
 Paper & Canvas
 Brushes & Painting Tools
 Accessories
 Crafts
 Beginners
 Brands
 NEW
NEW Gifts
Gifts Offers
Airbrush Application
Airbrush Application Description
Beginning Considerations
First, as simple as it sounds, ask yourself ‘What’s the main reason I want an airbrush?’ How you answer this question should help you learn what airbrushes are best suited for your immediate needs.
After you have practiced using the airbrush, its abilities and limitations emerge, you may want to purchase another airbrush or spray gun if it makes sense. This approach saves money and time, and reduces the chance of buying the wrong equipment. Many airbrushes sitting in closets or on shelves aren't used simply because they were not what the artist needed at the time.
Purchasing an Airbrush
There are over a dozen airbrush manufacturers, each with several airbrushes for the most exacting applications. Some manufacturers have in excess of 40 models from which to choose. As overwhelming as this may be, keeping focused on one's individual criteria narrows the choices.
Seek Professional Advice
The best source for a beginner can be a seasoned “vet” who can offer insight on how to get started and what equipment they prefer. After all, they too were beginners at one time, and know well what one goes through making these decisions. Personal acquaintances, art teachers, and local professionals will usually give free advice and may offer beginning airbrush lessons. Airbrushing magazines have many articles and artist reviews that cite what equipment they prefer. Keep in mind that these professionals have very specific requirements and typically use several airbrushes to meet all of their spraying needs.
How an Airbrush Works
The way an airbrush works is actually quite simple. Air and paint meet and the air forces the paint to break apart into small droplets. This process is referred to as “atomization”. Atomization controls the size of the paint particles.
In a garden hose slightly opened up, water passes through the nozzle, and results in a fine mist because a small amount of flowing water is under a high degree of pressure. The same nozzle at the same water pressure turned wide open allows the water to flow freely and the pressure propels the water a greater distance because it is a steady stream instead of being atomized into fine droplets.
In an airbrush, instead of water pressure dictating the atomization, it is accomplished with air pressure. The paint and air meet right in front of a tapered point known as the needle. The droplet size is determined by the airbrush needle size, the air pressure setting on the compressor (measured in pounds per square inch, or “p.s.i) and the fluidity of the paint. Getting this combination under control can be the most difficult aspect of spraying.
The Airbrush Needle and Nozzle
All airbrushes work on the same principle; air and paint meet at an exact point in space. At that point in space a tapered "needle" projects the combined air and paint outward. Airbrush head assemblies have amazing baffling systems funneling air around the needle and atomizing the paint evenly. Instead of one air stream there are several and that helps to atomize the paint into consistently sized droplets.
Fine line spraying requires very delicate needles tapered to a precise point. The finest detail airbrushes have a nozzle opening size of .18mm. Large commercial spray guns, such as those used for automotive painting have blunt needles that do not have much of a taper. They are made to fit into large nozzles (usually from 1.0mm to 2.3mm) meant to deliver higher volumes of paint. Larger nozzles can spray thicker paint resulting in faster coverage.
The nozzle is the part of the airbrush head assembly in which the needle rests. It is tapered exactly the same as the needle it holds. On a single-action airbrush, when the screw is twisted, it widens the space between the needle and nozzle by unscrewing the nozzle cone. In a double-action airbrush, when the trigger is pulled back, it moves the needle away from the stationary nozzle. The farther back the needle moves, the larger the space between the needle and nozzle.
NOTE: Airbrushes are devices that rely on proper care and cleaning. Always spray plenty of water to flush out paints between colours and before and after spraying. This reduces the frequency of having to perform complete airbrush breakdowns and cleaning out dried paint inside the airbrush.
Airbrush Types
Single-Action vs. Double-Action Airbrushes
Single-action is similar to an aerosol can of spray paint. The finger presses the cap (also called a finger button) and it begins to spray. The amount of paint flowing out is controlled by twisting a knob or screw located near the tip. This type of airbrush is also referred to as an "external-mix," because the air and paint mix in front of the needle. There are few moving parts requiring regular cleaning, making it an easy airbrush use and maintain.
The single-action airbrush does not have the precise control offered by a double-action; however, a single action is a great beginner's brush that will always have uses no matter how advanced an artist becomes. Smooth gradations are easily accomplished, and for many artists, this will be the only airbrush they will ever need.
A double-action airbrush offers much greater control and is essential when producing fine lines and thick-thin strokes (the classic "dagger stroke"). These are also known as "internal-mix" airbrushes because the air and paint mix inside the nozzle. The double-action airbrush has two trigger movements. As with the single-action, airflow is controlled by de-pressing the button (resting on top of the “finger lever”. The amount of paint however is controlled by pulling the finger lever back instead of twisting a front knob. The farther the lever is pulled back, the more paint comes out.
Precise control and line variation is achievable with this kind of airbrush. Fine lines and lettering is much easier and experienced, "freehand" (painting without the aid of masking materials) airbrushers can control a double-action to produce photo-realistic artwork.
Siphon-feed Vs. Gravity-feed Vs. Side-feed Airbrushes
How the colour cup and/or bottle are attached to the airbrush body is different for various models of airbrushes. This feature controls the amount of paint loaded up before having to refill. It also plays a role in the comfort and use. For example, a large colour cup on the top of the airbrush gets in the way of the line of sight when spraying and can feel off balanced to some. A small cup can be annoying when you have to constantly refill it during a large painting project.
Siphon-feed means that the colour-cup attaches from underneath the body of the airbrush. Air suction pulls the paint from the cup to the nozzle area, where it comes in contact with the air. This type of airbrush is useful when spraying for extended periods of time because the colour-cup (typically 1/4 ounce capacity) can be taken off to behave more like a gravity feed airbrush and a bottle can be attached for larger volumes of paint.
Gravity-feed essentially means that the colour-cup is on top of the airbrush body. Most models have an immovable colour-cup. Although larger airbrush models can have paint reservoirs of 2 ounces, gravity-fed airbrushes are made for detail, where small amounts of paint are applied at one time. Because the paint is in an open colour-cup, some models offer a separate cap to keep paint from spilling. They have a tiny hole in the center of the cap to prevent a vacuum from developing. It is essential that this hole be open to maintain proper paint flow. Siphon-feed bottles also have this hole on the cupcap for the same purpose.
Side-feed colour cups attach on either side of the airbrush rather than on top (gravity) or bottom (siphon). This feature allows the artist to choose which side they prefer to have the cup to suit their holding style. In fact, these airbrushes can have a gravity feed style colour cup or a siphon feed bottle attached as desired.
Mixing Paint to a Sprayable Consistency
Aside from proper technique, good spraying is a result of the right combination of spray equipment, proper air pressure and adequately thinned paint. When one starts an airbrush project, all three aspects can be adjusted and refined before and during spraying. If the appropriate airbrush has been selected, then the paint needs to be at the proper consistency for spraying.
A typical airbrush spray paints between 40 and 80 cPs. “cPs” is shorthand for centipoise and is used to measure paint’s viscosity. Using a detail airbrush for precision work means working with low viscosity paint and low pressure settings. Larger areas require bigger airbrushes and higher pressure settings. Spraying large area with too thin of a paint results in more paint in the air instead of on the art surface. If the paint is too thick, then it doesn’t flow through the airbrush properly resulting in spatter, grainy paint patterns if it sprays at all.
The paint not only needs to be the right viscosity, but smooth flowing within the airbrush during spraying. This combination of thickness and flow is called consistency. Thinning with water can be done if the paint has the other key properties. If not, then the use of GOLDEN Airbrush Medium or Airbrush Transparent Extender is required. These products a thin but also add retarders and flow improvers to transform the acrylic paint into airbrush paint. Basically, the paint needs to flow freely and readily. With experience, mixing paints by the feel alone is possible. Until then, stick to the recipes suggested for each product. Some products will be ready to spray right from the bottle, such as the GOLDEN High Flow Acrylics. Some colours may need to be altered depending on the equipment and application but beginning airbrush artists can greatly benefit from product ready to spray.
Adjusting Air Pressure
Equipment manuals usually provide initial setting air pressure based upon the intended use. Some have more details for the kinds of paints and surfaces. These are starting points and it is expected adjustments are likely needed. If the paint seems like it’s the right consistency, and the equipment is worked well during startup (more on this later), then try increasing the air pressure a little and see if the spraying quality improves.
Air Sources
What is an "Air Source"?
An airbrush's air source is where the pressurized air (that propels the paint) comes from. Aerosol cans, CO2 tanks, air regulators, air compressors, air tanks, even tire innertubes can be considered to be air sources.
A reliable air source can be a bigger investment than the airbrush. If an artist is just exploring the possibilities of an airbrush with the least amount of investment, rent or borrow the air source.
Selecting the Proper Air Source
The type of needed air source is dictated by three factors:
- the type of spray equipment
- the kinds of spraying
- the amount of work
Each air source has its own pros and cons. Some require constant refilling. Some are loud. Some are just simply unable to deliver the level of performance required for the work you want to achieve. Generally speaking, small projects with short spraying times and low viscosity paints can be accomplished with a wider range of air sources. Bigger projects where there is a lot of spraying involved (or a lot of precise detail work), require a source of constant air pressure for long periods of time require compressors or CO2 tanks. Other considerations cost, space, noise constraints, and availability of electrical power may force one to choose one source over another.
Below is a Quick Reference Chart showing the pro's and Con's of the more popular air sources
| Air Source Type | Positive Attributes | Negative Attributes |
|---|---|---|
| Compressed Aerosol Can | Low cost, constant air pressure, silent, very portable | Low pressure, runs out fast |
| Tire Inner Tube | Low cost, refillable, constant air pressure, silent, portable | Low pressure, runs out fast, pressure qickly lowers |
| Air Tank | Low cost, refillable, very portable, various sizes, pressure regulator | Medium pressure, runs out fast, pressure quickly lowers |
| Air Regulator/Compressor (without Air Holding Tank) | Inexpensive, long life, small size | Constantly runs, gets hot, low pressure, pressure drops while spraying, noisy, uses electricity, pulsating air flow |
| Oil Lube Air Compressor | Moderate pricing, reservoir tank, higher pressures, automatic shut-off, built in regulator, constant air |
Noisy, needs frequent oiling, oil can get into airline, uses electricity, tank needs frequent 'bleeding' of moisture |
| Oil-less Air Compressor | Moderate pricing. reservoir tank, higher pressures, automatic shut-off, constant air, built in regulator | Noisy, uses electricity, tank needs frequent bleeding of moisture |
| Silent 'Pancake' Compressor | 'silent', automatic shut-off, constant air, built in regulator, compact size. | Expensive, uses electricity, needs frequent 'bleeding' of moisture |
| CO2 Tank | Truly silent, built in regulator, moderate pricing and/or rentable, no electricity needed, portable, long lasting, moistureless air source | Needs refilling, all connections must be secure to avoid freezing up, moderate danger of compressed inert gas |
Paint Choices
How to Know Which Type of Paint to Buy
Golden Artist Colours produces several lines of acrylic paints that can be sprayed. However, with the exception of High Flow Acrylics, they all require thinning with a medium and/or water to reduce viscosity. Rather than looking at this as an inconvenience, this allows for absolute control of their paints. Modify a base paint to suit your immediate needs. Of the wide array of GOLDEN paint lines, the Fluid Acrylics and the High Flow Acrylics are the best products to use through an airbrush. Other paints can be used of course, but their thickness means higher dilution with water and medium, impacting pigment load.
Mixing Acrylics
Thinning Fluids Acrylics for spraying is as simple as mixing 1 part paint to 1 part Airbrush Medium. This mix should spray well at around 4050p. s.i, and in airbrushes of 2.5mm or larger. However, each paint has its own unique formula and some may require additional thinning with water. More Airbrush Medium can also be used instead of water but it can slow the drying time down of the paints if over-added. This mixture may be used for most airbrushing applications.
Thicker paints like Heavy Body Acrylics should be first thinned by adding water and mixing carefully until a pourable consistency is achieved. At that point, add 1:1 Airbrush Medium to the original mixture.
If the paint is going to be used transparently, the GOLDEN Airbrush Transparent Extender can be a better choice. Start at 5 parts Airbrush Extender to 1 part paint and adjust transparency as needed.
On launderable garments, exchange the Airbrush Medium/Extender for GAC 900, a heatset fabric medium. This provides a soft hand and improves launderability.
As with learning how to use any tool or try a new artist technique, learning how to airbrush takes time and patience. Take the time to research equipment and techniques, and practice as much as possible on cardboard, paper or whatever test pieces you can work on.
Spraying, Drying and Masking
Modifying Acrylic Paints
Each project requires paints with specific properties. Textile work needs a paint system that will remain soft and flexible so it won't crack when worn and laundered. Harder, less pliable paints have better adhesion and resist peeling for nonporous, rigid supports such as metal. Before beginning a project understand the factors affecting the artwork upon leaving the artist’s studio.
Most of the GOLDEN paint lines have very similar acrylic resins. They are flexible, but not so soft that it remains tacky when dry. This is ideal for artwork applications on canvas and some textile work, but they need to be modified for other kinds of applications.
The Difference Between Airbrush Medium and Airbrush Transparent Extender
GOLDEN Airbrush Transparent Extender is essentially a "colourless" sprayable paint that can be mixed with or sprayed over acrylic paints. The hard acrylic resins in the Extender reduce pullup when masking is removed. GOLDEN High Flow Acrylics (HFA) have the same hard acrylic polymer. This is why they work well with "loose" masks or lowadhesive masking films.
GOLDEN Airbrush Medium is used to blend into the acrylic paints to make them sprayable. Also having hard resins, it is designed to most effectively work with the Fluid Acrylics at a 1:1 ratio. Thicker paints will require more Airbrush Medium.
Generally speaking, the majority of needs can be met with GOLDEN HFAs and/or the Fluid Acrylics (modified with Airbrush Extender and/or Medium).
Thinning Acrylics Properly for Spraying
GOLDEN Artist Colours products can be modified to make sprayable including GOLDEN Heavy Body Acrylics, Fluids Acrylics, Iridescent/Interference Colours, High Load Acrylics and Matte Fluid Acrylics can be adjusted for spraying. Only HFAs are ready to spray. Rather than an inconvenience, mixing paints offers absolute control of the paints. The key is to know the pros and cons of each paint line and medium.
| Typical Airbrush Applications | Suggested GOLDEN Paint Lines | Suggested GOLDEN Mediums | Suggested Air Pressure (P.S.I) |
|---|---|---|---|
| Illustration (hot-press board) | Airbrush colours, fluids | Airbrush Transparent Extender | 20 - 40 P.S.I |
| Fine Art (canvas, sign board, etc) | Airbrush colours, fluids, High Loads, Heavy Bodies | Airbrush Medium or Transparent Extender | 25 - 50 P.S.I |
| Automotive (helmets, gas tanks) | Airbrush colours, fluids | Airbrush Transparent Extender | 25 - 50 P.S.I |
| Textile (tee-shirts, leather, etc) | Fluids | Airbrush Medium | 40 - 70 P.S.I |
Utilizing Tools & Techniques
The airbrush artist typically employs several application methods to create an artwork. While some "freehand" airbrushers paint using only an airbrush (without any other tools or masking), the majority of airbrushers use masking materials to render their art. The preliminary layout is just as important in airbrushing as it is in other painting techniques.
Perhaps the most misunderstood concept about using an airbrush is when to lay the airbrush down and use the other tools and techniques to compliment the sprayed areas. Commercial illustrators will use subtractive techniques and utilize the whiteness of their illustration board. Scratching, erasing, and ammonia-based cleaning products are used to remove certain areas of paint.
The effectiveness of brush, pencil & ink painting should also not be disregarded when airbrushing. It is much easier to detail with a paint brush than with an airbrush. When used together, they will increase the overall realism.
Preparation Description
Mixing and Storing High Flow Acrylics Paint Blends
An important step in preparing for airbrushing involves making sure the paints are properly mixed. GOLDEN High Flow Acrylics are made with lightfast pigments. When these dense particles are mixed with a thin medium, they have a tendency to settle to the bottom of the container. This "soft settling" is the result of phase separation, where the materials in the paint physically separate: the densest ingredients go to the bottom, and the rest form layers above. In colour blends, dense pigments like Titanium White commonly form the bottom layer.
GOLDEN Artist Colours puts a ceramic mixing ball (technically known as a "barundum") in every bottle of HFA. Paint can be mixed easily by simply shaking the container. Begin each day of painting by shaking all of the bottles of HFA intended for use that day. This vigorous mixing will make the paints quite homogeneous. Premixing well in advance of spraying allows time for air bubbles to dissipate. Bubbles can affect how well the paint will spray. Sticking to this daily ritual will assure that the paints never are allowed to develop the phase separation, which means less shaking in the long run.
To mix paints that need to be thinned with medium, reuse old HFA containers or add a mixing ball to a new
container. Try to do the majority of mixing before spraying. This is important when storing blends, as many pigments will "crash" harder than the pigments used in the HFA. "Crashing" refers to a hard settling of pigment that is difficult (and sometimes impossible) to restir into suspension. Be sure to mix even the premade HFA thoroughly. This leads to a more consistent colour, less clogging, and better film formation. Many spraying problems can be attributed to improper mixing and thinning.
Thinning Fluid Acrylics
Ideally, the Fluids should be thinned with GOLDEN Airbrush Medium to reach the proper viscosity for spraying. Airbrush Medium is a blend of acrylic polymers, retarders, levelers, and flow enhancers. When blended with an acrylic paint, it produces paints with excellent spray characteristics.
There is a limit to how much Airbrush Medium should be added to paint, mainly because the high level of retarder often results in colour pull-up when masking. If additions of GOLDEN Airbrush Medium begin to exceed 2 parts medium to 1 part paint, add water until a sprayable consistency is reached.
When extending paints to create transparent layers, Airbrush Transparent Extender is a better option than high levels of Airbrush Medium. Alternatively the Heavy Body Acrylics or Fluid Acrylics can be first extended with a fast drying medium such as GAC 100, 200 or 500. The paint/medium mixture can then be blended 1:1 with Airbrush Medium to make it sprayable.
Thinning Paints with Water
Water can be safely added into High Flow Acrylics for minor viscosity adjustments, as Airbrush Transparent Extender doesn’t reduce viscosity of these paints, only extends them. Up to 15% water can be added without affecting the paint durability. If higher levels of water are added, thin coats of Airbrush Transparent Extender should be sprayed over them to improve their film strength.
GOLDEN Fluids (400-700 cPs) are typically too thick to spray, and need to be thinned to a more proper viscosity range. They could be thinned with water alone, but doing so first produces a paint that can quickly clog an airbrush and often results in a mottled paint layer. Add Airbrush Medium 1:1 to Fluid Acrylics and then adjust with water afterwards.
Thicker paints such as Heavy Body Acrylics require a high level of thinning. The best approach is to start with water additions until the paint becomes liquid, and then blend the mixture 1:1 with Airbrush Medium.
Adjusting High Flow Acrylics
HFAs are for the most part sprayable right from the container. However, when doing extended airbrush work or precision work with fine airbrushes (.25mm or smaller) these paints can be modified to improve performance. First begin with water additions. After reaching the suggested maximum 15% water addition without enough improvement it’s time to try another tactic. Airbrush Medium can be introduced into these mixtures. Some artists add only Airbrush Medium into the paints, and others add water and Airbrush Medium. It’s important to note that not every paint sprays equally due to their formula or pigment content.
High Flow Acrylics include a set of transparent colour mixtures. These colours are less pigmented than the standard colours. Airbrushing with these low strength paints allows for a slow development of colour saturation (one of the great unique features of using an airbrush). This gradual colour buildup tends to produce smoother, less grainy paint layers.
Any full-strength HFA can be modified with the Airbrush Transparent Extender to create similar transparent paints as well. Adding extender into paints doesn’t always have to be to the point of making the paint transparent, but some colours are so intensely pigmented that reducing the pigment load brings out the brilliancy of the colour. Additions of Airbrush Transparent Extender also make the paint physically stronger and more resistant to colour pull-up when masking.
Spraying Preparation
Adjusting Air Pressure for Each Application
Many airbrushers get comfortable with an air pressure and don't adjust for each application, especially if using the same paints for each project. When different paint mixtures are used, increasing or decreasing the air pressure can help to complete the application without having to stop and remix the paint. Beginning airbrushers should probably start somewhere in the between of the suggested air pressure settings of either the airbrush manufacturer or paint maker’s recommendations. For most paint mixtures, around 30p.s.i. (for thinner paints) and 50 p.si. (for Fluid Acrylics with Airbrush Medium) are good starting points.
"Atomization" can be adjusted from a spattery stipple pattern to an extremely fine mist. GOLDEN HFA can be
sprayed as low as 10 p.s.i. for a stipple pattern, and up to 60 p.s.i. for fine atomization. Of course, adjusting the air pressure also affects other attributes. Low pressures produce thicker paint films that take longer to dry before masking over, and can increase the chance of paint drying in the nozzle and on the needle. High pressures can inadvertently lift masks, cause overspray, and can result in an uneven film that may feel "powdery" or rough, which may lessen masking adhesion.
Paint Properties in Relation to Spray Equipment
Paint viscosity needs to be in line with the spray equipment set at the appropriate air pressure or smooth operation isn’t possible. Illustration paint made specifically for airbrushing usually have a low viscosity (relative thickness) of 3560 Centipoise. This viscosity range is ideal for spraying in an airbrush with a .2mm or .18mm nozzle size. When thin paints are used in larger spray guns it produces a great deal of overspray, and lowering air pressure only results in poor atomization.
Similarly, thicker paints, such as premade fabric paints, or GOLDEN Fluid Acrylics would have to be sprayed at a much higher pressure and can clog up a fine airbrush. Therefore when thicker paints need to be sprayed, they should be used in larger airbrushes at increased air pressure so it flows smoothly through the gun.
General Airbrushing Notes
Filling the Colour Cup
As basic as this may seem, many artists have had spills ruin their artwork simply because the colour cup was too full, so start by adding small amounts of paint instead of filling it right up. If spilling is a recurring problem because of the spraying angles (spraying down onto a horizontal painting), consider an airbrush with a covered cup, or a larger capacity airbrush and/or cup.
Proper Spraying Techniques
The following suggestions are generally meant for even gradations of colour. These application techniques can take many hours of practice to achieve satisfactory results. Learning the right way to spray does not come from reading, but experience. However, these main points should minimize the learning curve:
- Build up paint films very slowly.
- Avoid heavy "wet" films which take long periods of time to dry.
- If a film is wet, use the airbrush (air only) to speed drying.
- Add Airbrush Transparent Extender if the paint seems to always be too strong, especially colours like Carbon Black.
- Always spray with the airbrush as perpendicular to the surface as possible. Spraying at an angle will result in uneven applications.
- Move the elbow, not the wrist, to keep the spray consistent.
- Start spraying before a masked area, and continue past it to avoid paint buildup at either end.
Masking/Frisk-it Tips
Masking off areas can produce clean edges when done properly. Learn the general rules of masking techniques on test pieces before using them on an actual artwork.
- Before laying Friskit down, wipe the surface with a soft cotton cloth. This will remove eraser dirt, excess graphite, and body oils (fingerprints).
- Proper drying is essential to avoid colour pull-up (see next section).
- Select the proper masking for each substrate. Masking tape can damage illustration board.
- Don't excessively rub the masking in order to get good adhesion. If they aren't sticking to the paint surface, lightly spray a coat of Airbrush Transparent Extender over the film, allow it to dry and then re-mask.
- Weaker airbrush films may lift when waterbased masking fluids are applied over them. Spray a light layer of
Airbrush Transparent Extender over very thin films and let cure before using such masks. - If a paint film is grainy, masking may not adhere well. Apply a thin coating of Airbrush Transparent Extender
over it, or mix some extender into the paint to even the film.
Accelerated Drying Techniques
Proper drying of a film is critical when employing Friskit techniques to an illustration. If the film is not fully dry, paint can lift off of the board as the 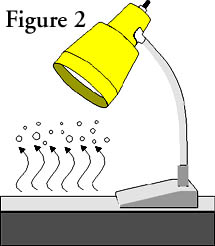 mask is pulled up. Use tools like hair dryers, fans and heat lamps to speed drying, all of which should be used with caution. Airflow can lift pieces of Friskit. Heat sources can warp illustration board and wrinkle the Friskit. Additionally, the heat can increase the adhesion of the mask to the board. In extreme cases, this can cause paint pull-up, even if completely dry.
For more information about the drying process of acrylic paints:
- Create a drying area in the studio for speeding the curing time of paint films. Adjustable desk lamps with heat bulbs or high wattage bulbs can create a higher temperature/lower humidity environment, that will allow the paints to be nearly cured in the time it takes to flush out an airbrush (see figure 2).
- Speed drying of paint films with hair dryers & heat lamps.
- Be wary of excessive heat. Frisk-it can soften and cause pull-up, or be wrinkled. Illustration board can be
warped. - Place a small fan alongside a wall to improve circulation. It is not necessary to point a fan directly towards the
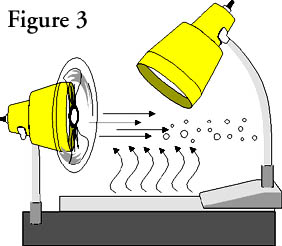
drying area, especially using a hair dryer (See figure 3). - Bubbles forming in the Friskit are an indication too much heat is being applied. Allow it to cool off before
continuing. - After using heat to cure an artwork, allow it to cool before applying masking over it to avoid inadvertent adhesion from the heat.
- Airflow is essential for faster drying.
Disclaimer
The above information is based on research and testing done by Golden Artist Colours, Inc., and is provided as a basis for understanding the potential uses of the products mentioned. Due to the numerous variables in methods, materials and conditions of producing art, Golden Artist Colours, Inc. cannot be sure the product will be right for you. Therefore, we urge product users to test each application to ensure all individual project requirements are met.