
Tutorial: Painting a spring landscape with early morning shadows using acrylic paint
Paul Weaver is a full-time artist, tutor and demonstrator based in Bristol, UK. Today he takes us through his process for capturing a spring landscape with shadows from the early morning sunshine using acrylic paint.
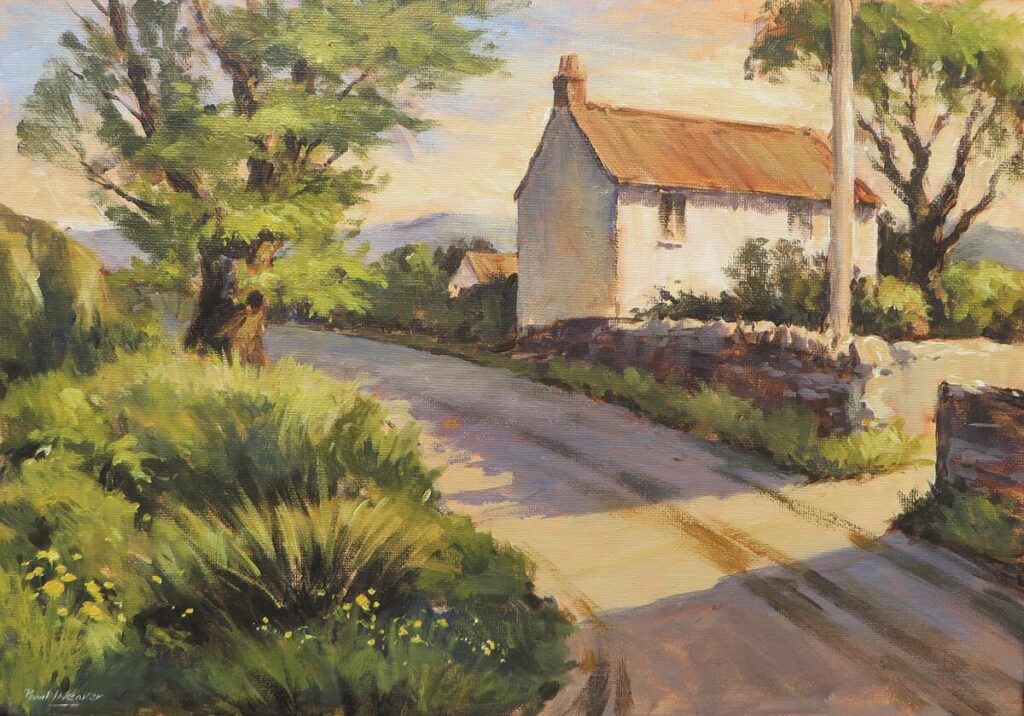
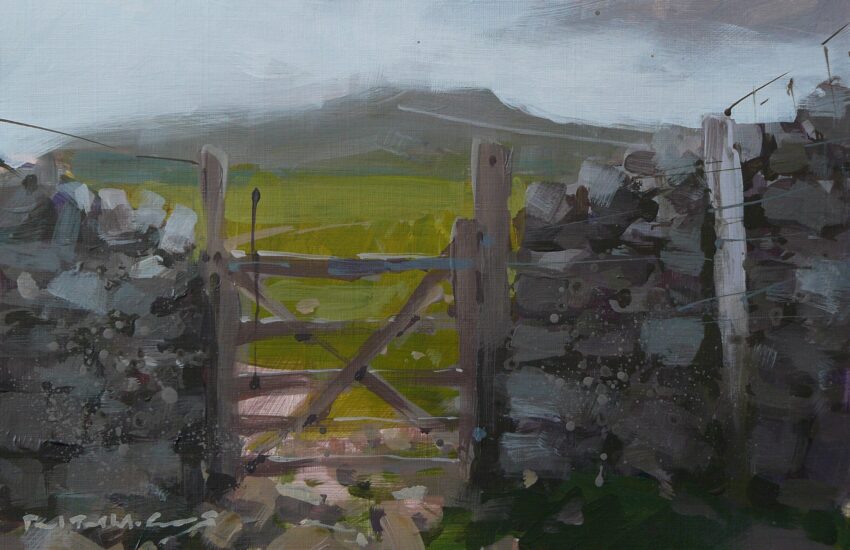
This is a view I pass on my bike ride each morning and I have been promising myself to paint it for years. When the sun shines, the light on the cottage and shadows across the road are irresistible!
Materials
Materials used were Winsor and Newton Galeria Acrylic Paints in colours: Naples Yellow, Cadmium Yellow, Yellow Ochre, Burnt Sienna, Alizarin Crimson, Cobalt Blue, French Ultramarine and Titanium White. Daler Rowney System 3 Acrylic Brushes in head shapes and sizes: Bright No.10, Filbert No.8, Flat No.2 and Round No.6. The spring landscape was painted on a 10′ x 14′ Loxley Canvas Board.
Tonal Sketch
This is an essential part of my creative process and is highly recommended. I know a lot of painters avoid doing tonal sketches as they want to cut to the chase and get on with the painting, but it can avoid a lot of heartache later. By exploring the subject with a sketch before painting, I become aware of what’s there in visual terms. This helps me plan the composition and most importantly, what is going to be light or dark. My tonal sketch was rendered in pen and charcoal.
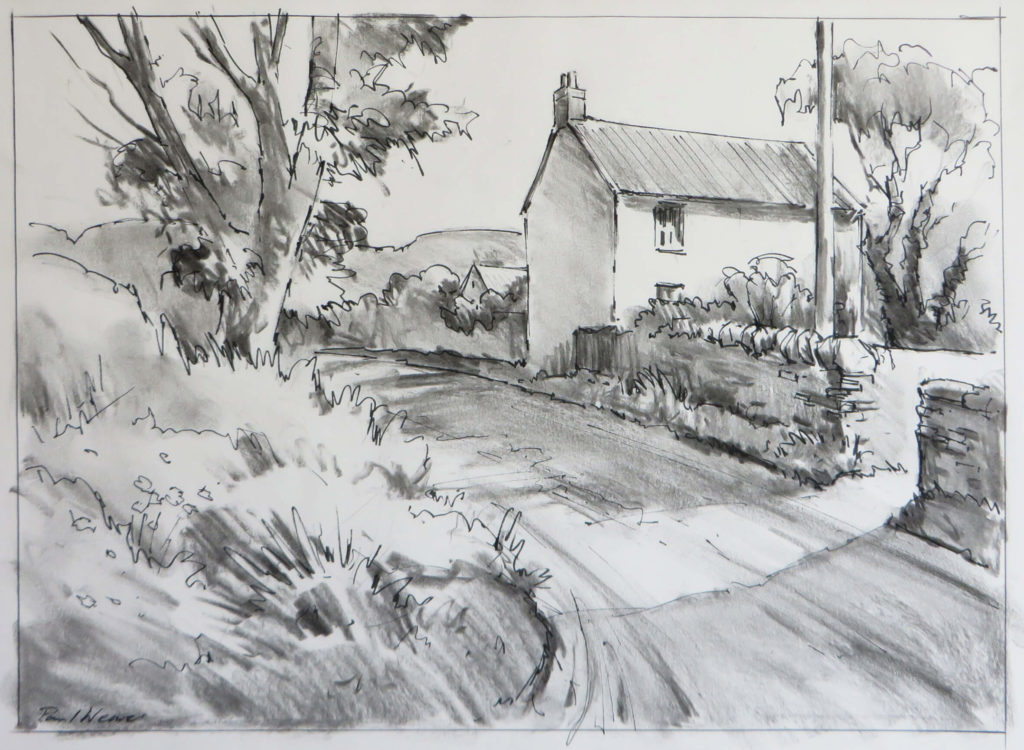
I wanted the sunlit cottage to be the focal point, placing it on the top right third.
The shadows across the road are a key feature, as they help accentuate the morning light. The large tree on the left balances and frames the house, while the road makes an effective lead into the scene. I now felt focused and ready to paint!
Get your free printable sketch here and use Transfer Paper to trace it on to your canvas or paper.
Step 1
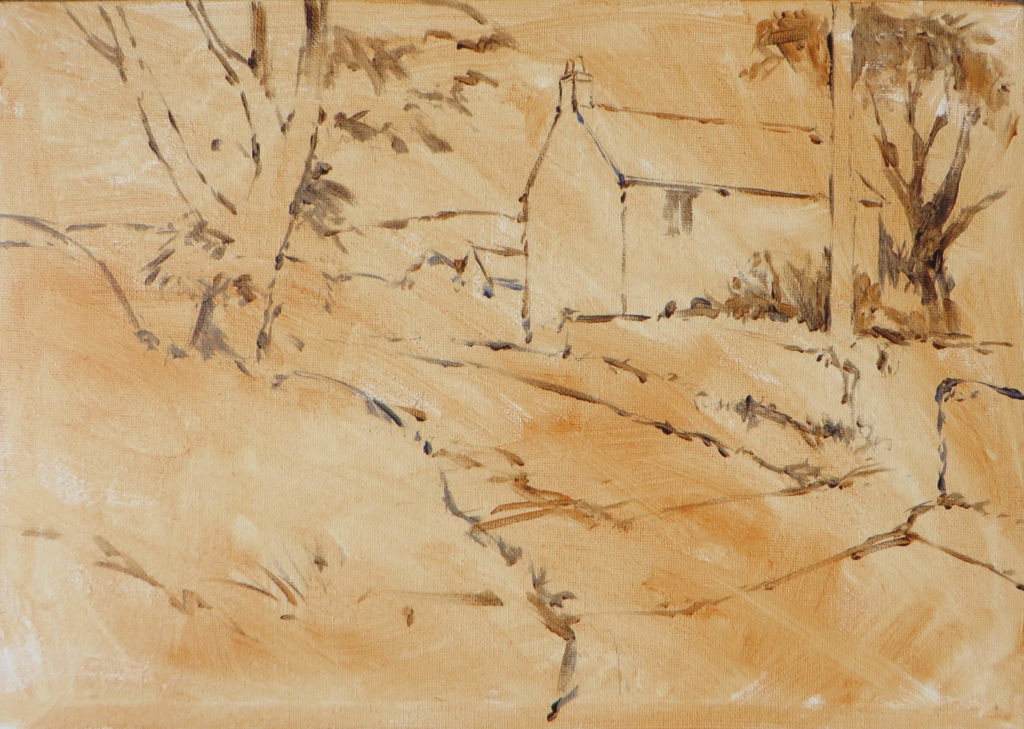
I first prepared the board with a foundation wash of Burnt Sienna to get rid of the white surface. Unlike watercolour, we don’t have to reserve the white of the painting surface and working on a tinted ground helps one to judge tones more accurately. Once dry, I sketched out the composition with a mix of Burnt Sienna and Ultramarine Blue with the edge of the flat brush.
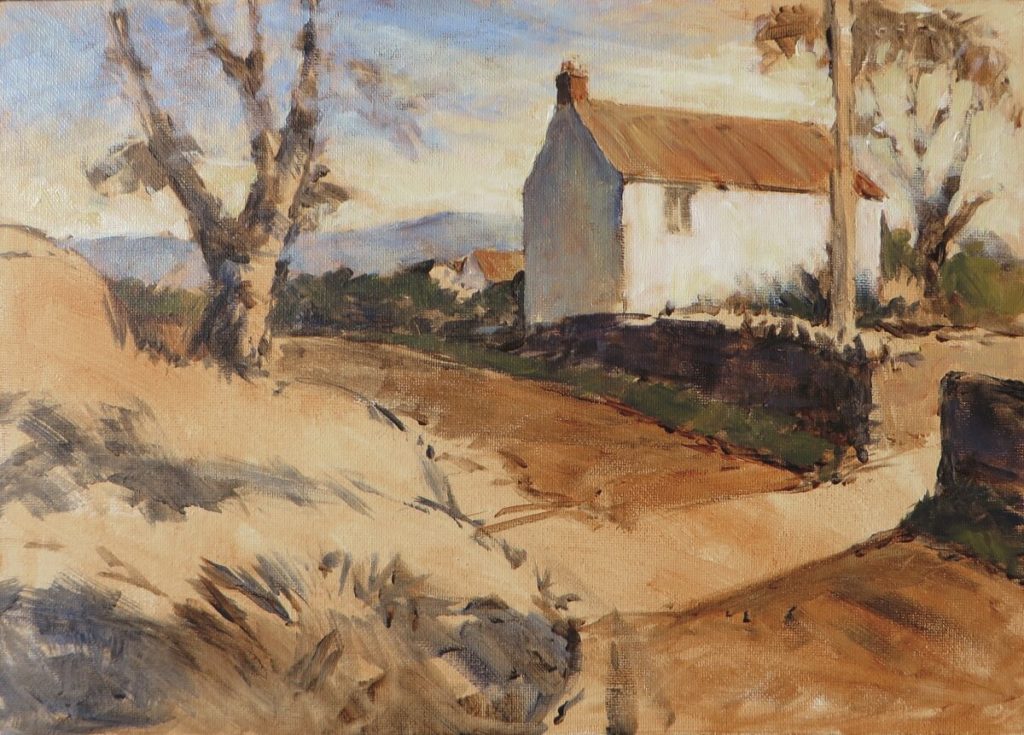
Step 2
Referring to my initial tonal sketch, I then blocked in the main tones using Burnt Sienna and a little Ultramarine. This creates a tonal foundation, or underpainting. I don’t worry about using the correct colours at this stage. By working in monochrome, it’s easier to focus on getting the composition correct and what will be light or dark. The underpainting is my guide to where the final colours are placed with thicker paint. This working process is known as ‘fat over lean’ and works just as well with oils if you wish to try it.
Step 3
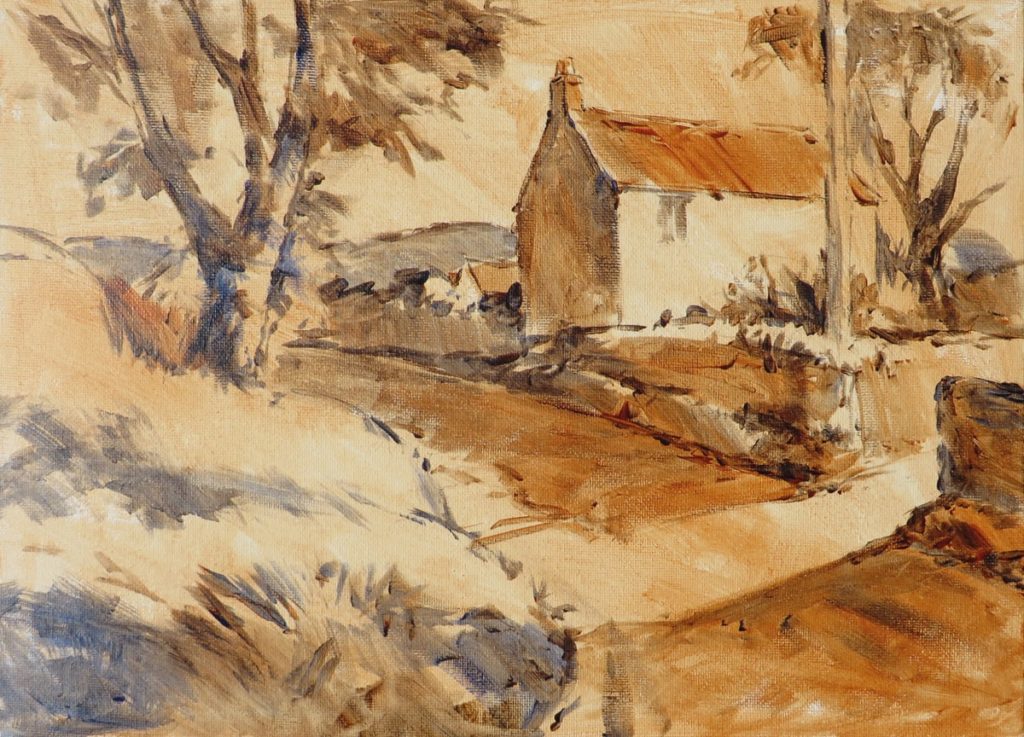
The sky was painted first, using Naples Yellow and Titanium White for the bright sunlit area on the right and at the horizon. Once dry, a mix of Cobalt Blue and Titanium White was dry brushed over the top left, feathering the edges out. The distant hills were painted with Cobalt Blue, Alizarin Crimson and a little Naples Yellow.
The dark foliage along the roadside was added with a mix of Ultramarine and Yellow Ochre. The shaded part of the wall was achieved with Ultramarine and Burnt Sienna.
The roof of the cottage was roughed in with Burnt Sienna and a little Naples Yellow, using diagonal brush strokes to suggest the tiles. The shaded wall was painted with Cobalt Blue and Alizarin Crimson, using Naples Yellow to lighten it and add warmth at the base. The sunlit wall was Titanium White. The underpainting helped me place colour cleanly and accurately and added subtle warmth to the colours going on top.
Step 4
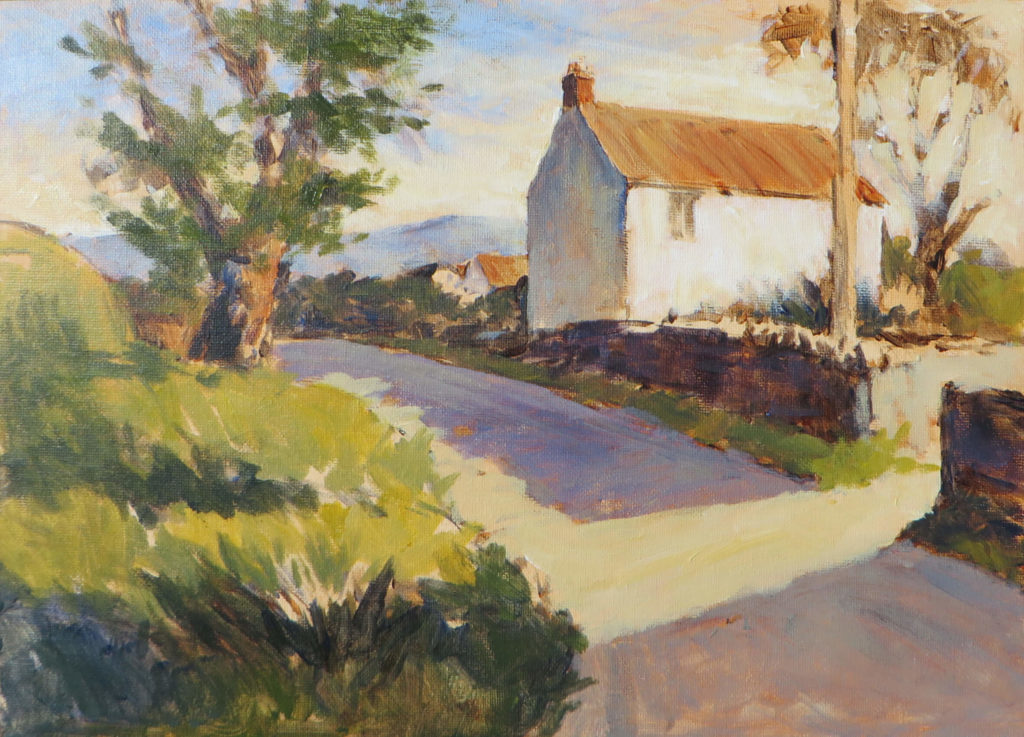
I continued to block in the rest of the painting, avoiding the temptation to add any detail or modelling yet. Everything looks a little rough and basic at this stage, but it’s important to get the basic shapes and tones working as a whole. No amount of detail will improve things if the foundation is weak!
The shadows over the road were added with Cobalt Blue, Alizarin Crimson and Naples Yellow. Note how I allowed the underpainting to show through in places, creating warmth. The sunlit road was added with Yellow Ochre and Titanium White.
The sunlit grass on the left was blocked in with Cadmium Yellow, a little Cobalt Blue and White. For the shadows on the grass I used Cadmium Yellow, Ultramarine and a little Burnt Sienna. I used energetic, direct brush work for this, aiming to keep it loose and expressive.
The foliage on the tree was roughed in using the same green as for the foreground shadows. The trunk was Burnt Sienna and Naples Yellow, the darker branches and shadows were added with Burnt Sienna and Ultramarine.
Step 5
Now the detailing can commence! The tree and foliage on the right were painted with the same colours I used for the larger tree on the left. The windows and edges of the roof of the cottage are dry brushed with Burnt Sienna and Ultramarine.
The shadows under the eves and along the edge of the telegraph pole were painted using Cobalt Blue, Alizarin Crimson and Naples Yellow. The telegraph pole was then highlighted with Titanium White and Naples Yellow.
The grass along the edge of the wall was modelled with lighter greens and dark shadows beneath. It is a dry stone wall, so I added a few marks here and there to suggest texture with Cobalt Blue, Alizarin Crimson and Naples Yellow. The stones along the top were defined with Burnt Sienna and Ultramarine.
I defined the distant cottage further by darkening the trees behind it. I also added more weight to the foliage on the left hand tree with Cadmium Yellow, Cobalt Blue and a little Titanium White. When painting foliage like this in a landscape, think of the mass rather than individual leaves.
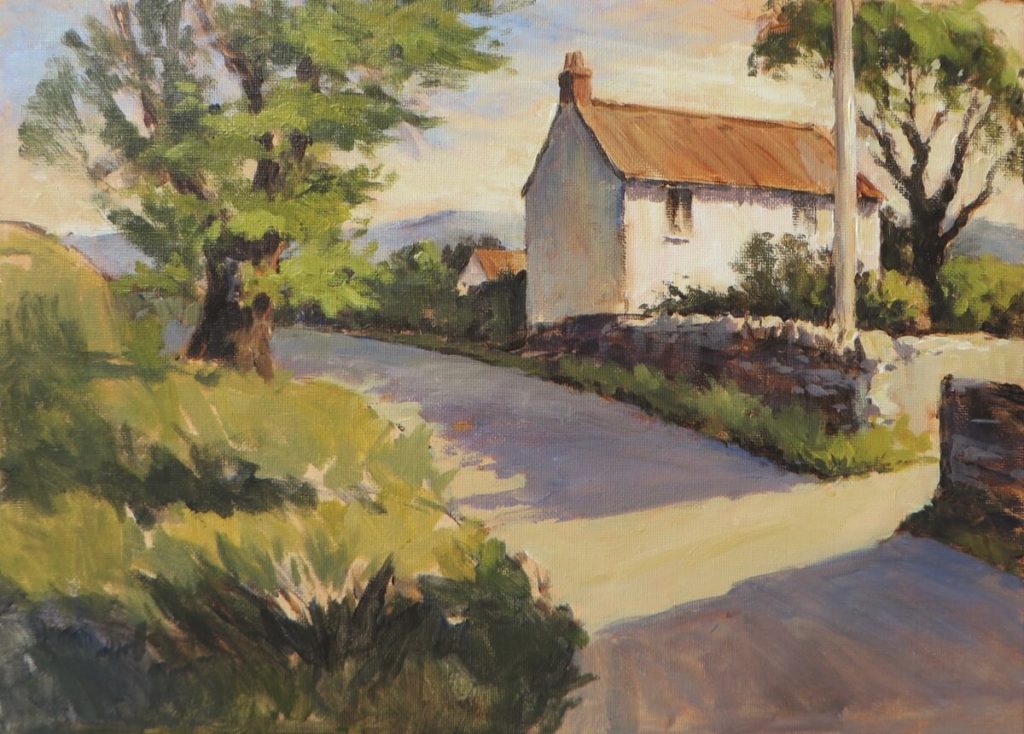
Step 6
I modelled the foreground grass using mixes of Cadmium Yellow, Naples Yellow, Cobalt Blue and Titanium White to create highlights on the sunlit areas. A few wild flowers were also dotted in with thick Cadmium Yellow and Titanium White. This little corner really illustrates the benefit of an opaque medium, working from dark to light.
Finally I added highlights on the tree trunks with Burnt Sienna and Naples Yellow, along with a few tractor marks on the road. Note how these marks narrow as they recede. It’s also important to remember that a shadow is transparent and colours change in tone as they go in and out of it. I therefore make these marks darker in the shadows on the road using Burnt Sienna and Ultramarine and brighter in the sunlit area, using Burnt Sienna on its own.
All work ©2020 Paul Weaver


I am beginning acrylic lessons and have my supplies. For now, I have been doing landscapes with markers and will try this one.
Paul Weaver’s spring landscape with early morning shadows is quite charming but I shall have to move house before I can paint it as I cannot fit a canvas of ten feet by fourteen feet into my current home! (See ‘Materials’!) How I larfed!!!
I found the tutorial to be very straight foreward, clear, and at the same time invested with profound experience, es[ecially with the colours used.
Thank you for the tutorials you have been sharing. The sketch is very helpful but a reference photo is best. I have mentioned this before. Otherwise you are really just copying a painters painting.